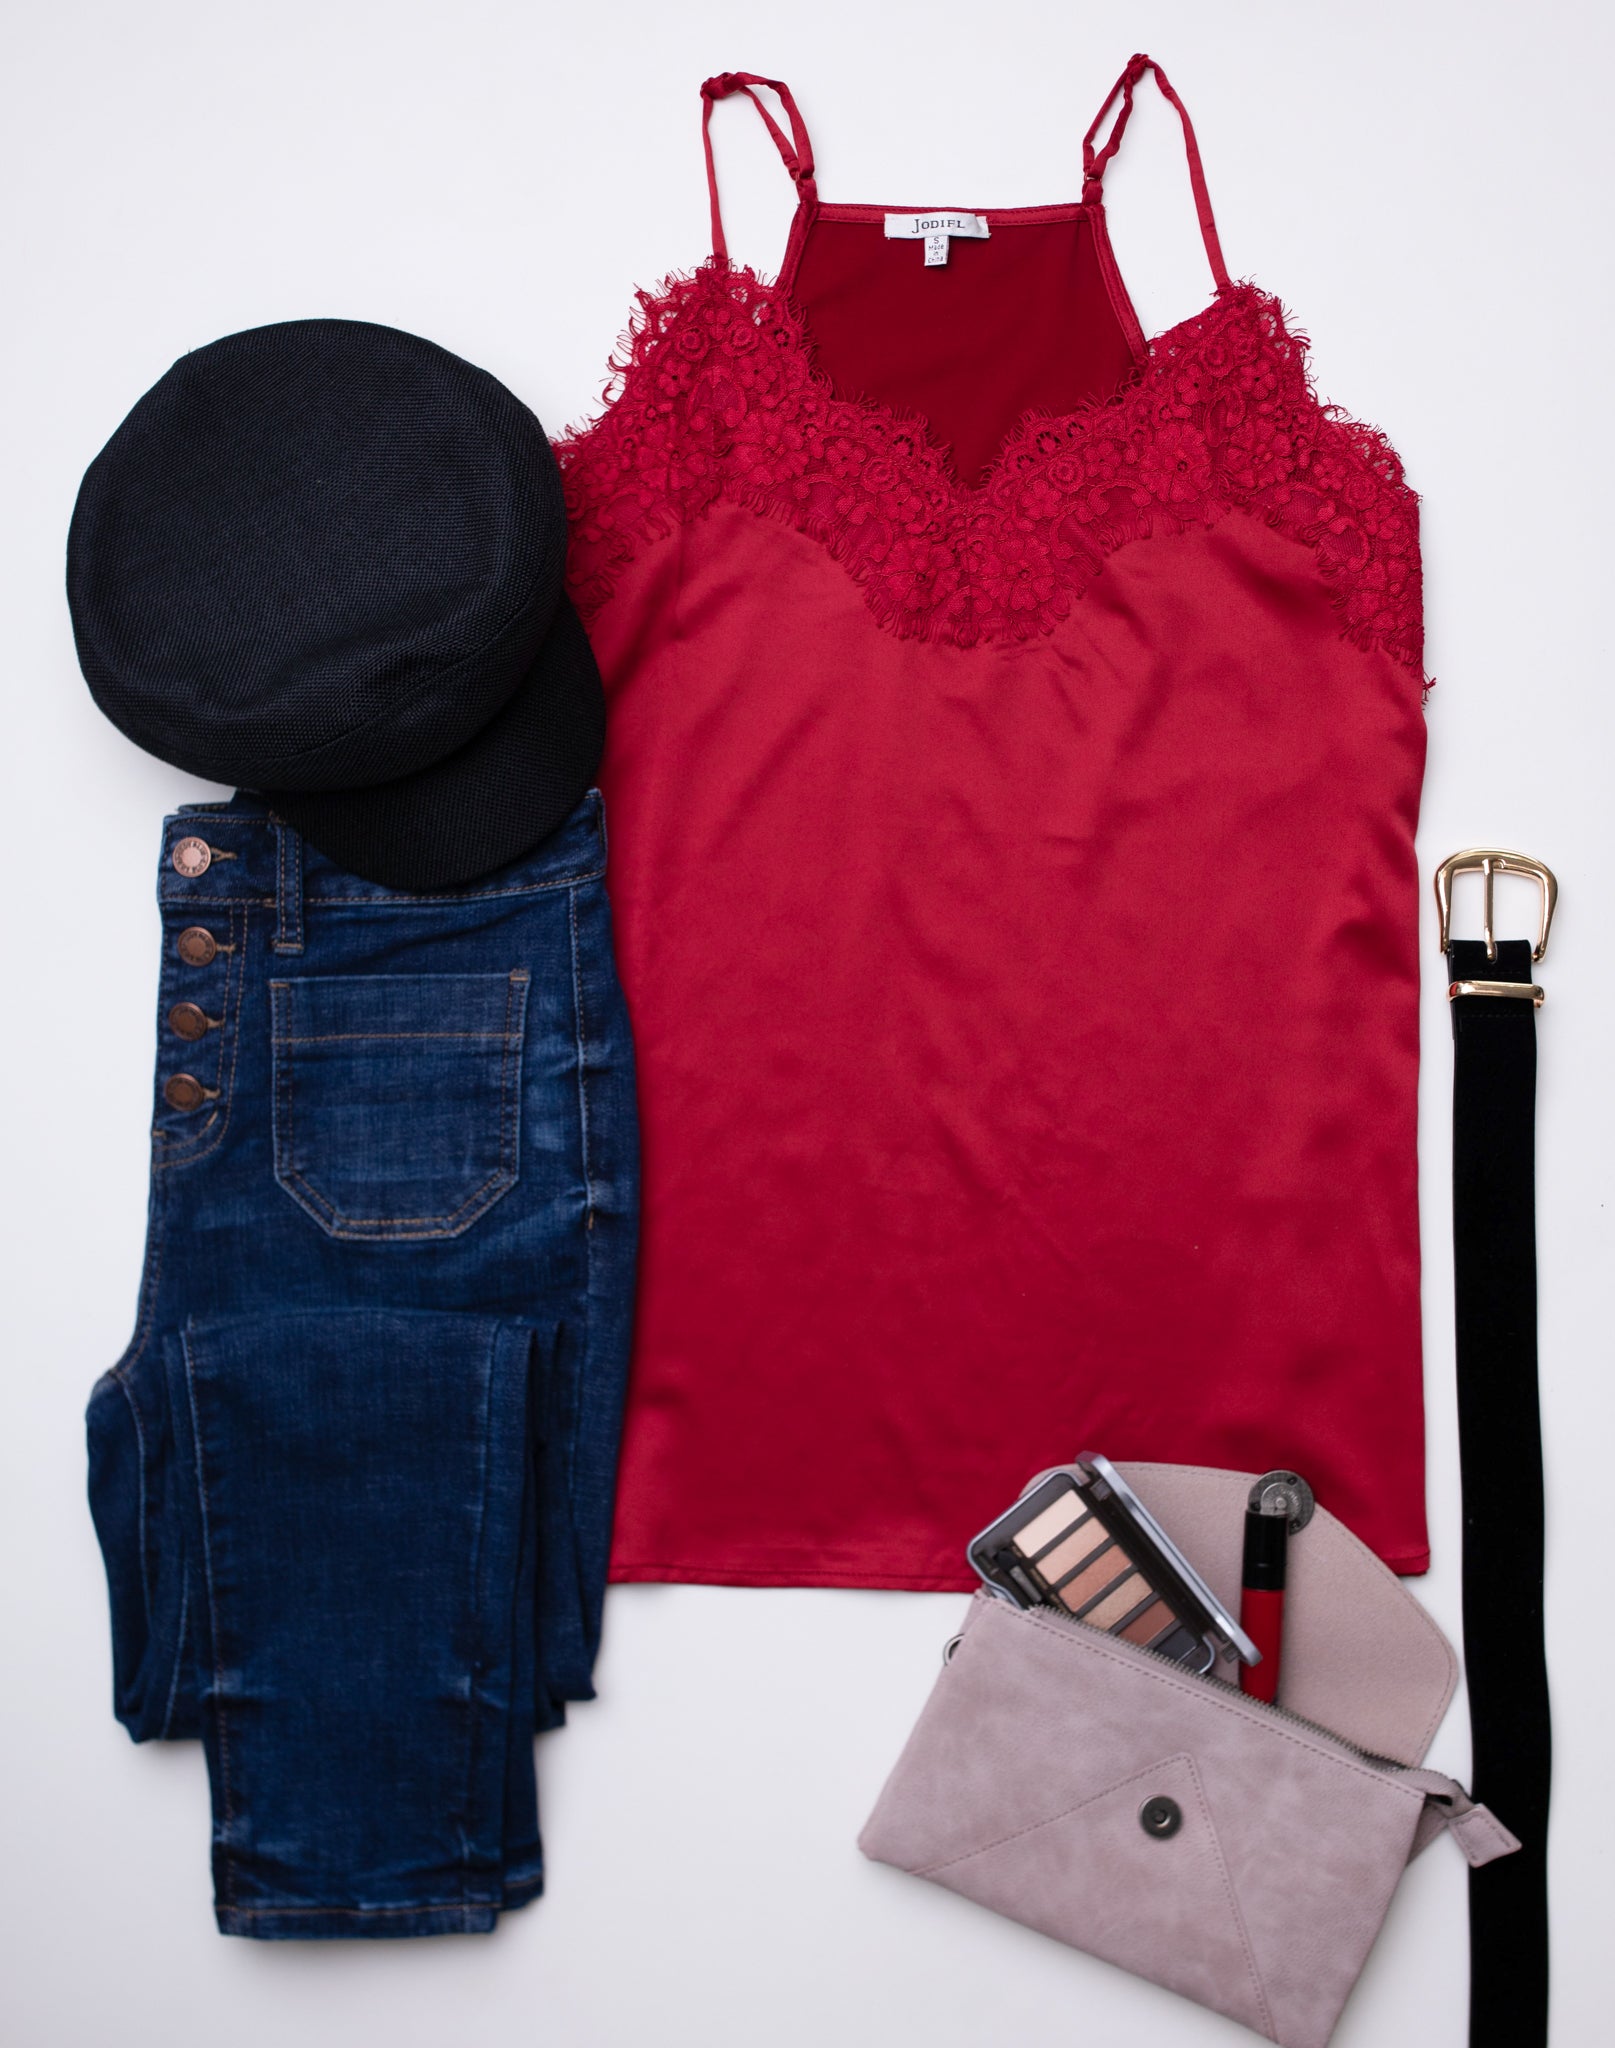
When was the last time you cleaned out your closet? I know I should go through it more often! I LOVE to shop and regularly bring in new items to hang In my closet! Who doesn’t thought? Right?!
Selling my lightly worn clothes on poshmark has been such a blessing! My closet is constantly evolving, growing, replacing & growing some more. I have been selling clothes on poshmark now since 2019!
The products I now list on Poshmark are typically items we have received as exchanges/returns from our boutique shop. They are generally in perfect condition and instead of re-stocking these items back on our website (because that item may have completely sold out) I list them quickly on poshmark.
The app is basically an Instagram but for clothes!
If you are just looking to make some extra room in your closet or you are selling boutique items, these are my best tips from selling on Posh! I have met some amazing poshers over the years!
Poshmark is a popular online marketplace where people can buy and sell new and used fashion items. It’s like an online thrift store, but with a focus on stylish and brand-name clothing. You can sell everything from clothes and shoes to accessories and handbags.
You know when you get that “shopping spree itch” & you just desperately want to wear something new?
It’s that feeling you get when you look into your closet & nothing seems exciting anymore.
You’ve “out-worn” everything already. You start to think “I have nothing to wear” & yet your closet is actually completely full & clothes are spewing out of their drawers. Your clothes are probably still totally wearable and in excellent condition.
Well I totally understand you! It’s time for a wardrobe refresh. The first place you should turn to when you start feeling this way is back to your closet.
The second thing you should do is pick out a few items you know you haven’t worn in a while & probably won’t wear again anytime soon. Or pick out those items that are still in excellent condition, but you feel kinda tired of wearing. Those are the best items to sell on Poshmark.
Now it’s time to list these items on poshmark and make some room in your closet for a wardrobe refresh.
First things first, wash that item.
Selling an item that may have been collecting dust in your closet is a big Noooo. Make it look beautiful & brand new again.
Once you have washed it & steam it, it's time to get the item ready for photos.
PHOTOGRAPHING YOUR ITEM
Great photos help your items sell faster!
Next you are going to want to find a good spot in your home with lots of diffused natural light.
(Quick tip- avoid direct sunlight, it will leave harsh shadows & potentially skew colors)
Hang your clothes on a hanger to photograph. If you choose to photograph as a flat lay style, please, I beg you not to take the photos on the carpet floor! Mostly because I have read in several poshmark forums that people won’t buy from anyone who takes the photos of the clothes on their carpet. Many concerns about dirty carpet, pets, shoes & derbies in carpet come up often.
Instead, use a clean surface such as a table or lay some photography paper down on the floor first to protect the clothing. This also makes for a better and more professional looking shot!
If you are comfortable modeling the item you can totally wear it on yourself. This can actually help the buyer see how the item fits on an actual real body.
Another tip for selling your old clothes on poshmark iks to add more photos. Upload at least a minimum of 4 images, but the more you can add the better your chances are at getting an offer.
If you list an item with ANY flaws, make sure to show it in the images or at least disclose the flaws in the description.You want to make sure you do this or you will end up with an unhappy buyer and likely have a case opened up against you. Which nobody ever wants, but if it does happen, don't fret-It happens to the best of us!
Don't skip this step! Everyone & their mother wants to know the measurements of the item on Poshmark.
Save yourself some time by listing measurements ahead instead of waiting for when people ask-because they will!
Even if you have every measurement listed in the description you’ll still be surprised to get questions about it in the comments.
By listing out all of the necessary measurements you will find that you are also more likely to receive offers on the item than if you skip this step.
Basic measurements to include
Quick tip: If an item has a fitted no stretch waist line, add this measurement too, but if it’s a loose fit with no defined waist I skip this measurement.
If your still not 100% sure on where and how to measure, check out my How To Measure Guide HERE with Videos to show you how we get the job done!
Listing an item to sell on Poshmark is actually really really easy. They make it super user friendly. Once you have completed the steps above, listing an item should only take you a couple of minutes!
So #1 & #2 are pretty self explanatory so we can just skip to #3.
Enter a title for the item. Here you want to actually use keywords describing the item that you want to sell. So for instance if you have a Kate Spade Purse, you will want to give it a title like " Pink Kate Spade Mini Crossbody Bag" Instead of "Cute pink bag". When people are shopping they will usually search keyword phrases for something they are looking for. For example, if they are looking for a kate spade bag they might search something as simple as "kate spade bag" or "kate spade purse" and you want your item to show up when the buyer is looking for your item.
Write a description. When you write your description, make sure to add a few key elements. I like to use this outline for all of my items.
Then you will want to choose choose an item category. You want to place your item into the correct category to ensure customers can find what they are looking for.
When choosing a brand, it can be from the store you originally purchased it from or whatever the item tag states. If neither of these are applicable, you can also leave this section blank.
Choose NWT (new with tags) if it has tags or original packaging available, or none if its been word or used. A boutique item is an option only available from a boutique business on poshmark.
Style tags are anything that you can think of that quickly describe the item in 1 word. You can choose up to 3. For example, if you are listing your torn up jeans, you could add "distressed" as a style tag.
A shipping discount is optional. If you choose a shipping discount at this point, keep in mind that it will automatically apply this discount to "buy now" and all other private or public discounts you apply later on.
The availability option is actually one of my favorites and one that I use often. When you list an item, you can set it as immediately available or change it to coming soon or not available. This option is actually really wonderful. Whenever I buy an item online, I immediately add the items as a listing to my personal poshmark account and list it under "not available". This way when I am done with the item I have a listing ready to go and I don't have to scramble to put one together. I just add a few extra images of my item to my already listing and change the availability to "available" and I can sell it right away.
Listing items on Poshmark is simple:
Now for the fun part. How to actually find buyers for your beautiful clothes! Since you have completed the first step of creating an immaculate listing, the second part is about promoting yourself and your worn clothes!
The MOST IMPORTANT thing you can do to sell your old clothes on Poshmark is to SHARE SHARE & SHARE some more. You have probably heard this one before, and it's totally true! If it's the only thing you do every day-just share. Share your entire closet over and over and over.
Its tedious, but it’s the best way for getting your items found. Another way to share is to share other peoples listings. The benefit of this is that when you share someone else’s closet, they may come back and share your listings to their followers too, so it's a total win win for both of you.
When you share your listings you bring them back to the top of the algorithm. But there's a catch, old listings dont always make it back up to the very top of search like new listings do.
This bring me to my second tip which is to RE-LIST old items. When you re-list an item, Poshmark sees it as a brand new listing and will push it back up in the feed. So if you have been sitting on an item for a couple of months, it's probably due for a re-list.
Here’s the thing about re-listing. It doesn’t mean EDIT and then hit "list" again and it also doesn’t mean "copy listing" and re-list it. It means that you will have to delete the original listing completely and totally re-do the entire thing. It can be a bit of a headache, but you will see new activity on your item when you do it this way and it will be worth the effort when you finally get that buyer!
Share when there’s a poshmark party. Poshmark throws parties several times a day with different themes. This is a great time to get on the app and share your listings. This is because Poshmark sends out app notifications to everyone during party times, so more people naturally hop on the app at those times. You can also try to share your items to poshmark parties if they fit the party qualifications.
Offer great customer service! You are more likely to get sales when you respond quickly to questions and have a friendly attitude. It honestly can be one of the biggest things that will make or break your sales.
Be open to offers. Here's the thing about offers, you might get some good offers and some "bad" offers. The truth is, everyone who is shopping on poshmark is looking for a "deal" and you will probably rarely get those "buy now" sales-but when you do get them, jump for joy! (: The app is designed to send offers back and fourth.
Send Offers! When you get likes on your listings, go ahead and send them an offer. Sometimes buyers may not be comfortable sending offers to you, but may accept an offer that you send them. I like to send offers soon after I get a "like" on an item because that's when that buyer is actively shopping. Don't worry about feeling like you are "annoying" the buyer. They are looking for deals! If they didn't want to receive offers, they probably wouldn’t like the item in the first place.
Pricing can be tricky, but here are some guidelines:
Poshmark offers two ways to get paid:
To cash out, go to your account settings, select “My Balance,” and choose your preferred payment method.
Promoting your listings can help them sell faster:
If your item isn’t selling:
The Adelman Peony Garden has been on my bucket list since I first heard about it a few years ago. I wanted to go ever since but missed the blooming season. The visiting window is small beginning mid-April to mid-June.
We ended up going twice to the peony fields in just one season! It was that good!
The first visit I made to the peony fields was on Mother's Day, for a Mother's Day picnic. Peonies make such a dreamy backdrop for a picnic! I couldn't have chosen a better location. A Mother's Day picnic has been a yearly tradition for us and I am convinced I will want to go each year to see the peonies in full bloom.
I came back a second time around to shoot our mommy and me dress release which I have been so excited about! It was so much fun to take pictures here with my mini. Several of the flowers were in full bloom and beautiful.
The best time to visit peony fields would be the height of their blooming season which is around Memorial Day. It can vary each year depending on the weather of course. But here's a general idea:
It is free to get in and visit the garden, April 27th – June 15th from 9 am to 6 pm Daily.
Of course, this can change in the future. As of now, this is the open house time posted on their website. They don't sell any food or drinks on site but they encourage picnicking. You can pack your food to hang out in the gardens with. You can also purchase flowers on-site, whether a bouquet or a potted flower to plant at home.
The peony fields don't have any activities like the pumpkin patch or the tulip festival, but there is plenty to do. Walking up and down the dreamy rows of peonies is enjoyable in and of itself. My kids had a great time walking and running all around. We brought our dog along for the ride. He was so excited to be there!
My kids loved watching the big, fuzzy, and cute bumble bees that were buzzing all around the peonies. These pollinators were really fun to watch bounce from flower to flower. It made for a mini-educational moment where we got to talk about how bees help plants and how they turn pollen into honey.
Visiting the field has inspired me to start my own peony garden. I want to fill my yard with these beautiful big blossoms. I envision a lush pink and white garden with a cottagecore vibe. Needless to say, I ended up bringing home a few peonies to plant and grow my garden!
All of the dresses, shoes and accessories are from thefoodforthoughtshow
]]>
Planning a vacation can be fun and yet overwhelming at the same time. Especially when trying to fit in all of the must-see attractions and activities within a limited timeframe.
A 7 day trip is a perfect amount of time to get in several activities while still making space for rest days and arrivals and departures.
This blog post contains A complete 7 day itinerary with additional tips and reviews from our trips to AZ!
PS. Scroll all the way to the bottom for the complete Itinerary
I love visiting Scottsdale Arizona and really enjoy it every time! I am lucky to have family that lives there too which makes it even more inviting to visit. Every time we go we try to do something new or different from the previous visits.
The amazing thing about Arizona, especially the scottsdale and Phoenix area is that there is so much to do there all of the time! And every time I visit, new restaurants, shops and activities seem to pop up!
Whether you're a nature lover, art enthusiast, or foodie, this itinerary has something for everyone. So pack your bags and get ready to maximize your next getaway to Arizona!
Pictured: Royal palms resort and spa
Whenever I plan a trip, especially with kids I try to pack my days lightly with plenty of room and space in-between activities so that there aren't any meltdowns or rushing around from one spot to the next feeling stressed out the entire time.
I will be sharing my 7 Day Arizona Itinerary from our most recent trip and how we managed traveling and exploring with a toddler and a teenager.
If you plan your days around "daily themes" and nearby locations, the trip goes smoothly and stress free! Gaining you more time to take your time and enjoy each location to the fullest!
Pictured: Lake Pleasant
Another tip is to create a plan B-list incase things on your original itinerary doesnt go as planned.
You can do this by simply creating a list in your iPhone notes called "Things to do AZ" and list out a tun of ideas or places you would also like to check out.
This way if something you had planned gets booked out or closes early, you have easy access back up ideas.
Another benefit of having a fall-back plan is that it can save you a lot of time. Especially if you are in locations where the wifi is weak and you can't look stuff up on the go, just pull up your notes and the info is ready to go.
You really can't go wrong by having a back up list. You can put the websites and addresses along side each place in your notes ahead of time. This way you save time by not having to look things up while you are on your trip.
Maximizing your time by planning ahead and accordingly is a great goal to set before heading out on vacation. Of course, this doesn't always leave room for spontaneous events, however, you could always easily cancel everything if something more enticing comes up.
If your into taking photos, these spots are it! Everything in this itinerary will make for beautiful and unique photo opportunities.
Pictured: Royal palms resort and spa
Day 1 is all about immersing yourself in the local culture and exploring the unique landmarks of your destination. If your arriving on day one, its a good idea to start out light by exploring walkable locations and avoid booking any activities in case of arrival delays.
Foodie spots to visit
Start your day by visiting old town Scottsdale and checking out some of the missions in the area. You can also find lots of art and paintings on the walls all over the city which make for cute photos.
Shop Vacation Dresses HERE
Take your time to learn and explore the place, and don't forget to capture those picture-perfect moments. We took over 3000 photos from our last visit! That's alot of pics!
In the evening, you can also check out the local nightlife scene. Since I have kids, I dont really get to do the nighttime stuff, but instead I hang out in the jacuzzi sippin' on something sparkly if you know what I mean. Just over here living that mom life! Even while on vacation, but it's worth it! I love being a mom!
I stayed at the Royal palms resort and spa for a bit and it really had me feeling inspired and so happy durning our vacation! There are so many amazing resorts in the area! I am sure once you go and experience them for yourself you will leave feeling inspired with some pretty magical memories too!
From my personal experience, some of the other resorts that are worth a stay include Scottsdale Camelback Mountain and The Scott Resort and the Hyatt Regency Scottsdale Resort & Spa At Gainey Ranch.
Pictured: Butterfly Wonderland
Start your morning early and head to a coffee shop and grab a bite to eat to energize for the adventurous day. Start your first activity off with the butterfly wonderland and check out everything in that local area afterwards. There is a lot to explore!
Morning:
Afternoon:
Evening:
Foodie spots to visit:
Shop Cadigan HERE
Butterfly Wonderland: Yes, the butterflies here really do land on you! I went a couple of years ago, and it was so memorable I had to go again! This time it was even better since there were so so many more butterflies! The way they fly around you makes you feel like you are in a magical fairytale!
Butterfly wonderland
If you have kids they will absolutley love the butterfly wonderland! This was fun for both my toddler and teenager. It can sometimes be a bit challenging to find activities that they will both enjoy due to the age difference, so it's safe to say that this place is great for all ages.
There's just something magical about seeing so many beautiful butterflies flutter all around. There's a lot of fun to be had here!
Pictured - Costini
Connect with the beauty of the great outdoors. Whether it's mountains, cactus forests, or breathtaking views, defenitly take the time to appreciate the gift of nature and let it rejuvenate your soul.
Stunning state parks you can check out in Arizona:
As the day comes to a close, don't forget to capture those breathtaking sunset views. Whether it's atop a hill, on a lake, or even from the comfort of a cute and cozy café, witnessing the sun dip below the horizon is a moment to treasure -especially in Arizona.
Shop Swim HERE
Day 3 of your ultimate 7-day itinerary is all about taking care of yourself and finding inner peace.
Usually by the 3rd day the excitement and adrenaline from being in a new environments tends to wind down which makes day 3 the perfect day to relax and decompress a little. Having rest days or slower going days are defiantly important! Especially when on vacation!
Pictured: Royal Palms Resort and Spa
Day 3 is the perfect day to relax and treat yourself to a message, some spa time and truly rejuvenate your mind, body, and soul.
After all, traveling isn't only about adventure but can also be a time to indulge in relaxation and wellness experiences.
Start your day with a stretchy yoga or meditation session. Connect with your inner self as you stretch and breathe deeply, leaving behind any stress or worries. Feel the tension melt away as you find balance and harmony within.
After a calming morning, treat yourself to a spa day. Whether it's a massage, facial, or soothing body treatment, let the skilled hands of the professionals pamper you and release any lingering tension. Choose from a range of holistic therapies and treatments to rebalance your energy and promote overall well-being.
In the afternoon, explore the local wellness scene. Visit a hot spring or thermal spa, known for their healing and rejuvenating properties. Immerse yourself in the warm, mineral-rich waters and let their therapeutic effects soothe your muscles and promote relaxation.
End your day with a healthy and nourishing meal. Seek out a restaurant or café that specializes in organic and locally sourced ingredients. Enjoy a delicious meal that not only satisfies your taste buds but also nourishes your body from the inside out.
Pictured: Palms Resort & Spa
Morning:
Afternoon:
Evening:
Pictured: Wonderspaces
After breakfast head over to visit one of the local art museums and give yourself the grace to spend the time you need to really enjoy yourself and the art.
We went to wonderspaces, which is an interactive art museum and it was so much fun! I literally had a blast and my kids were obsessed!
My toddler has surprisingly been to several of these types of museums, so when she goes, she knows the drill. Some of the art however, I dont actually find appropriate for a toddler, so we skip these rooms.
(We always skip any movies and virtual realities -especially since im paranoid about everything on screens for my toddler.)
The art galley was very interesting and creative, which I love. You can also order a drink at the beginning of the museum and you get to keep the glass. They have several rooms with various art being featured. You could easily spend hours here. Since we have kids, we made sure to go first thing in the morning on a weekday, which helped us avoid any crowds.
Last time I went it was later in the evening and the place was packed. It's also a great place to go on dates and just something fun and different to do!
Pictured: Desert Botanical Garden
On Day 4 of your ultimate 7-day itinerary, get ready for a brilliant art day and a culinary experience.
Start your day with a scenic breakfast at a local café or bakery, where you can indulge in freshly brewed coffee or tea, along with a selection of pastries, bread, and local delicacies. Make sure you try something new too!
Pictured: Lake Pleasant
For lunch, head out to a beautiful winery for a relaxing wine tasting experience along with a snack board if offered. One of my favorite recreational activities is visiting a winery and bringing a bottle of something special for later.
It's fun to engage with an expert sommelier and learn something new. Sometimes they are also passionate about wine pairings and can guide you in the right direction and perhaps even introduce you to new unique flavors and spices.
After a light snack you can head to the next art locations. Visit the SMOCA (Scottsdale museum of contemporary art) and Cosanti which is a small historic site scottsdale art studio and it is stunning! You can even purchase some of the work to place in your home!
End your day with a memorable dinner at a fine dining restaurant of your choosing!
Pictured: Cosanti
Morning:
Afternoon:
Evening:
Pictured: Lake Pleasant
Here's to connecting with nature and slowing down a bit. Sometimes for a vacation to really feel like a vacation, we have to step back from all of the noise and take in some stillness and outdoor escapades.
Start your day early by heading to a nearby national park or nature preserve. Lace up your hiking boots and explore the scenic trails that wind through lush cactus forests. Take in that fresh air and get into the serenity of nature.
For lunch, pack a picnic with some local goodies. Find yourself a picturesque spot to enjoy your picnic amidst the breathtaking landscapes. I like to pack a blanket and hike out until we get hungry or get to a really pretty spot. Then we take a pause there and have some lunch.
Morning:
Afternoon:
Evening:
Pictured: Glow Putt Mini Golf AZ
If there are any local events going on, I like to partake and get a feel of the city this way. I also love to visit local libraries and check out the local farmers markets and gardens when possible.
Old town scottsdale is a fun place to check out some of the local markets, where you can find unique treasures and souvenirs to take home with you. These little nicknacks can also make great gifts for friends and family. You can find everything from handcrafted jewelry to intricate artwork, these markets offer a glimpse into the local creativity and craftsmanship.
After an afternoon of shopping we went to lunch and then the desert botanical garden. This garden is beautiful and I visit it every time I go to Arizona! There's so many beautiful sights to see and its just a relaxing walk through, even if your not a crazy plant lady (; After all of the walking we were just starving and decided to head back and have some dinner.
Pictured: Sugar bowl, Old Town Scottsdale
Morning:
Afternoon:
Evening:
Shop Dress HERE
As your vacation comes to a close, take some time on Day 7 to reflect on the amazing experiences you've had throughout your vacation!
But first, I like to start the day by getting ready and packing everything up. Once everything is ready you can take some time to relax and reflect. This of course all depends on what time you will be leaving.
If you have enough time before your departure, you can probably squeeze in a farewell lunch or time to walk around the city for a bit before heading home. If you have kids and are flying, take them to a nearby park to get some of that energy out which will ensure a more pleasant ride or flight home.
If you have a little bit more time with a nighttime flight, you can probably enjoy your resort for as long as possible before check out too. Giving your self the space to wind down before coming back to reality.
Pictured: Desert Botanical Garden
Morning:
Afternoon:
I hope this ultimate 7-day itinerary has inspired you to plan an incredible vacation filled with adventure, relaxation, and unforgettable moments. Safe travels and until next time!
Arizona is a fun and colorful place and alot of people here like to wear bright and fun colors! Most people where I am from wear black all day everyday & It's honestly so refreshing to see people wearing happy clothes in AZ! Especially since I love to wear colors and suddenly, in AZ I am not the brightest one in the room anymore!
Since Arizona is a desert and naturally a warmer location, most of what you'll want to pack should be for warmer weather, however in the winter months the temperatures can drop so make sure to bring some layers for those cooler evenings!
I have always gone in the springtime and the weather hovered around 80-90 degrees, but this year I went in wintertime and temps hovered around 50-79 degrees as a high. I was glad to bring an assortment of clothing. I brought cardigans which worked well and also a wind breaker, dresses, jeans, Chelsea boots and sandals. So basically I was prepared for anything! And it served me well!
Foodie spots to visit
Morning:
Afternoon:
Evening:
Foodie spots to visit:
Morning:
Afternoon:
Evening:
Morning:
Afternoon:
Evening:
Morning:
Afternoon:
Evening:
Morning:
Afternoon:
Evening:
Malls worth checking out in AZ
I hope this itinerary has inspired you to plan an incredible vacation filled with adventure, relaxation, and unforgettable moments. Safe travels and until next time!
You can totally impress your guests or loved ones with a dessert board that combines the best treats and cutest aesthetic! Crafting the perfect charcuterie board is technically an art form in itself.
Looking for something cute to wear on Valentine's day? Check out these cute outfits HERE
Whether you're planning a dreamy date night at home or hosting a get together with friends, a well-curated charcuterie board is sure to make the experience!
Not only does a Valentine's day board offer a variety of fun tastes and textures, but it also presents an opportunity for creativity and can be totally decorative!
You can add your favorite spreads, treats, and even fresh fruits, nuts, and candies to enhance all of the flavors and showcase your gorgeous style.
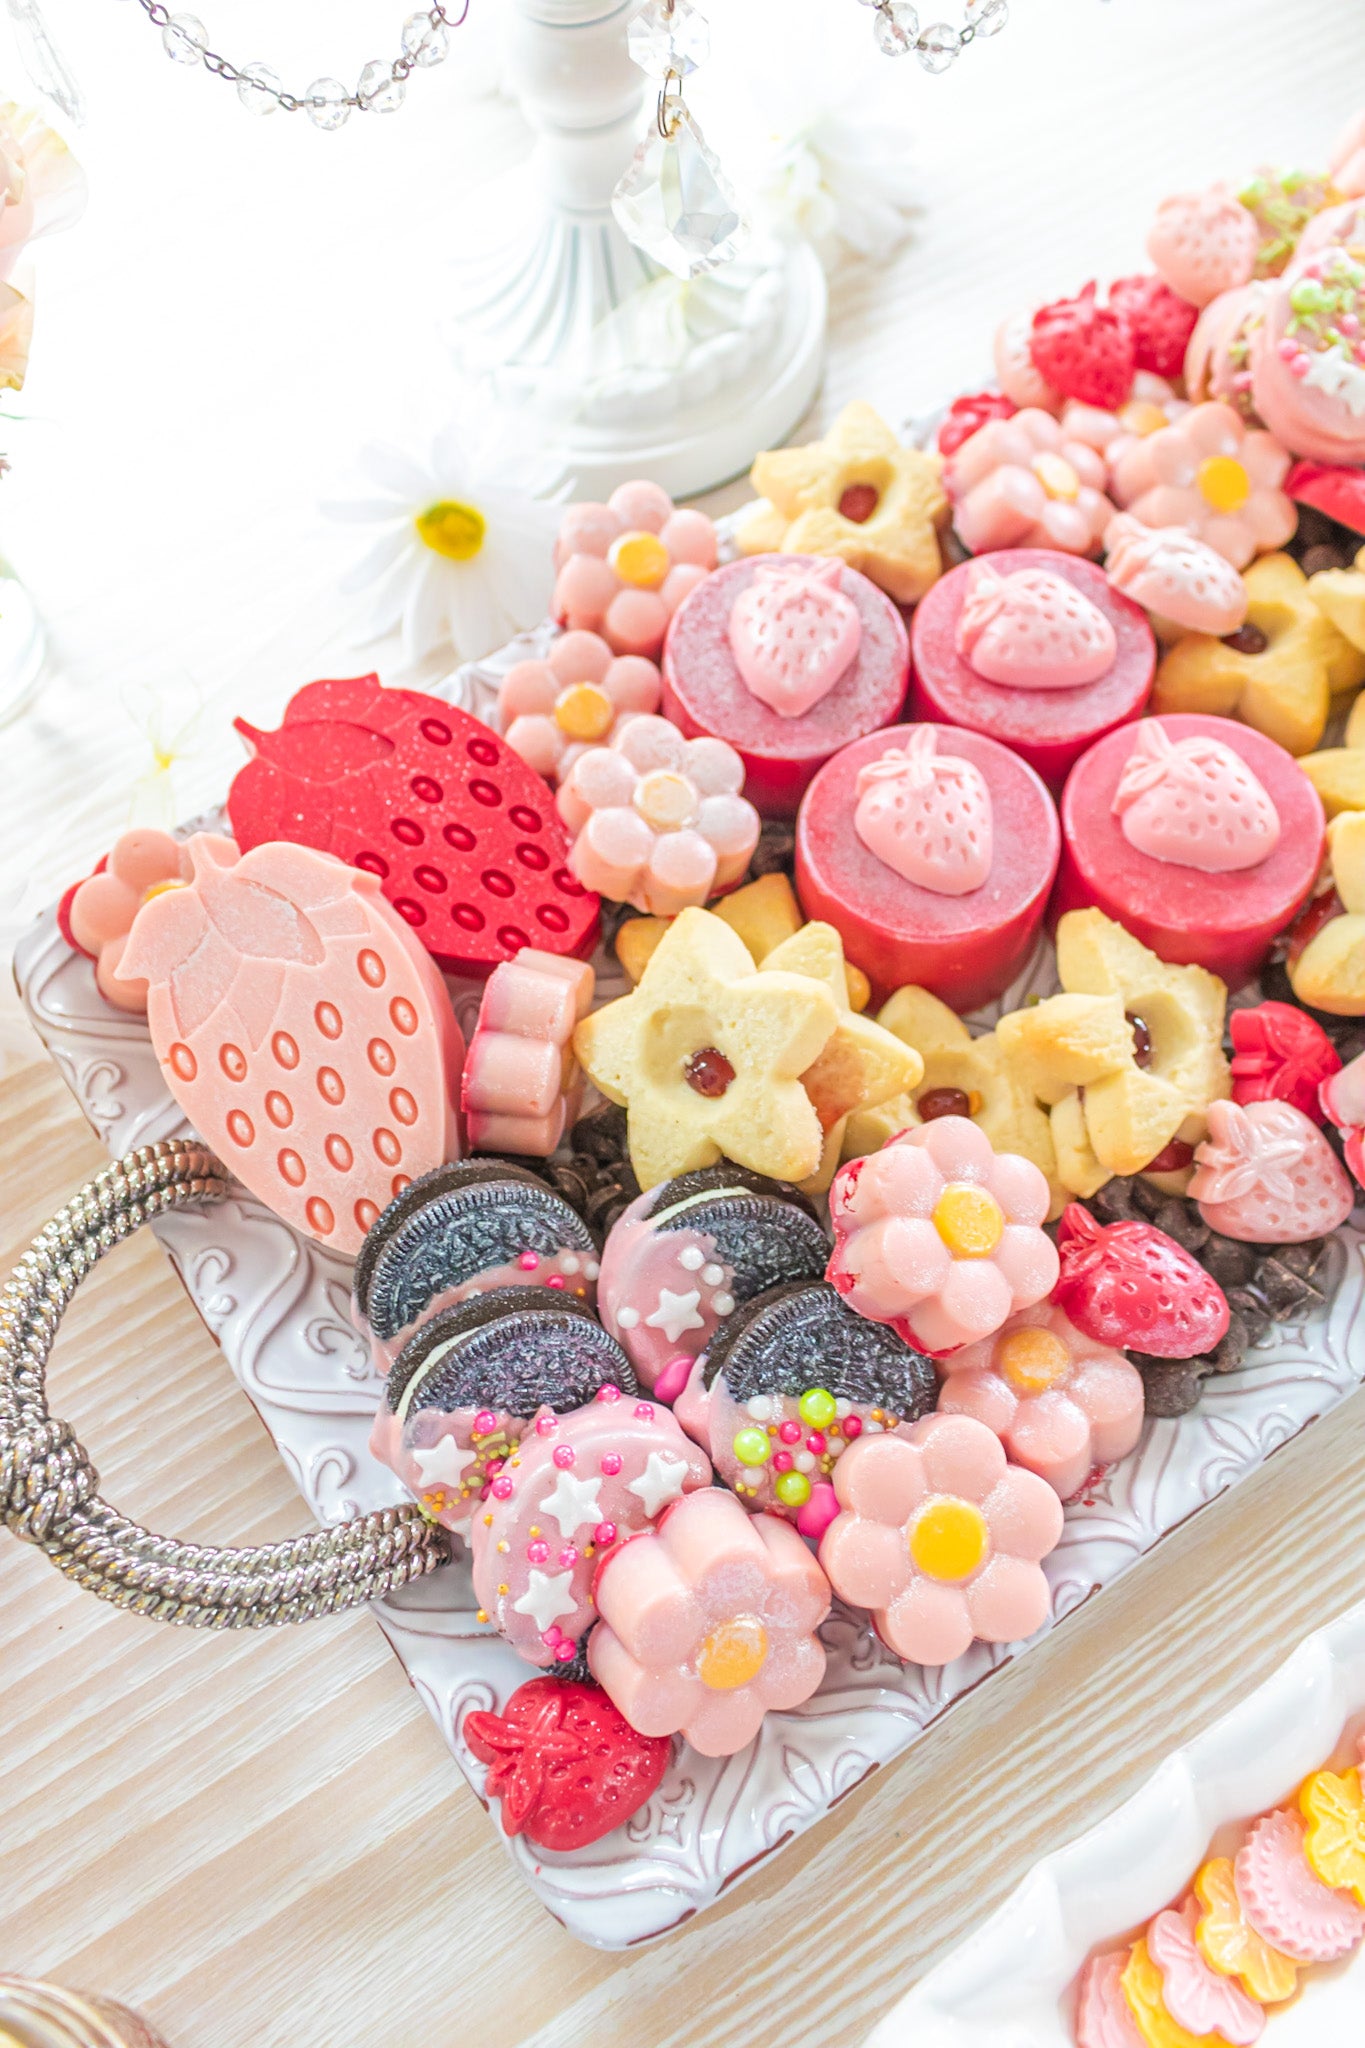
You can get really creative with the types of yummy treats to put on a dessert board. The more variety of treats you have the better! Keep it interesting with different textures, flavors. You can also mix sweet and salty and even tangy treats. Go for a specific aesthetic or color. Like hearts, pink or red.
Try mixing the following treats to make your next valentine dessert board:
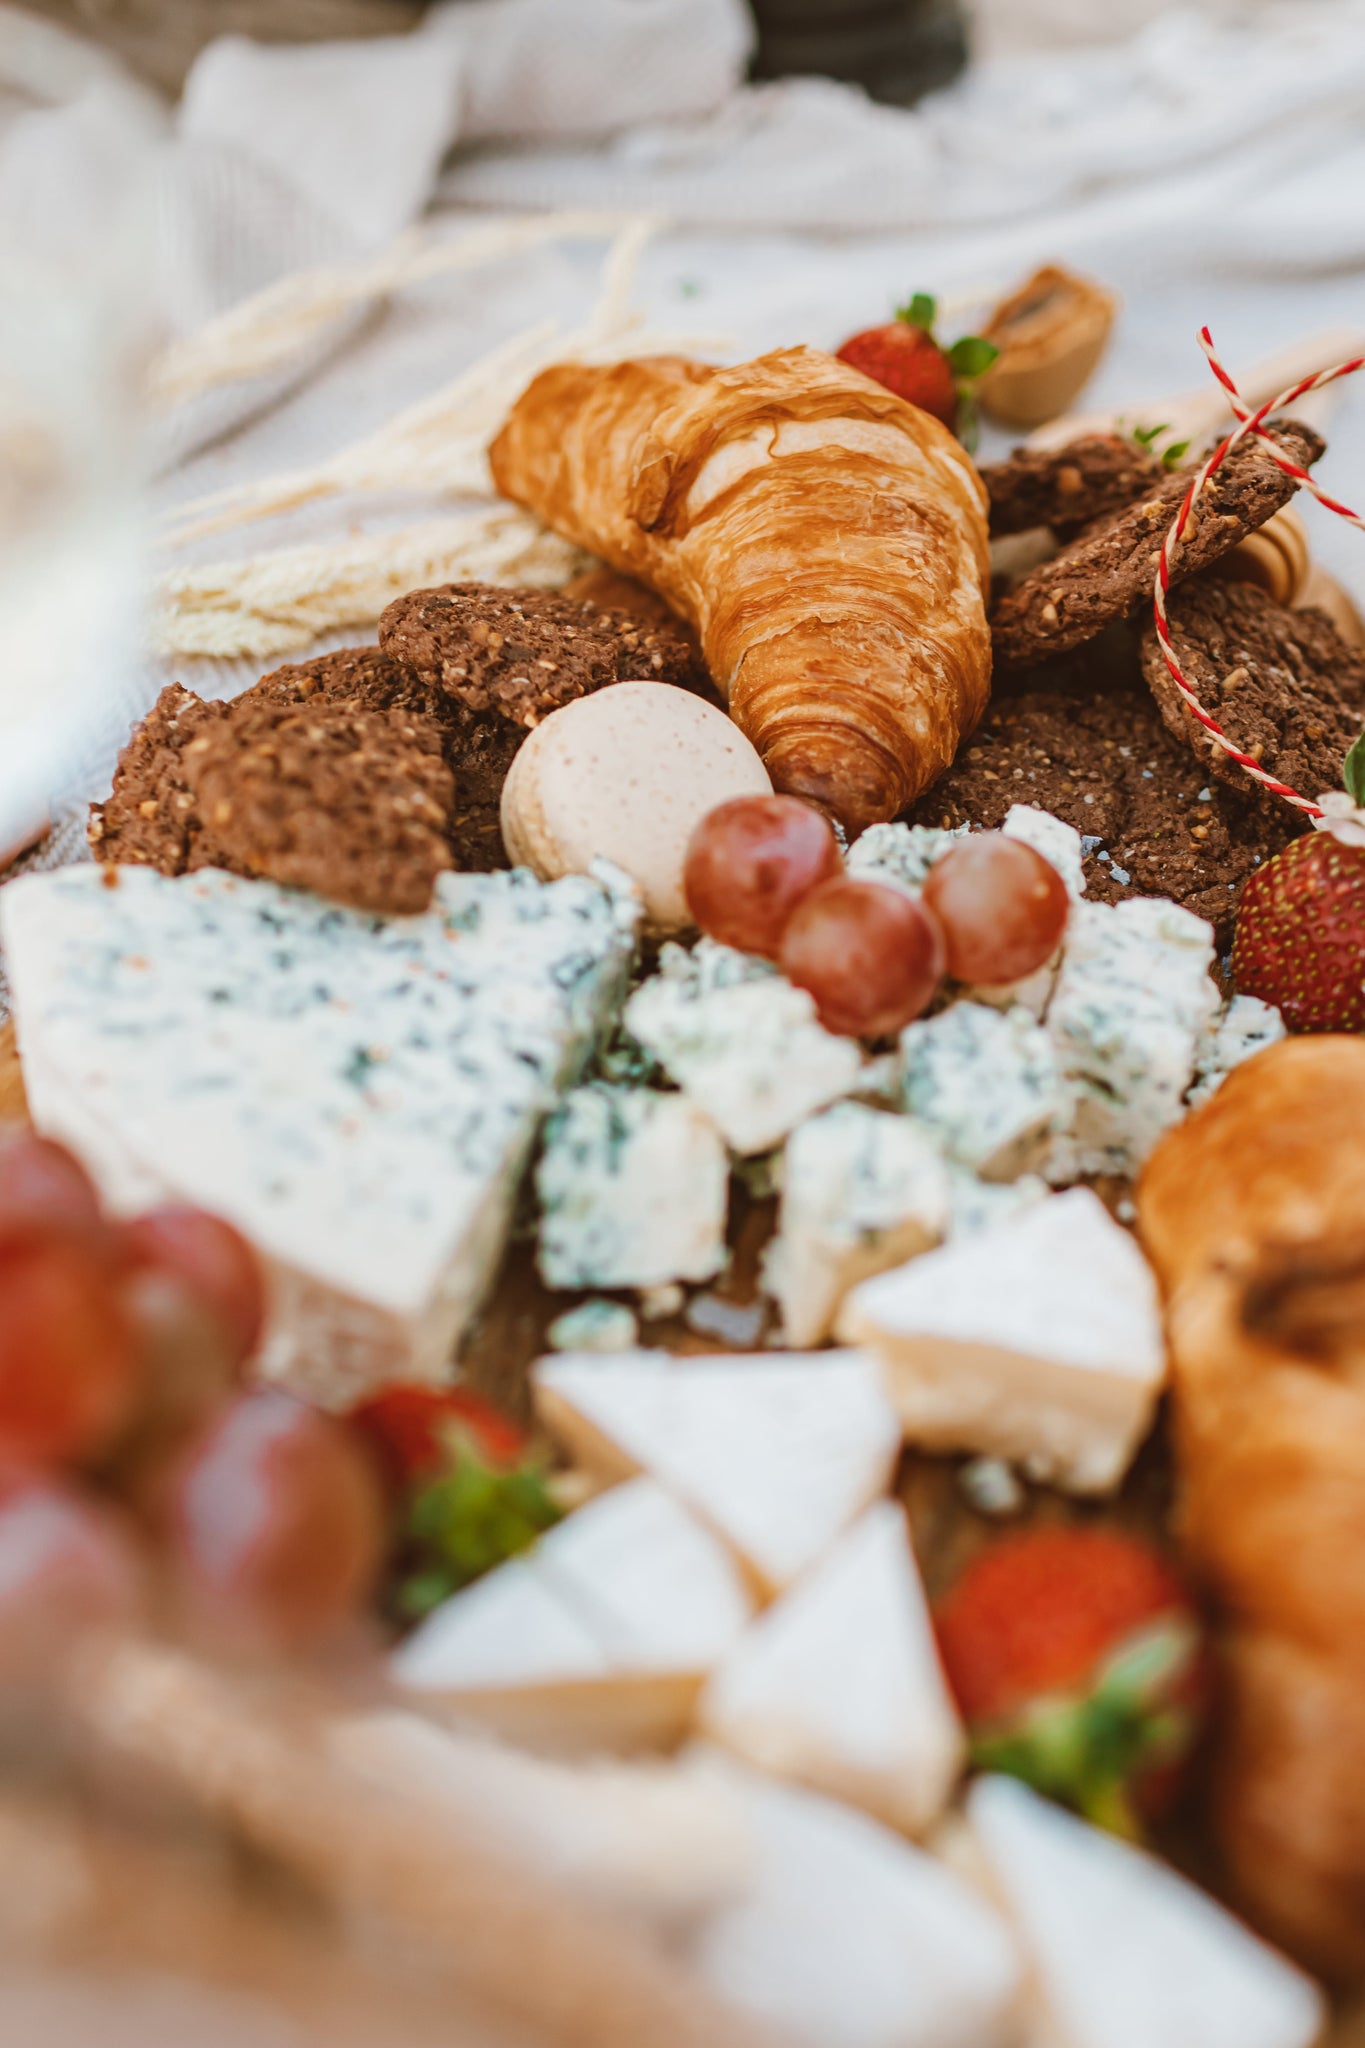
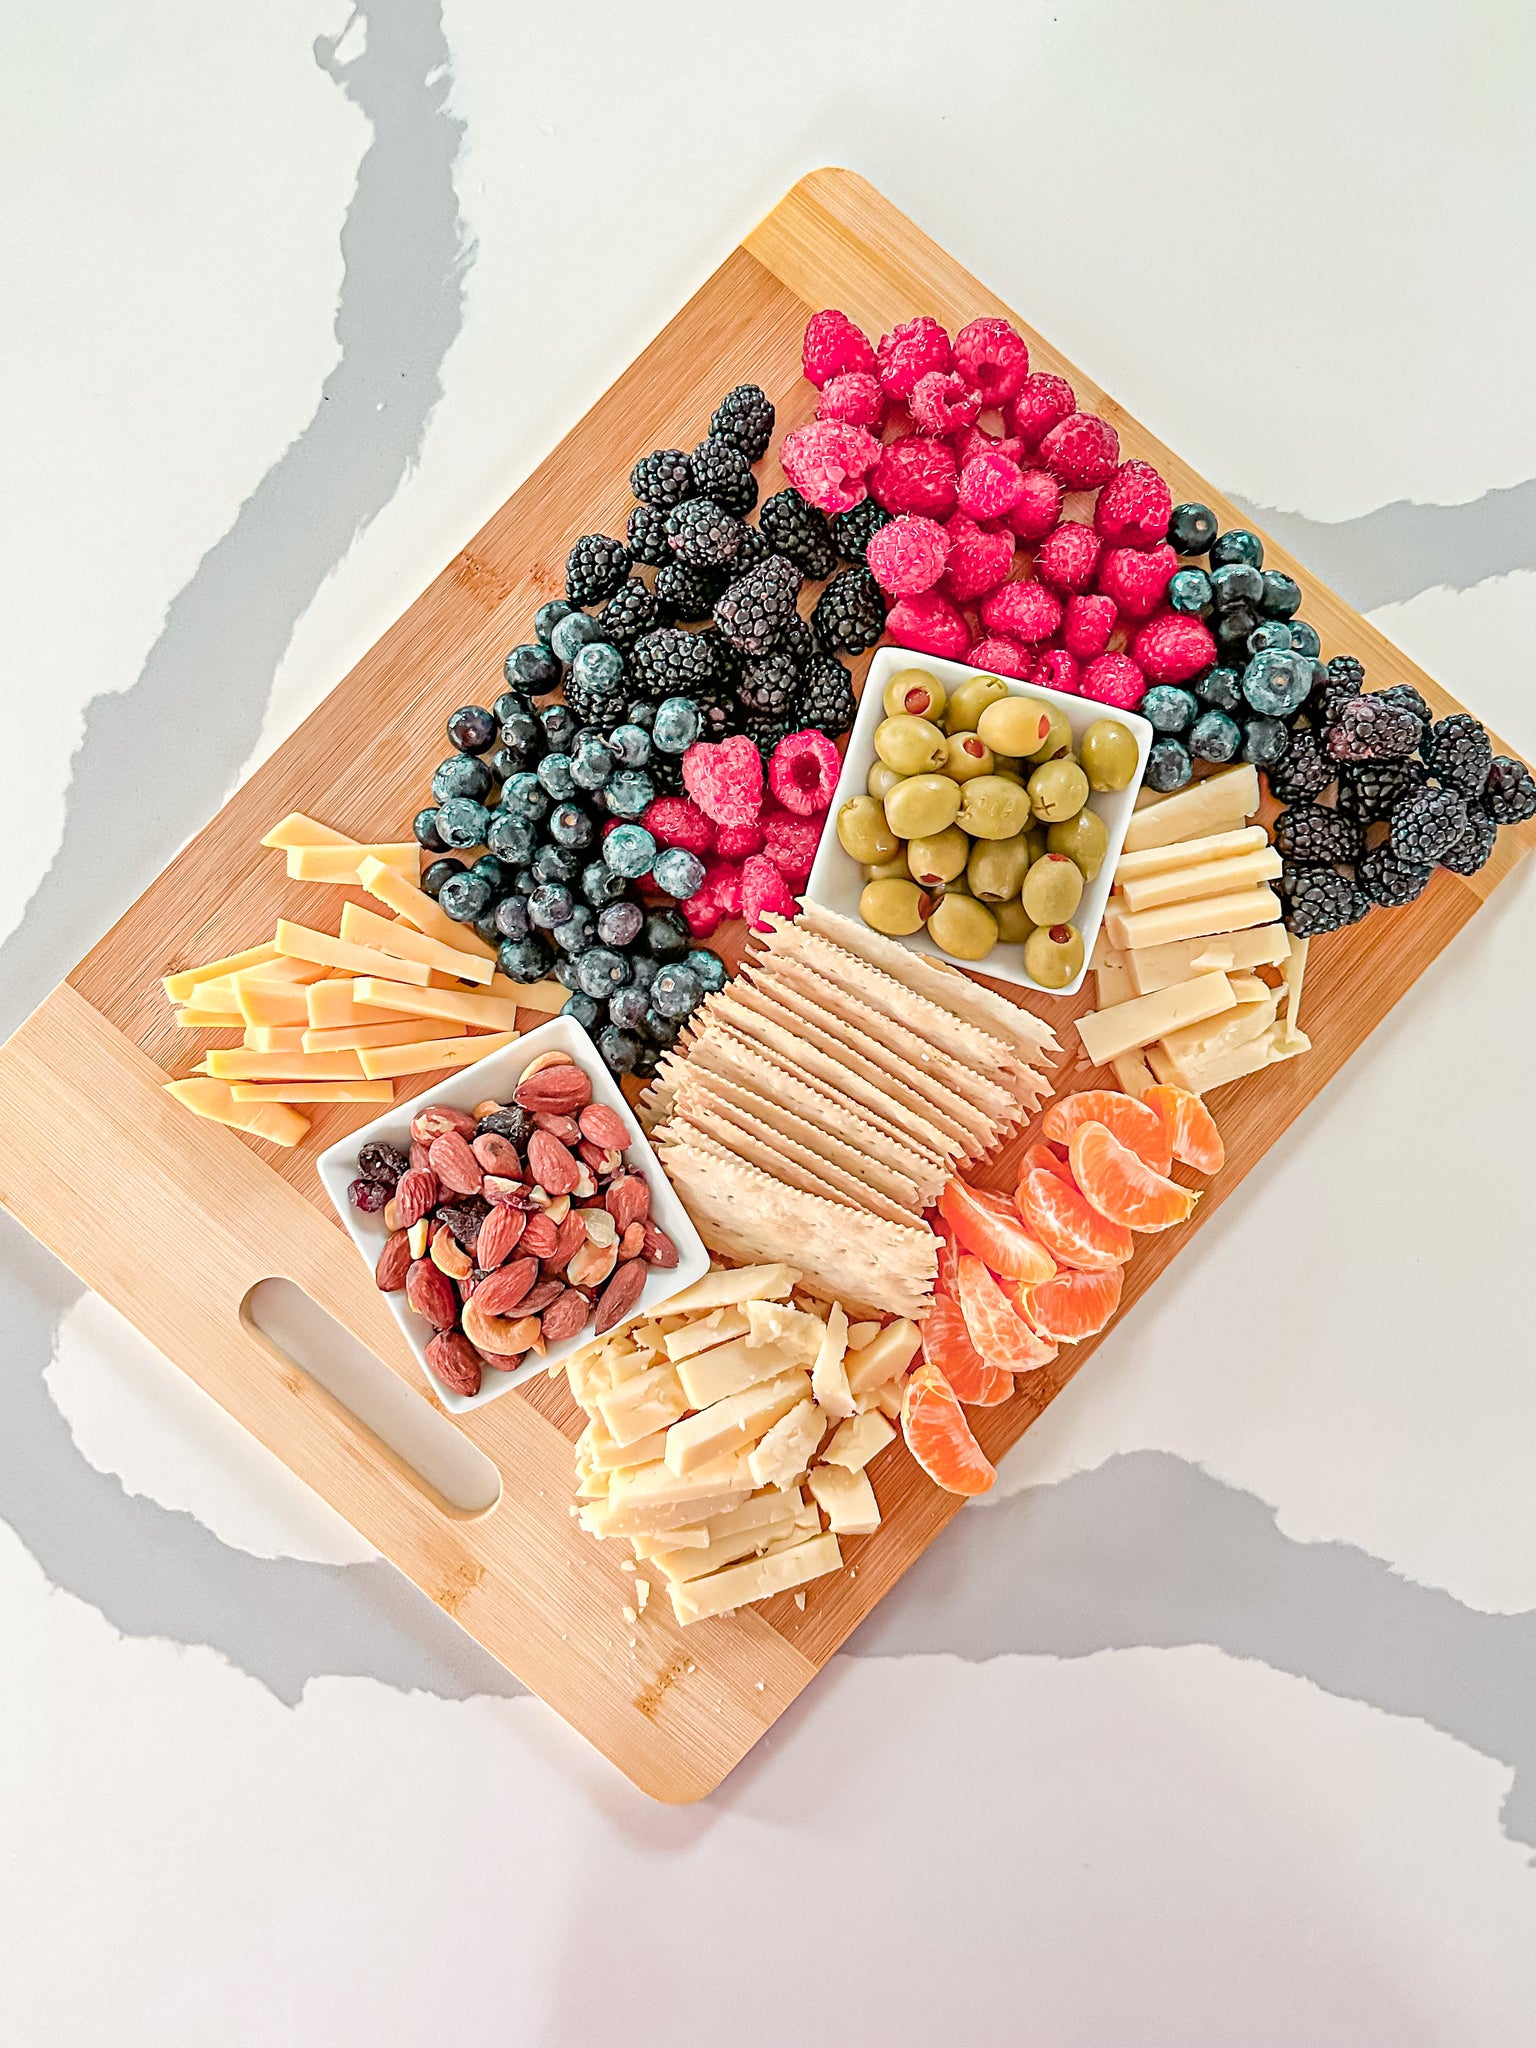
A charcuterie board is pronounced (shar-koo-tuh-ree) which is made with fresh fruits, cheeses, crackers, nuts, olives, and small bites. I love to serve a charcuterie board for just about any dinner party we throw. Birthday parties, dinner parties and holidays are a great reason to make this delightful appetizer.
My Kids also love it when I made these boards! I like to make them on the weekends after lunch time, because my kids will snack on them all day long and help hold them off until dinner time.
What I love about this style appetizer is that you can make these boards really healthy by using lots of fresh fruits and vegetables. I also like to think of a charcuterie board as an adult Lunchable!* But you didn't hear it from me* 😜
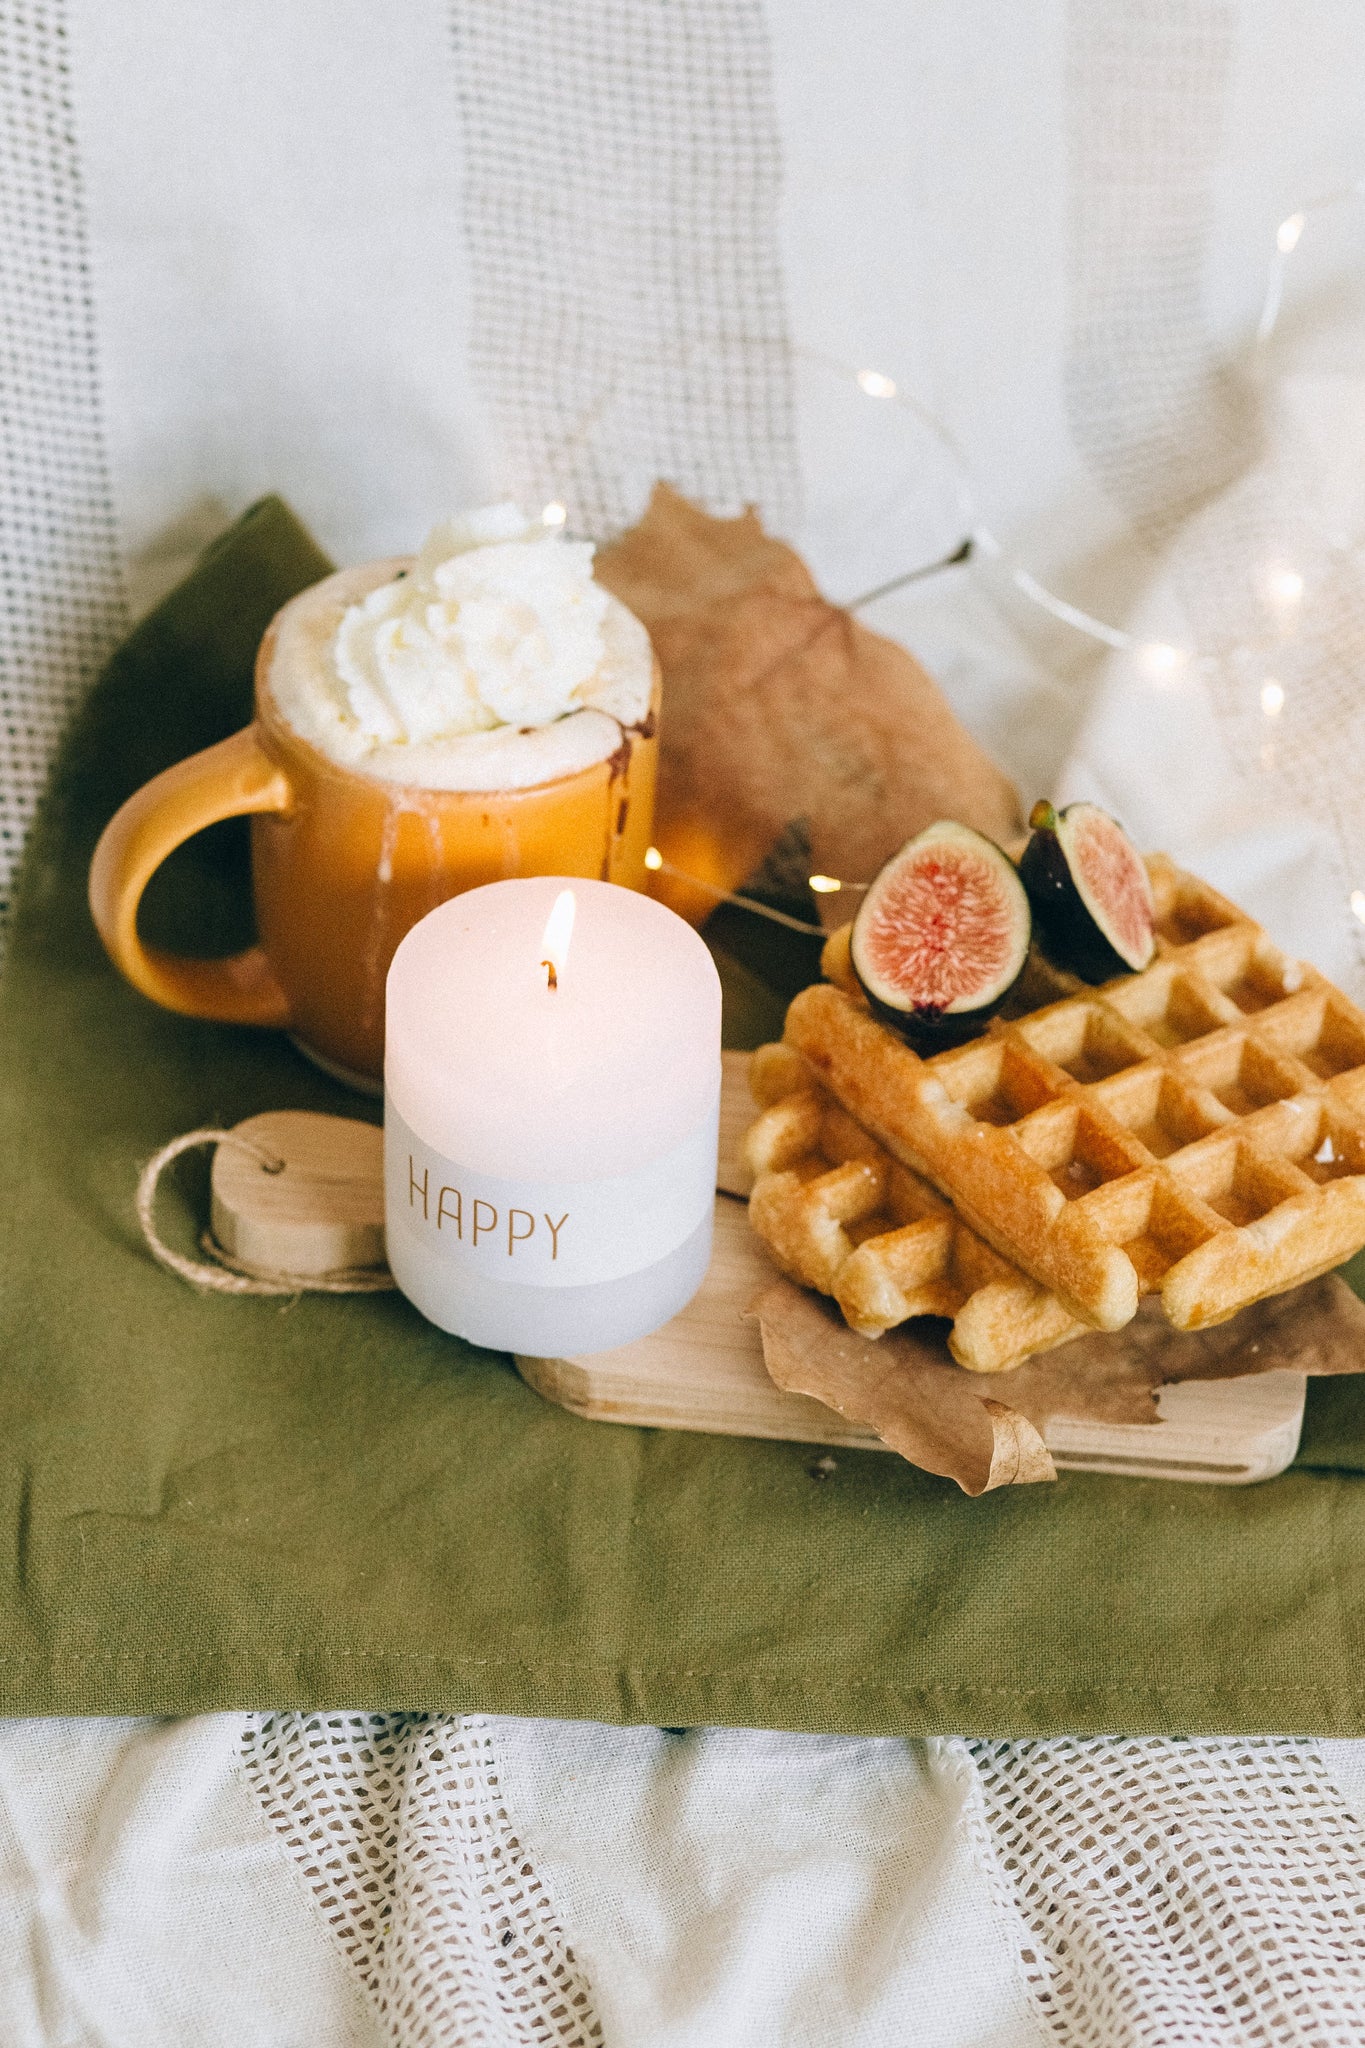
Make someone's morning extra special with a Valentine breakfast board for two! You can make a really delightful mini Valentine Charcuterie board with your favorite breakfast! Pair it with a hot drink and light a candle to go along with your breakfast board.
FIY, you don't actually have to wait until valentines day to do this. This is a great treat for any day you want to make someone feel special or loved. You can also do this for a birthday, anniversary or valentines day.
1.Start by gathering all of the ingredients you wish to assemble on your Valentine board.
2. Lay out all of the items in front of you on the counter when setting the up the board. This helps you to see everything you have. Having all of your ingredients out in front of you gives you an opportunity to play around with mixing and matching treats and rearranging them.
3. Begin to arrange and rearrange your board depending on what looks good and feels right.
4. Discard any pieces you won't be using ( or eat them along the way 😉) & Enjoy!
Amazingly, lovely garnishes such as fresh herbs can really uplift and complete the look of your board. Try flower petals for valentines day, or chamomile and lavender for a pretty summer Charcuterie Board.
You can also garnish your Charcuterie Board with various herbs to make it extra lovely. Try the following
Tip: When you are purchasing flowers to use as a way to garnish your boards with, make sure to use food grade flowers. Some grocers carry fresh edible flowers. You can also garnish your boards with dried flowers for making into tea if you can't find fresh flowers.
Add honey comb, honey drizzle and jams for added flavors and texture. I love to drizzle a spicy honey over baked Brea for example.
Another lovely way to decorate a Valentine Charcuterie Board is with dried fruit. Think orange peel, lemon zest, and any other variation of dried fruit.
You can purchase dried fruit or make your own in the oven.
Dried oranges are on of my favorites to decorate my boards with. Especially if the aesthetic is a cinnamon and spice board. Oranges are vibrant, yet when dried they evoke a romantic flair to whatever you add them to. Once the oranges are dried, they almost glisten with a stained glass look that makes them so irresistible.
One of the most popular way to dry oranges is in the oven.
Remember to take your time and enjoy the process. Dont rush it, enjoy it!
Different varieties of oranges will produce different colors. If you want a bright and vibrant color, go for Cara Cara oranges. If you want a classic orange go for a navel orange.
LOOKING FOR MORE VALENTINE INSPO?
I especially love making snack boards for my kids to munch on throughout the day. It’s a great way to encourage healthy snacking for your family.
There are so many different types of snacking foods that can go well together, you just have to pick a theme.
In today's post, I am sharing my secret to coming up with perfectly palatable snack board combinations and how to set these boards up to ensure that they are not only aesthetically pleasing but also delicious!
From elegant to simple or even petite, a snack board is a versatile and aesthetically appealing way to serve a variety of your favorite snacks and appetizers.
It is honestly a perfect option for parties, gatherings, special events or even a chill night in with your family.
By arranging an assortment of delicious bites on a single board, you can create a stunning centerpiece that will awe & inspire.
When it comes to arranging the snack board, this is the part where you either make it or break it, outside of getting together the right ingredients.
The most important thing I have found that helps me arrange a beautiful snack board is to take out all of my ingredients & have them out in front of me ready to pick & pull whatever I need.
This way I can rearrange ingredients if I don’t think the items are a good fit together.
When I pick & pull things from the fridge one at a time, I always forget something & the board just doesn’t look as full. Still tastes great, but if I’m planning on having guests over, I want to make sure everything is covered.
I love to make these super simple & easy fruit snack boards for my kids on Saturday mornings.
It’s a good way to move through the fruit that’s in the house while also keeping the family full on healthy food choices.
Simple afternoon healthy snack board for kids
The secret to setting up the best snack board is to first start by picking a theme.
The next thing you'll want to do is gather a diverse array of yummy ingredients and finger foods to fulfill that theme.
In terms of choosing the right ingredients, think of tasty combinations that go well together, like flavors, textures or even colors to make the board aesthetic and lovely.
For example, I love to make simple snack boards for our weekend breakfasts and fill them up with any of the fruits available in the house. The kids go crazy for these boards and it really does encourage them to eat healthy and fresh foods.
If we are considering the specific ingredients of a snack board, here is a list of the foods you will likely encounter or need to create a snack board.
This probably isn’t what you were expecting to hear, but the truth is that when arranging snack boards, it’s like working art. Food art, that is.
Sometimes you have to rearrange the ingredients, or cut the foods in different ways to achieve a desired result.
When setting up boards for events, it can take me over an hour to put it together in a way that I feel fit. Of course, when I am making snack boards for myself or to just go with a movie I don’t stress so much over the layout. But it’s still good practice to experiment and have fun making boards.
With each board I have made I have learned what my preference is and tips and techniques that have led me to make all sorts of improvements over time.
This is the fun part as the list can just go on and on till your heart's content
Christmas snack board with a red, white and green theme
Sunday Brunch board for the family
Ingredients:
Birthday Party Treats Snack Board
Ingredients as listed:
Party snack board for party
Ingredients as listed:
Elegant minimalist snack board for wine tasting
Ingredients:
Wine pairing snack board
Ingredients:
Afternoon kids snack board
Ingredients:
Before serving the snack board, make sure to add some final touches:
Small gathering snack board
Rustic snack board for one
Birthday party snack board
Valentine’s day snack board
I have a lot of fun putting together snack boards for my friends, family, special occasions and events. It's a fun way to just snack and sometimes instead of a dinner we will just make a snack board to munch on. It's also a great way to express yourself creatively through food.
Check Out These Related Posts Next
EASY CHOCOLATE COVERED STRAWBERRIES RECIPE USING A MICROWAVE
I made these chocolate covered strawberries for my daughter’s second birthday party. You can check out the strawberry themed birthday party HERE
This easy chocolate covered strawberries recipe using a Microwave only took me about 30 minutes to make and was a total hit!
There's just something magical about the combination of fresh strawberries and rich, velvety chocolate.
It's a fresh treat that is so satisfying And the best part? You can make these delectable treats in just a few minutes using your microwave!
- Fresh strawberries
- High-quality chocolate chips or chocolate bars
- Microwave-safe bowl
- Microwave
-Coconut oil
- Parchment paper or wax paper
Since strawberries are the main ingredient, you will want to make sure that they are nice and fresh.
Start by washing your strawberries and patting them dry with a paper towel.
Make sure the strawberries are totally dry before moving on to the next step. This will help the chocolate adhere better to the strawberries.
Break the chocolate bars into small pieces or use chocolate chips for convenience.
Place the chocolate in a microwave-safe bowl and microwave it in 30-second intervals, stirring in between, until it's completely melted and smooth.
Be careful not to overheat the chocolate, as it can burn easily.
If the chocolate is too stiff, you can add a tablespoon of coconut oil to help loosen the chocolate.
Hold each strawberry by the stem and dip it into the melted chocolate, swirling it around to ensure it's fully coated.
Allow any excess chocolate to drip off before placing the strawberry on a parchment paper-lined tray or plate.
You can also use a toothpick to hold the strawberry if you prefer. This can help keep the strawberry leaves looking good.
Place the tray of chocolate covered strawberries in the refrigerator for around 20 minutes, or until the chocolate is nice and set.
Once the chocolate has set, your easy chocolate covered strawberries are ready to be enjoyed! Serve them as a sweet treat for yourself or impress your guests with this simple yet elegant dessert.
You dont even have to wait for a special occasion to whip these treats up. They are so easy and fast to make. I love making these for the kids on the weekends for movie nights, picnics, brunch, girls day and whenever I get the craving.
You could also get pretty creative with these treats and try different variations by adding toppings like white chocolate drizzle and sprinkles on top. The possibilities are endless!
]]>I have seen a lot of strawberry milk baths photo shoots for babies and toddlers but I wanted to change things up a bit. Instead of a strawberry bath, we did a strawberry cake & dress!
The strawberry cake is actually from her birthday party, but it was a two tiered cake and we never managed to eat the second half. I thought a great way to give the second half of the cake some purpose is to let Emma have it all! She thought it was so fun to just play with the cake and it really kept her entertained for the entire shoot!
I figured since Emma is now 2, a milk bath seems a little bit more fitting for a 1 year old shoot, but I still wanted to do a strawberry theme.
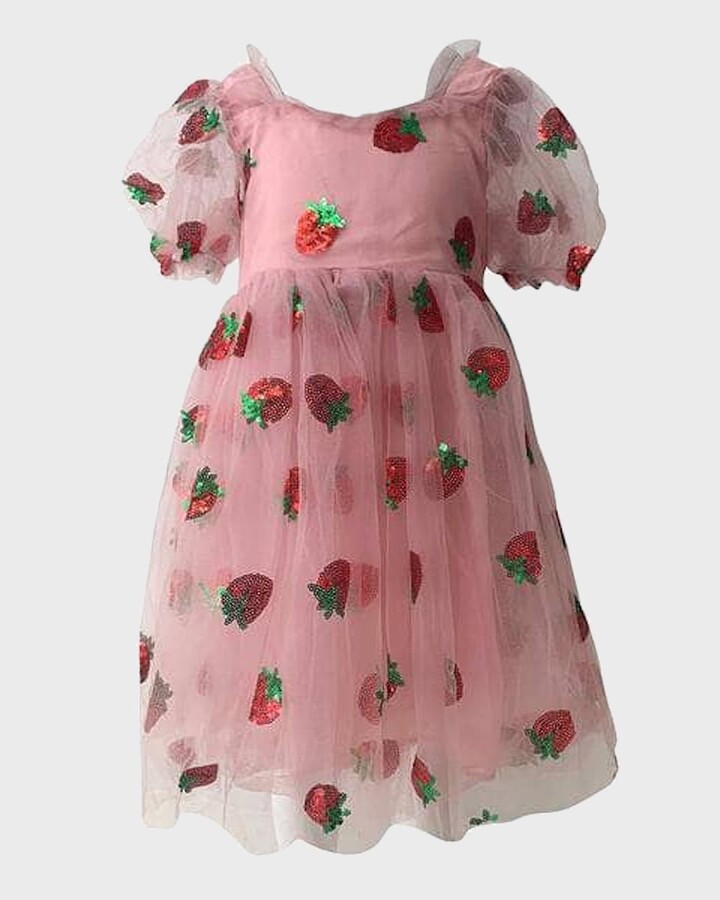
I managed to find this darling strawberry dress for her birthday party and her strawberry photoshoot! We tied the whole look together with a darling green gingham headband! Which I like to call the “finishing crown” and Emma definitely loves to wear her crown! She definitely looked like a cottagecore princess!
I was so happy to find a wooden picnic table for this shoot and you can find a similar one HERE
The nice thing about a strawberry photoshoot is that it gives you a sweet memory to look back on for your little ones first summers.
After all, babyhood and toddlerhood go by so unbelievably fast. And when we are just running on the motions of everyday life, it can seem like we blink and these precious young moments are gone. I feel like this is a great way to hang on these times and memories!
A photoshoot is a simple yet powerful way to make memories for your little one that last a lifetime.
Let’s dive in!
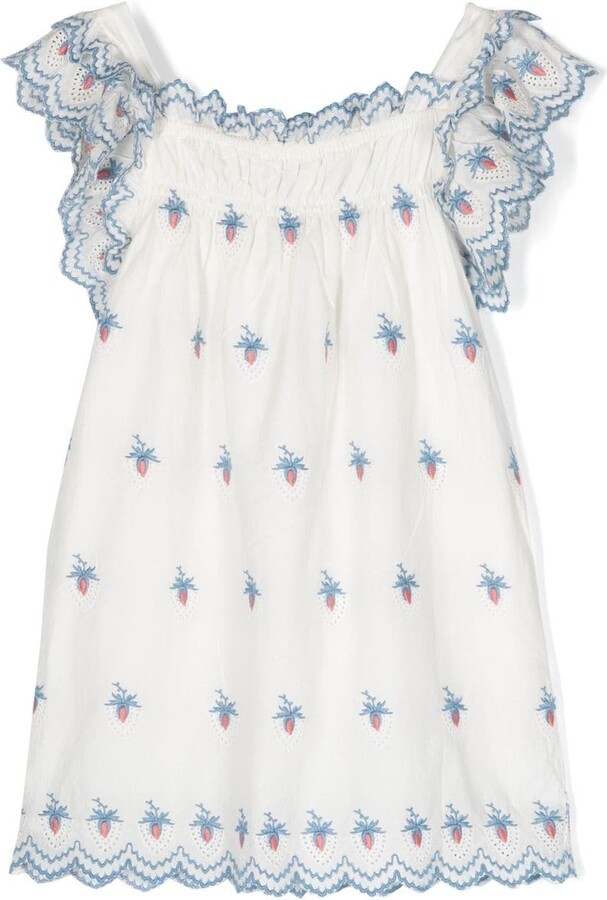
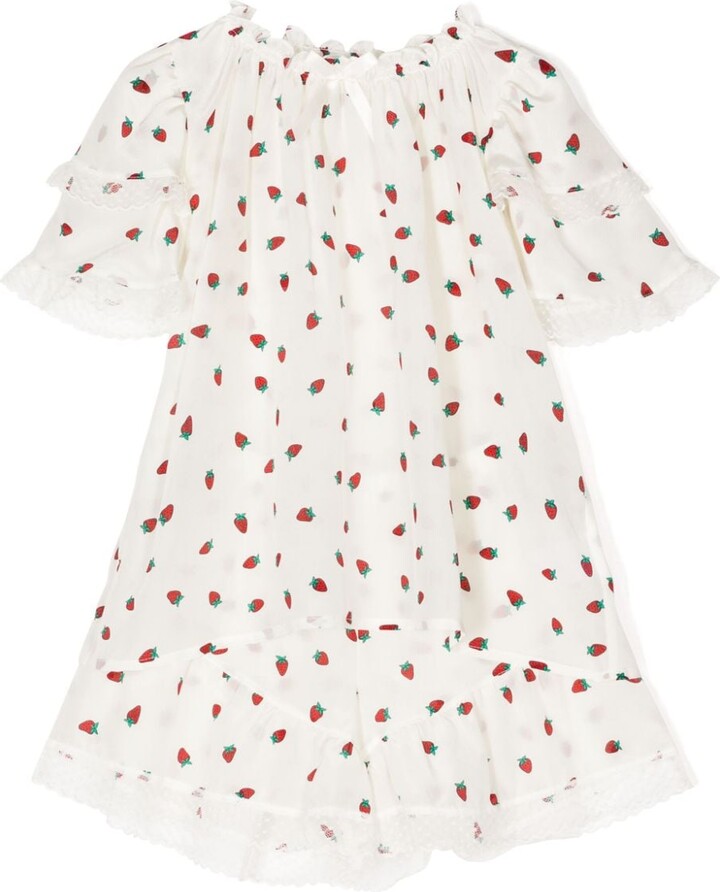
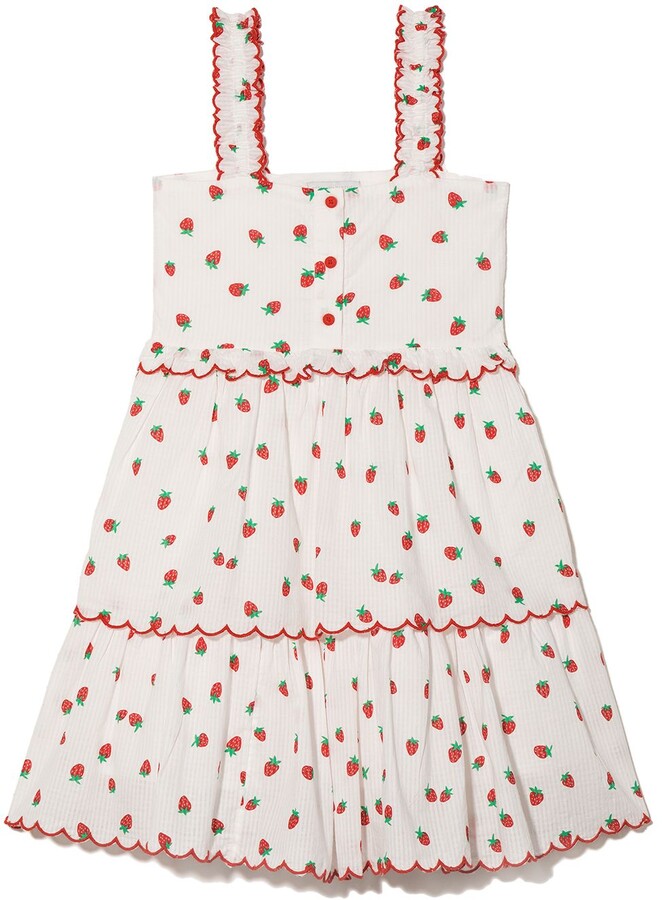
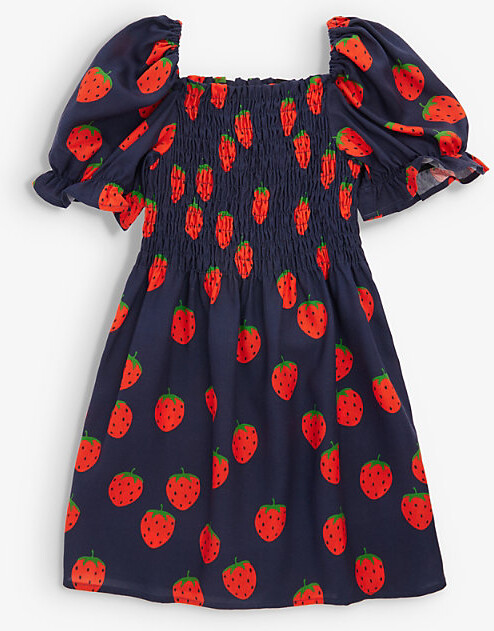
Shop Girls Strawberry Dresses
Check Out These Related Posts Next
Ever since Em was a little baby she has absolutely loved strawberries! Strawberry also happens to be one of her first words and first foods. I don’t think a day has gone by where she hasn’t had a strawberry to munch on. Lucky girl! Lol
Whenever we go grocery shopping she will ask for a basket of the red Barrie’s and surely will munch on them as we make our way through the store.
It only seemed natural to pick strawberries as the theme of my daughters 2 year young birthday party.
If im being honest, I’m still quite a bit in amazement that’s it’s been 2 years and yet it still seems like yesterday that she was a tiny little newborn. Now she is a curious, chatty, happy and loving toddler who is always up for an adventure to the park.
All in all, I’m very excited & grateful for this wonderful new chapter in our lives & im just trying to soak it all up as much as possible.
It’s bittersweet watching your baby grow, & celebrating the milestones is a great way to keep on making those wonderful memories and moments that will be cherished forever.
Let’s dive in!
For the dessert table this year I decided to do a variety of strawberry themed treats and desserts.
I did a strawberry cake, a dessert board, strawberries treat cups, mini cakes, a macaroon tower and chocolate covered strawberries.
I will break them down throughout this post for a closer look.
The color palette was colorful & cheerful for this party which made it really perfect for a 2 year old. It was definitely just right!
Since the theme is strawberries, I wanted to play around with the natural colors of a strawberry.
Strawberries are either red or pink, and have green leaves. Strawberry plants also bloom white flowers with yellow centers. So essentially I just went with the natural colors of a strawberry plant in pastel hues.
You could definitely choose to go for more vivid and vibrant shades instead, but my only concern was that since I had green & red together, I wanted to avoid the party looking like Christmas. So pastel shades for the win on this one.
I love how this strawberry theme cake turned out! It's exactly what I described to the cake maker. I asked for a two tier pink cake with hot pink strawberries and mini daisy flowers with green polka-dots.
The inner cake was a funfetti with vanilla cream.It was lovely!
I got this cake from a local bakery in Newburg Oregon called Sprinkles Of Joy. I absolutely adore the turn out! She did a beautiful job and made the cake exactly as I had envisioned. I was super impressed!
Similar to a charcuterie board, except made with treats and sweets. Dessert boards add such a fun flair to any party. They create interest and boost curiosity. It's the perfectly imperfect piece that keeps getting your guests up to pick a new treat and talking to one another.
The desert board contained a mixture of treats. Here's the breakdown:
I made all of the desserts at home except for the shortcake cookies which I found at Trader Joes. They don't always have these cookies in stock, so when I found them the last time I was shopping, I picked up a couple of boxes and froze them until the day of the party.
For a strawberry party, I had to make strawberry cakes of course! Mold cakes are so much fun, especially because the turn out can be so magical. I am not an expert baker by any means, but I know how to make chocolates and cake, and that's enough to make a beautiful arrangement. It took me a couple tries in the beginning to get them just right, but after I had the formula down they were easy enough to make. You can really make any type of cake you can imagine, as long as you have a mold for it.
Since finding strawberry cake molds and chocolate molds for baking were nearly impossible, I actually ended up using silicone ice cube trays to make these and they worked out great.
Here are a few of the other mini cakes and cake molds from the party.
I got this custom made wooden cake sign from The Birch Wood Market on Etsy. She was amazing and made the beautiful custom design cake topper for Emma's birthday cake.
This was such a scrumptious and easy treat that made a charming finish to the dessert table. It was only 3 ingredients to make this recipe which I will share in a later post. It's simple, fresh and beautiful. I used small crystal mason jars to display these in and it was the perfect size.
It seemed like I couldn't throw a strawberry birthday party without chocolate covered strawberries. These are so simple to make and in turn create an elegant and yummy display.
I will have to share my super easy 3 ingredient recipe for these chocolate strawberries which were a hit. I also use the same recipe to make chocolate & peanut butter banana bites. This recipe is also great for fruit in your fridge that are slightly overripe, but still totally edible.
Macaroons are my favorite cookies ever! Not only are they beautiful and elegant, but they really do complete a party! They are scrumptious little bites of deliciousness that are festive, elegant and beautiful. A perfect party treat.
I did not actually make these, but these are most definitely a fab find! I found them at Costco. Can you believe it?! I got 3 boxes of these and it was the perfect amount. They are seriously so good AND I used to get a macaroon for breakfast several times a week at bouchon bakery in Yountville CA, (one of Thomas Keller's restaurants) to go with my morning coffee. I have no complaints here.
For the savory treats, I decided to go with mostly finger foods. The party was hosted at 11 which is brunch time and perfect for small pickings. Also, kids love finger foods. There's something about small snacks that are just the best! These types of snacks are also great for serving at parties because they keep your guests moving around and picking which creates a more casual and conversational atmosphere.
Personally, I don't love a sit down meal at a birthday party. Of course, you can do whatever fits your personal style. But I love the casualty of being able to move around and keep peckish. There's too many people to talk to, too much to do and not enough time to sit down still and eat. I like to reserve these types of meals for a good ol' fashioned dinner party, with a more intimate setting, or smaller group of guests, if you catch my drift.
Shop serving tray HERE
In terms of decorations, I usually go pretty light. I actually try to avoid things like paper birthday banners, paper decor or too many small single use decorations. Mostly, because these items can add up quickly and I would just be throwing them away after only a couple hours of use. As cute as these types of decorations are, I find them to be too much extra work for just a few hours of use.
I actually prefer to decorate with edible "decor" to create a party theme. Guests seem to enjoy these as they can take them home as party favors or snack on them while at the party.
I love to decorate with flower bouquets, balloons and decorative foods. I also have a collection of decorative trays from over the years that really complement any party. I use them several times a year for several various parties.
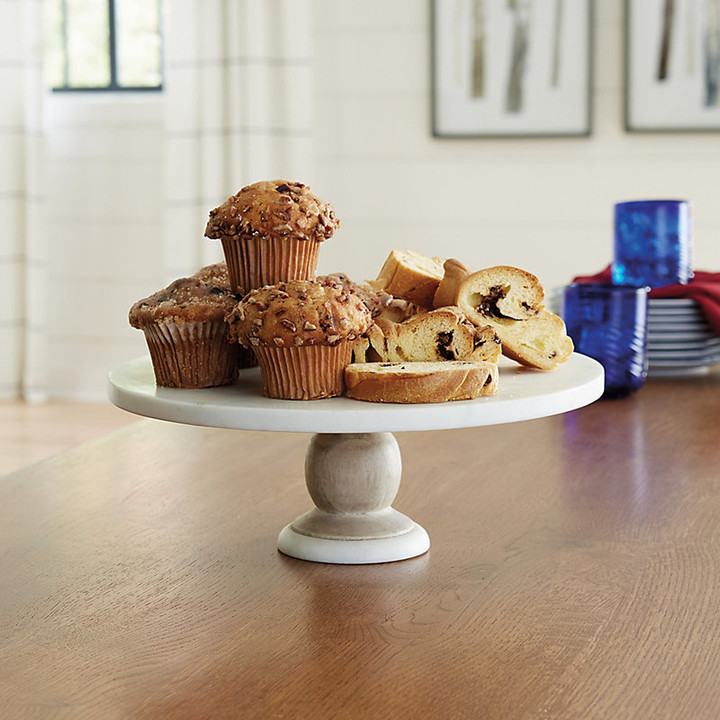
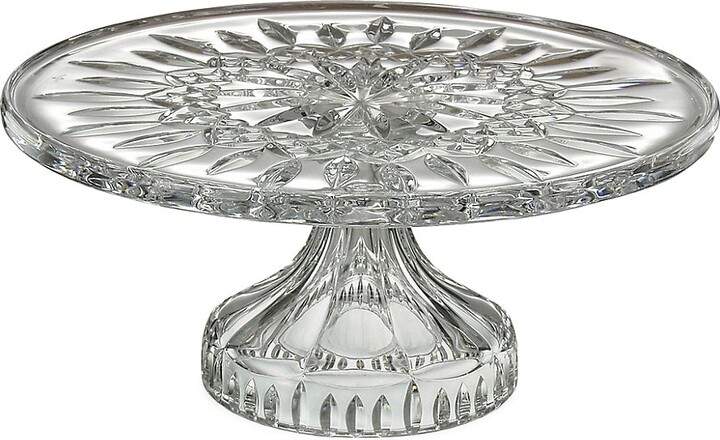
I started my decorative tray and cake stand collection when I was just 18. It's a perfect way to decorate without having to buy new decorations for each and every party. Especially if you love to throw parties. Of course, quality trays can be spendy, which is why I randomly will add a new piece when I see one that will seamlessly fit into my collection.
I have purchased several of my trays from various boutiques & wineries in Napa Valley CA. West Elm & anthropology have a beautiful collection of serving trays and serving trays.
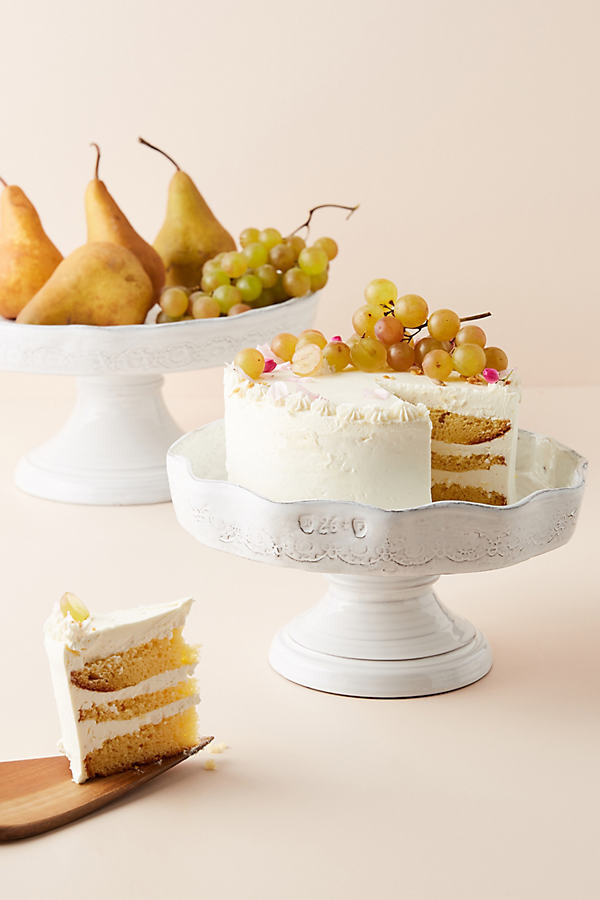
Shop Cake stand HERE
Shop Cake Stand HERE
Overall, I was so excited to throw this party for my sweet 2 year daughter! I love celebrating milestones and throwing fun parties. It's such a joy to get everyone together and treat ourselves and indulge a little. Afterall, life goes by fast and we want to make memories that last a lifetime. That's the important bit right there.
I ordered these two super cute wooden picnic tables from ikea. Each table would comfortably seat 4 toddlers or two older children.
I had asked for a headcount originally so I would know how many people would arrive and I am glad I only got 2 instead of 3 because it ended up being the perfect amount. There were about 12 children but they didn’t all sit at the table at the same time so it worked out perfectly.
If you plan on having all of the children sit down for food at the same time you will likely need more tables depending on the amount of kids.
I am totally in love with these cute wooden mini picnic tables! They are charming and too cute. This was an awesome place for the kids to sit and enjoy their snacks and cake.
For the activity we did a mini dip pool which we filled with shallow water. We also had a bubble machine going for the kids, music and wind up water toy turtles that swim in the mini pool. It was the perfect entertainment for 2 year olds on a hot summer's day.
Activities for 2 year old party
Mini-dip pool
Bubble machine
Balls
Music
Balloons
Outdoor games
Wind up turtles and water toys
Toys
Whether you're a kid or a kid at heart, Emma's strawberry birthday party had something for everyone. Emma's strawberry birthday party was the place to be for all dessert lovers and strawberry enthusiasts. It was a pink paradise of strawberry delights and fun. Cheers to another fun birthday party celebration in the books celebrated with our favorite people! 🍓💕😍
Check Out These Related Posts Next
Are you in search of a cute and cuddly snuggly buddy that not only brings warmth but also offers therapeutic benefits? The good news is that your search ends right here with the cutest warmies stuffed animals!
Warmies® Juniors Plushies are fully microwavable to provide soothing warmth and comfort. These adorable Warmies are scented with real dried French Lavender and perfectly weighted for a positive sensory experience. Warmies make a wonderful gift for your little ones, and even yourself!
They're honestly so wonderful for snuggling up with on a chilly day. When I take my toddler out on our brisk morning walks, I always give her a warmed up warmie to help keep her warm in the stroller.
These adorable plushies are also great providing comforting aid for muscle tension and pain relief. After having my baby, I would warm up a plushie and place it on my tummy for those tough after pains. They are soothing and too cute!
Warmies® are filled with dried French Lavender from Provence, France. I love the smell of lavender. Its soothing and so relaxing! Perfect for a stuffed animal. Warmies are also filled with flaxseeds which are a safe all natural stuffing option.
Simply warm weighted Warmies in a microwave between 20-30 seconds. I don't recommend heating the stuffies any more than a half a minute at a time. Only warm up you cute plush in a microwave. Of course, you want to always make sure that the plushie isn't too hot before offering it to your littles.
You can also chill the stuffies in the freezer for a while for cooling comfort.
Cleaning Warmies is pretty easy actually. Just spot clean your stuffy as needed. You can get a damp cloth and wipe down the plush as needed.
Since the plush is filled with natural materials, you want to avoid submerging it in water and do not put it in your washing machine.
Shop all warmies HERE
SHOP MUSHROOM WARMIES HERE
SHOP TRICERATOPS WARMIES HERE
SHOP ALLIGATOR WARMIES JUNIOR HERE
SHOP PINK MONSTER WARMIE HERE
SHOP WATERMELON WARMIES HERE
SHOP SLOTH WARMIES HERE
SHOP PUPPY WARMIES JUNIOR HERE
SHOP BLACK AND WHITE COW WARMIES HERE
SHOP BLUE MONSTER WARMIES HERE
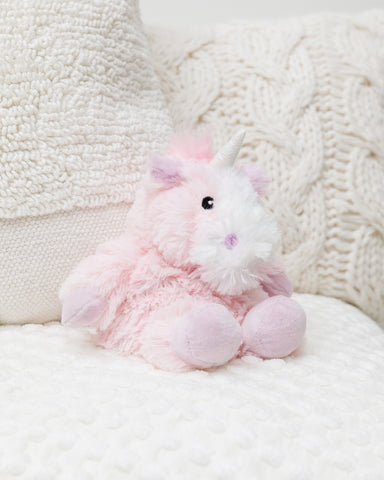
SHOP UNICORN WARMIES JUNIOR HERE
SHOP MARSHMALLOW WARMIES NECK WRAP HERE
These adorable and snuggly plushies can be warmed up or frozen to provide all the coziness or a refreshing coolness. They're simply lovely and so sweet. A great huggable plush for all of the snuggling. These are amazing on chilly evenings or serving as a comforting aid for relieving pain. Give them a try, and let the soothing cuddles begin!
]]>
Are you looking to find good toys for your toddler to play with? Toys that your toddler will actually enjoy playing with? That are quality, educational, beautiful and durable?
Maybe you are just on a hunt to find some unique toys because let’s s be honest, you are seeing the same exact toys over and over everywhere you go. You want to find something special & unique for your little one.
One of my personal favorite things about wooden toys is that they can be kept as treasures and past down from siblings, to grandchildren and so on. I have a wooden train set from my childhood which I have given to my son when he was a toddler 12 years ago and now I have passed it on to my daughter who is 21 months. It's truly amazing how new and beautiful it still looks after all of the years of play behind it.
I have found some super cute and fun quality wooden toys which keep your little one focused & engaged! These wooden toys are totally worth it!
So, whether you're a parent, grandparent, or a friend in search of the perfect gift, get ready to be inspired by the enchanting world of wooden toys for 1 and 2-year-olds. Whether you are searching for a gift, or gathering toy ideas for your little ones nursery, I have shopped, tested and tried several toys and today I am sharing my with you my absolute favorite wooden toys.
Get ready to watch their eyes sparkle with joy and witness their little hands explore the wonders of these timeless treasures.
Shop Montessori Dollhouse
Table of contents
Shop Montessori Dollhouse
Toddlers are innately very curious and happy to explore just about anything!
That's why you little one is always into everything.
Toddlers don't need all of the bells and whistles that come with most mainstream toys.
Simple wooden toys are impressively fun to toddlers.
And let’s not skip the obvious, but wooden toys are also so beautiful. Wooden toys are usually painted in delightfully soft colors and have nice textures. Some feel heavy while others are light which make them that much more interesting to play with.
I have been on a mission to find the best toys for my toddler to play with and let me tell you where it's at.
Whenever I purchase a toy for my toddler, I am looking for toys that offer either open ended play or have an educational purpose like puzzles and games.
A lot of people don’t know this about me, especially since I work in fashion but I actually studied Child Development in college. One of my biggest inspirations and takeaways is the Montessori Method which was developed by Dr. Maria Montessori in the early 1900s.
The Montessori Method focuses on child led activities and hands on independent learning. All children learn during play, so offering your toddler a variety of quality toys are very important.
The Montessori environment focuses on the playroom being filled with natural light and takes on a more minimalistic approach. For example, offering your toddler no more than 6-10 toys at any given time is good, while anything more than this can start to feel overwhelming to toddlers (& adults too)
Shop Montessori Dollhouse
Montessori Toy Shelf
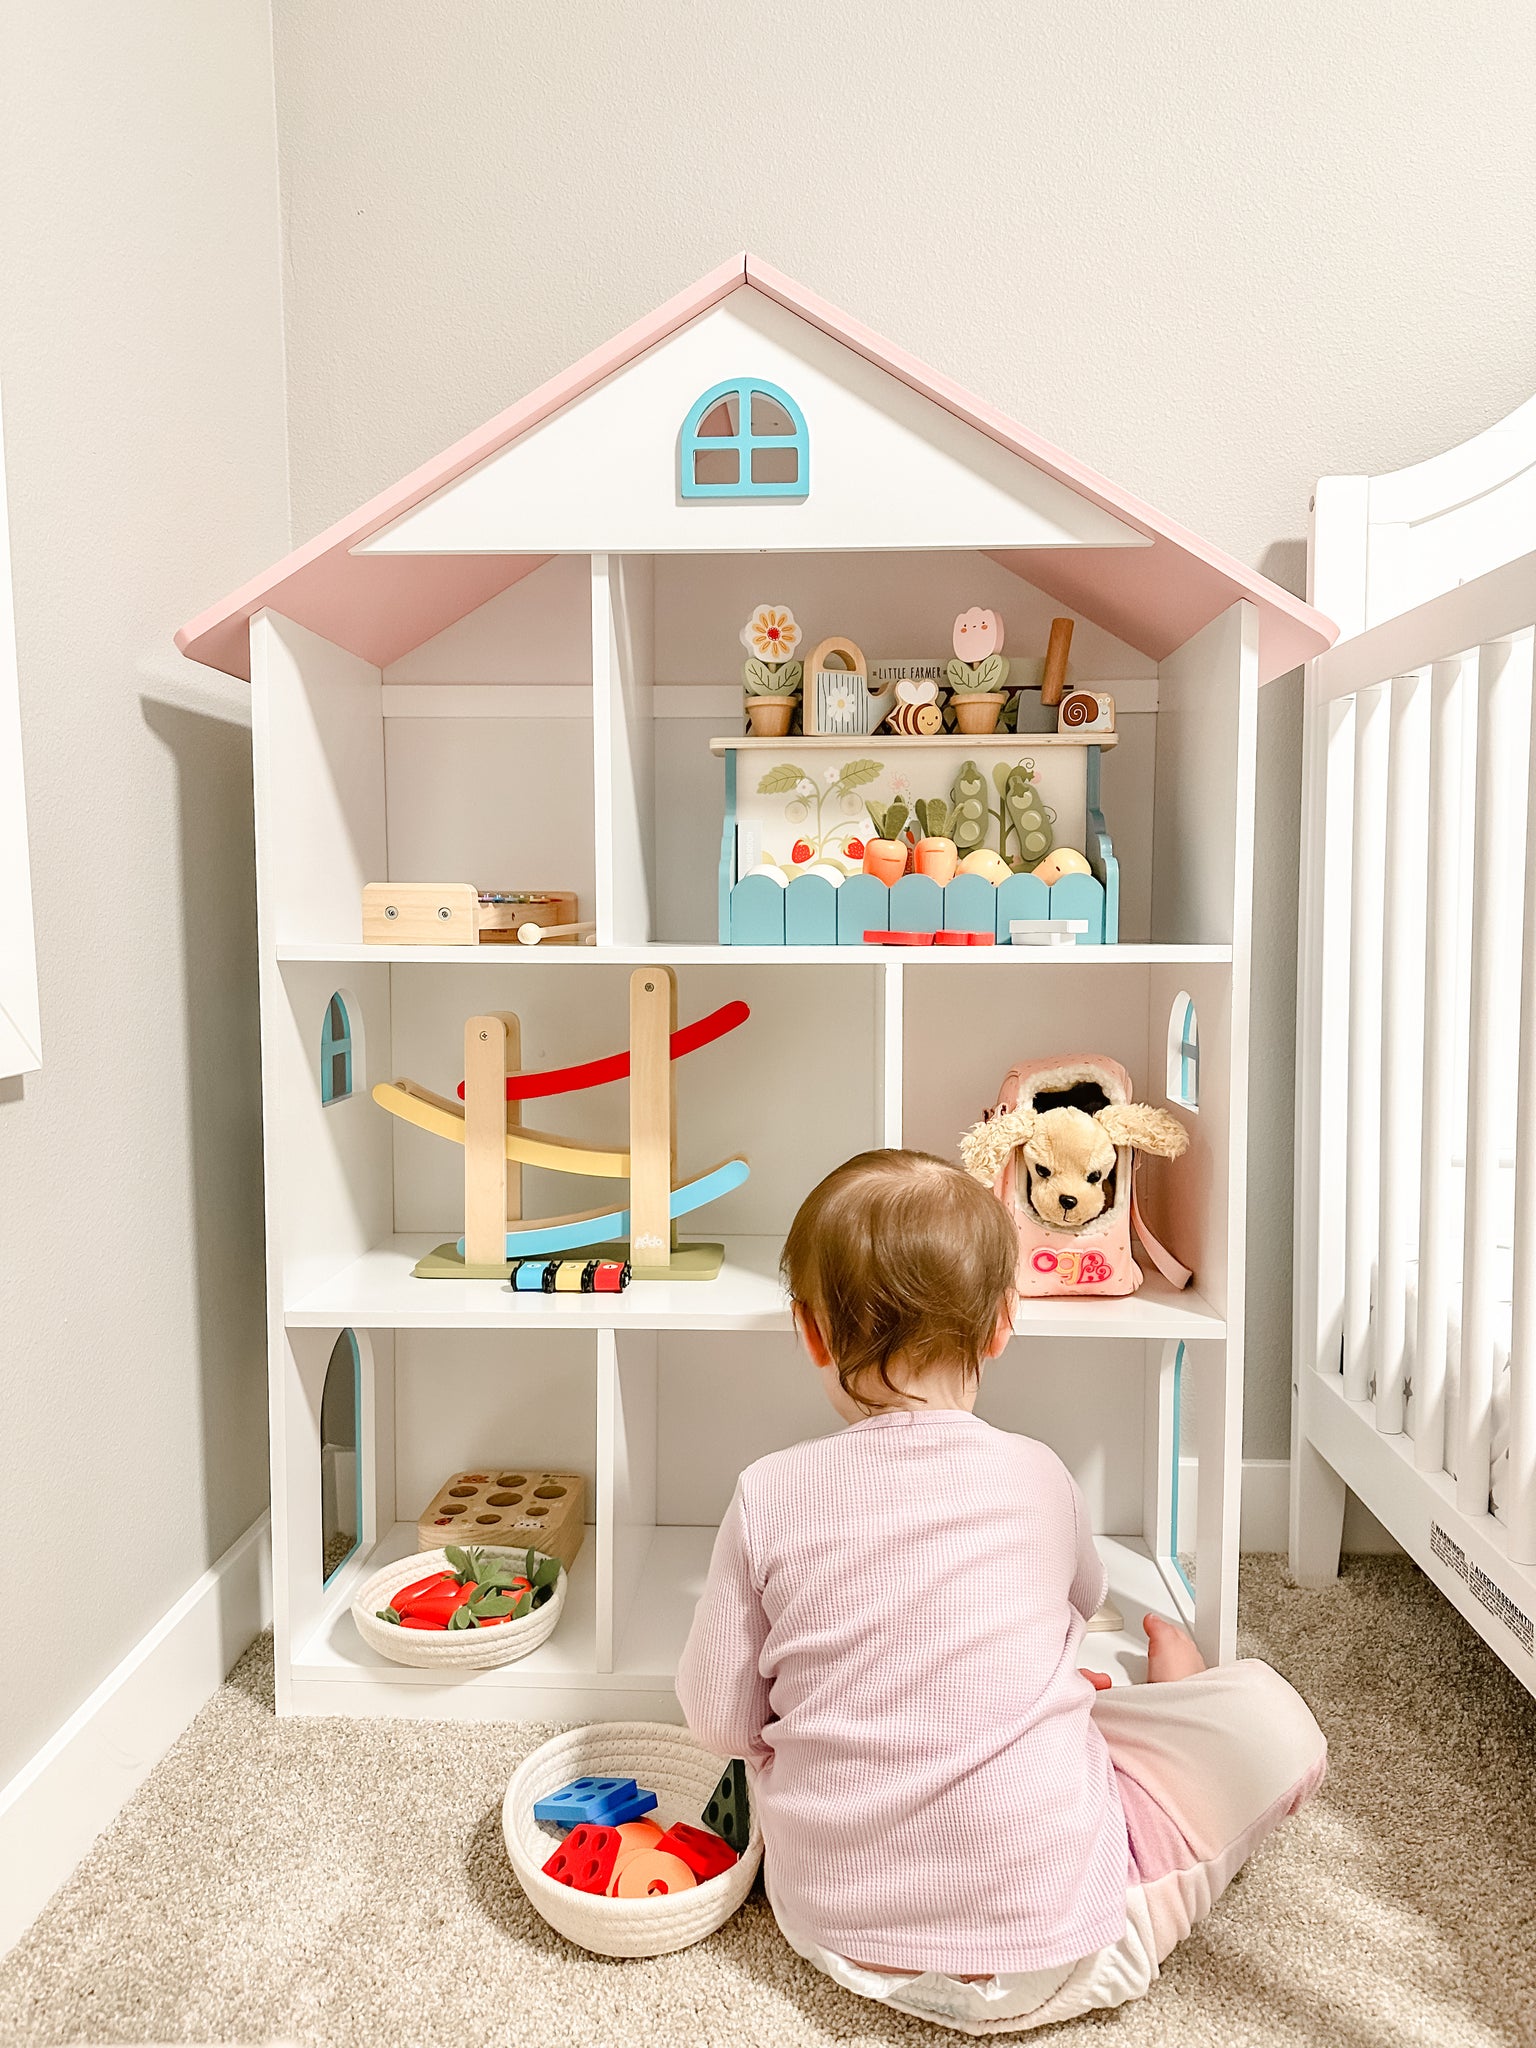
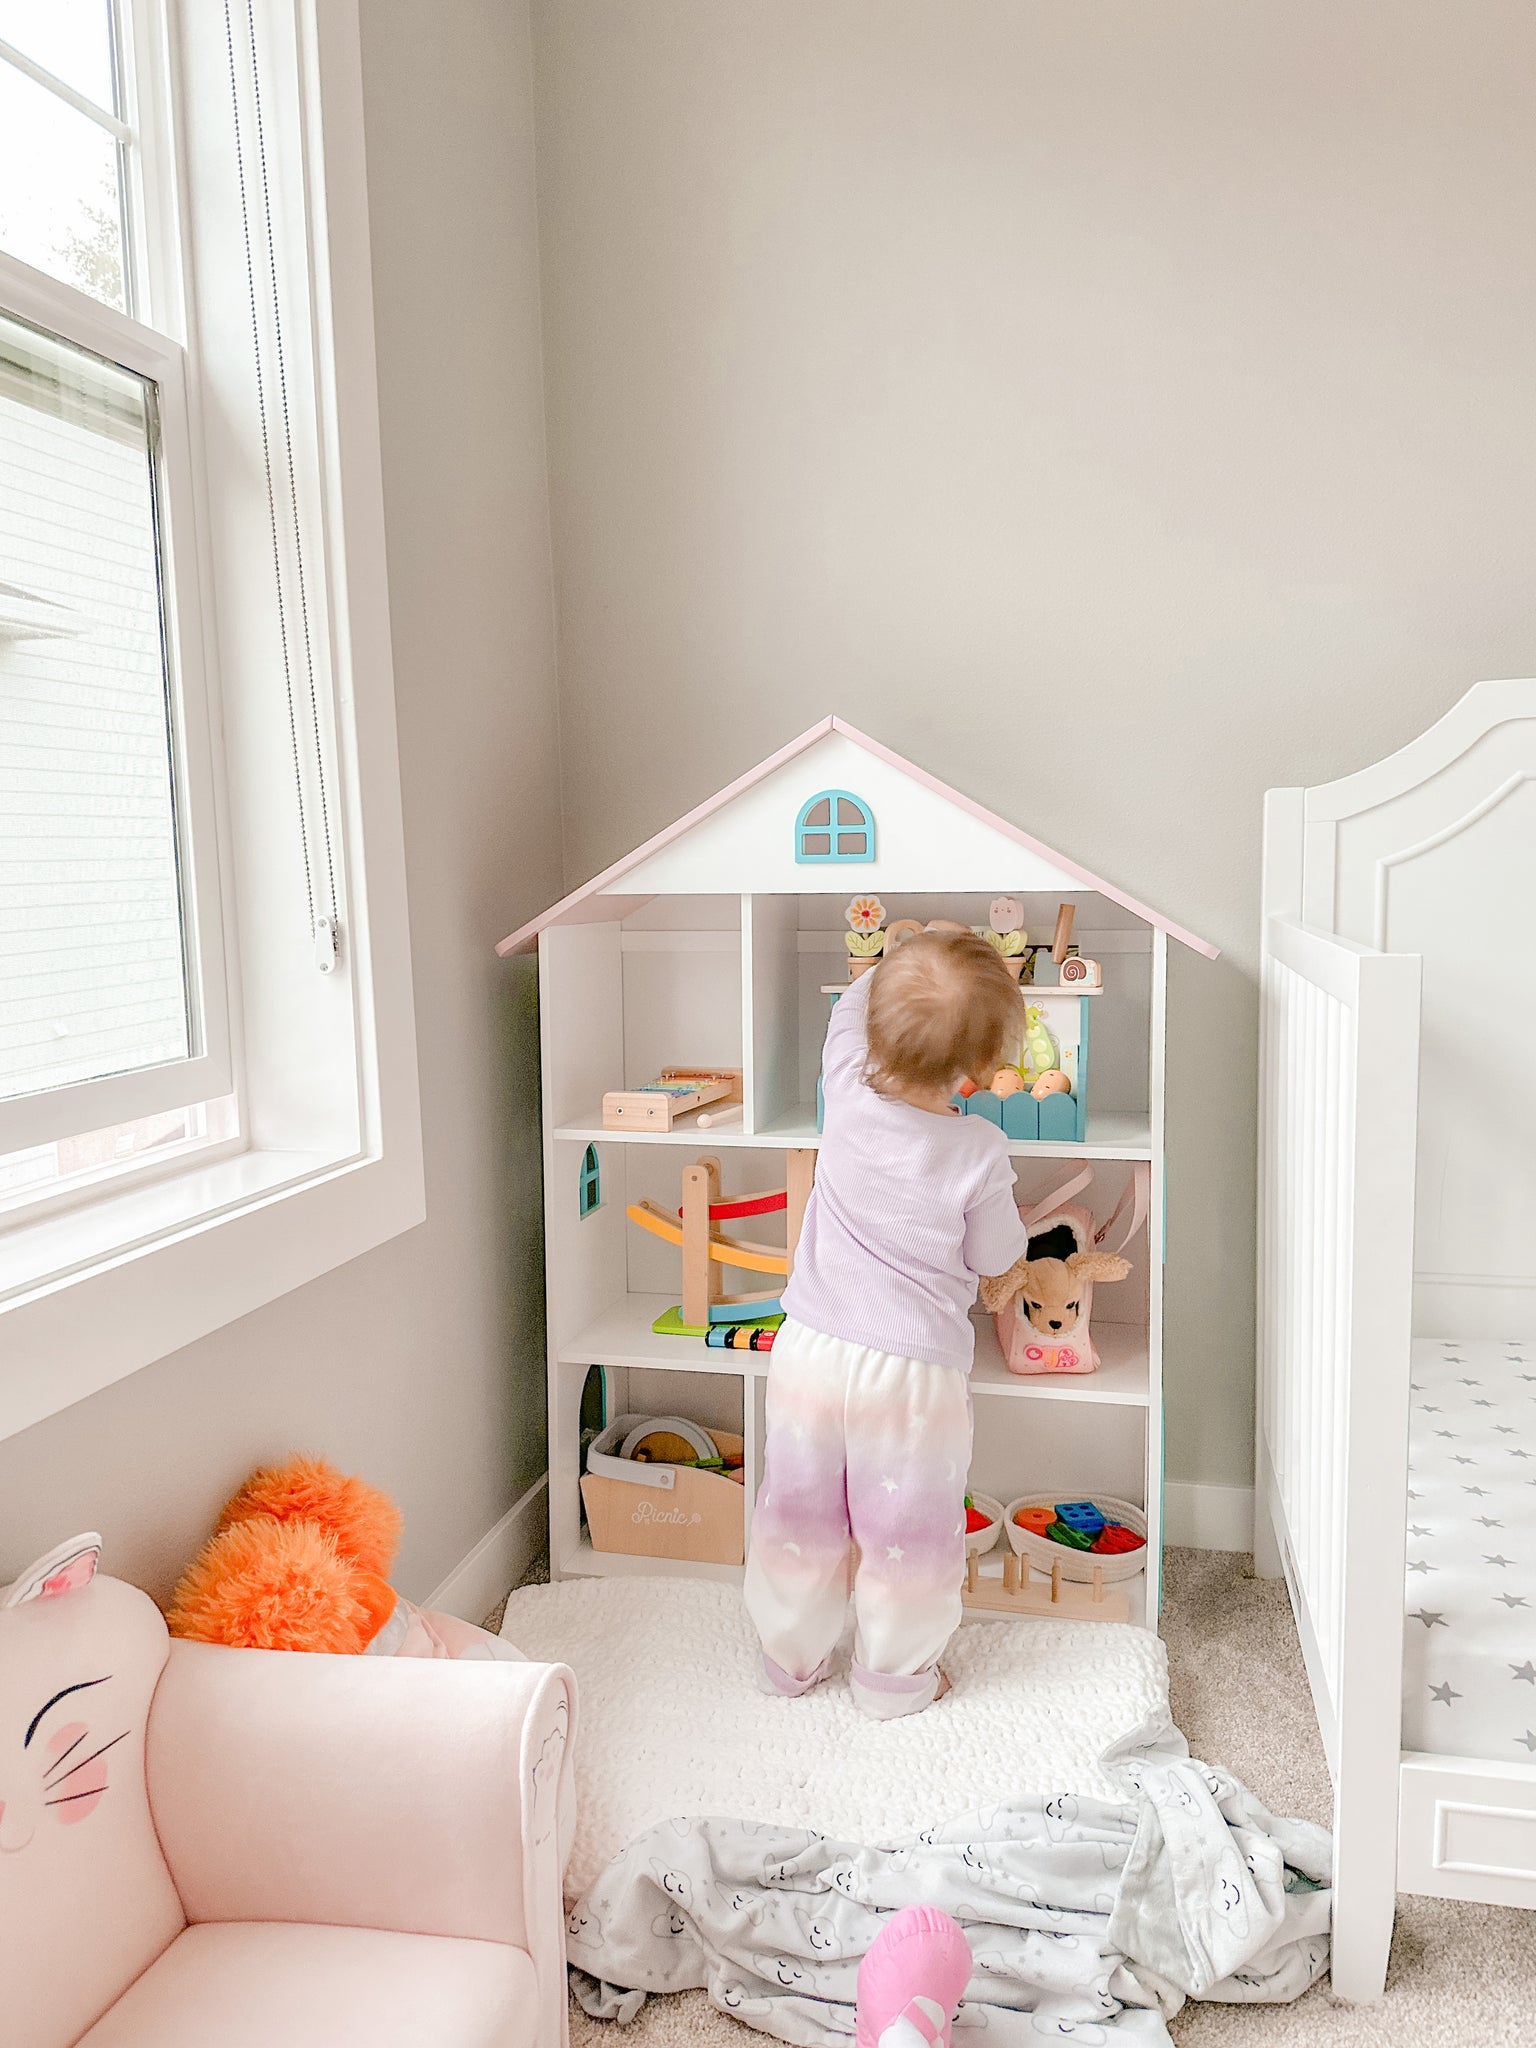
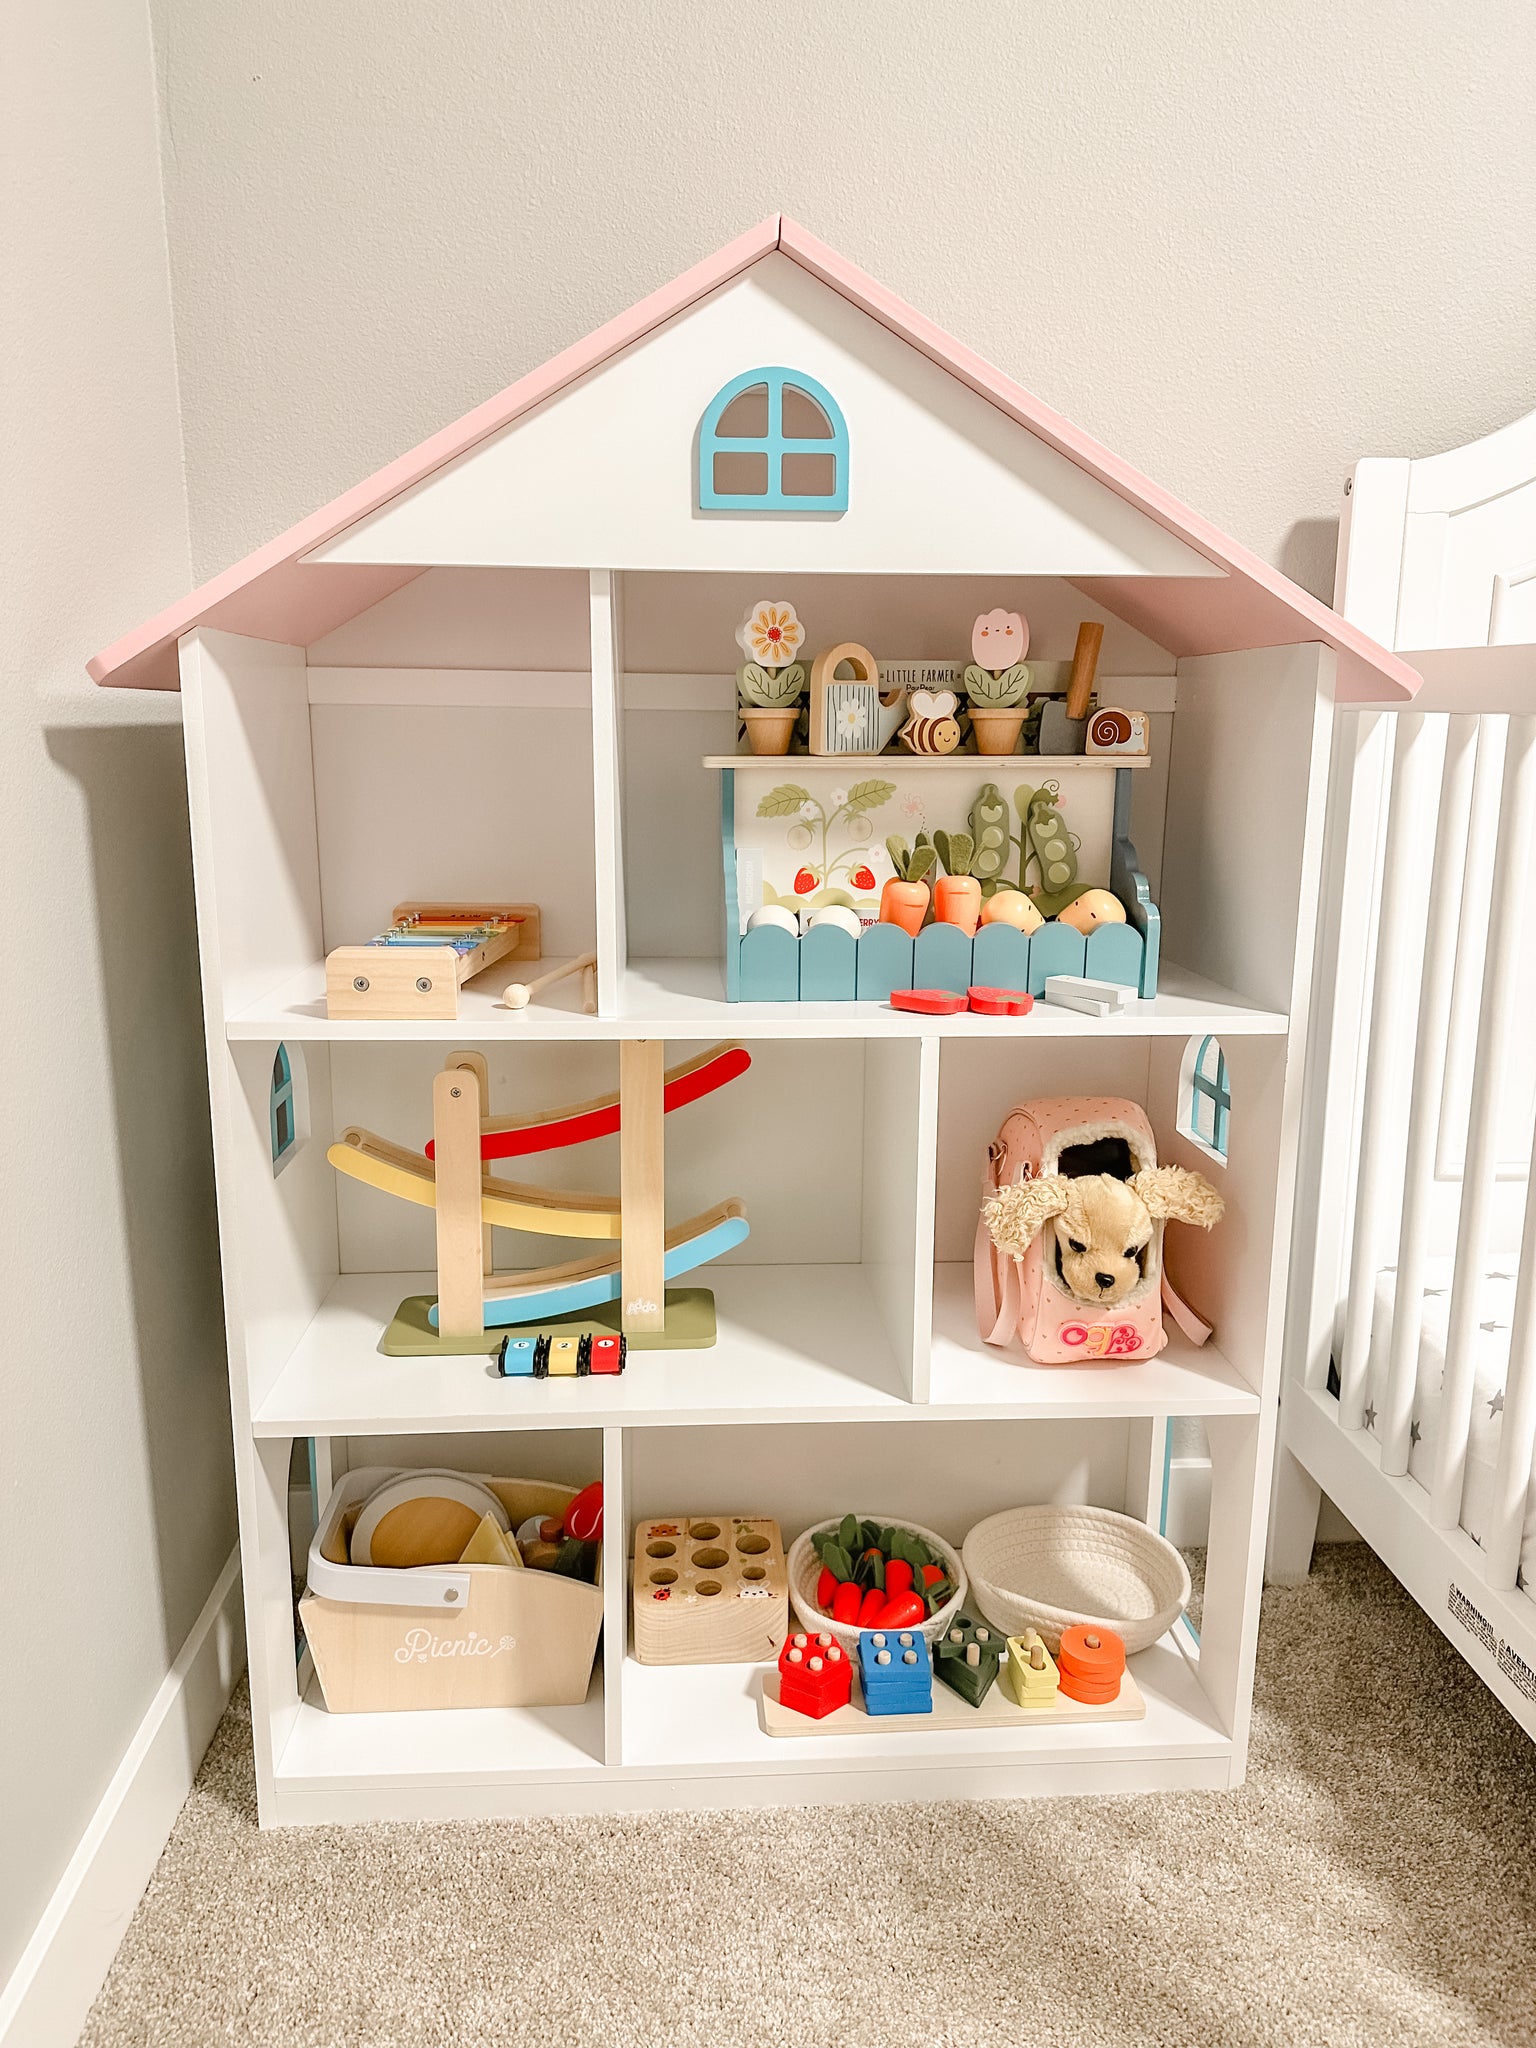
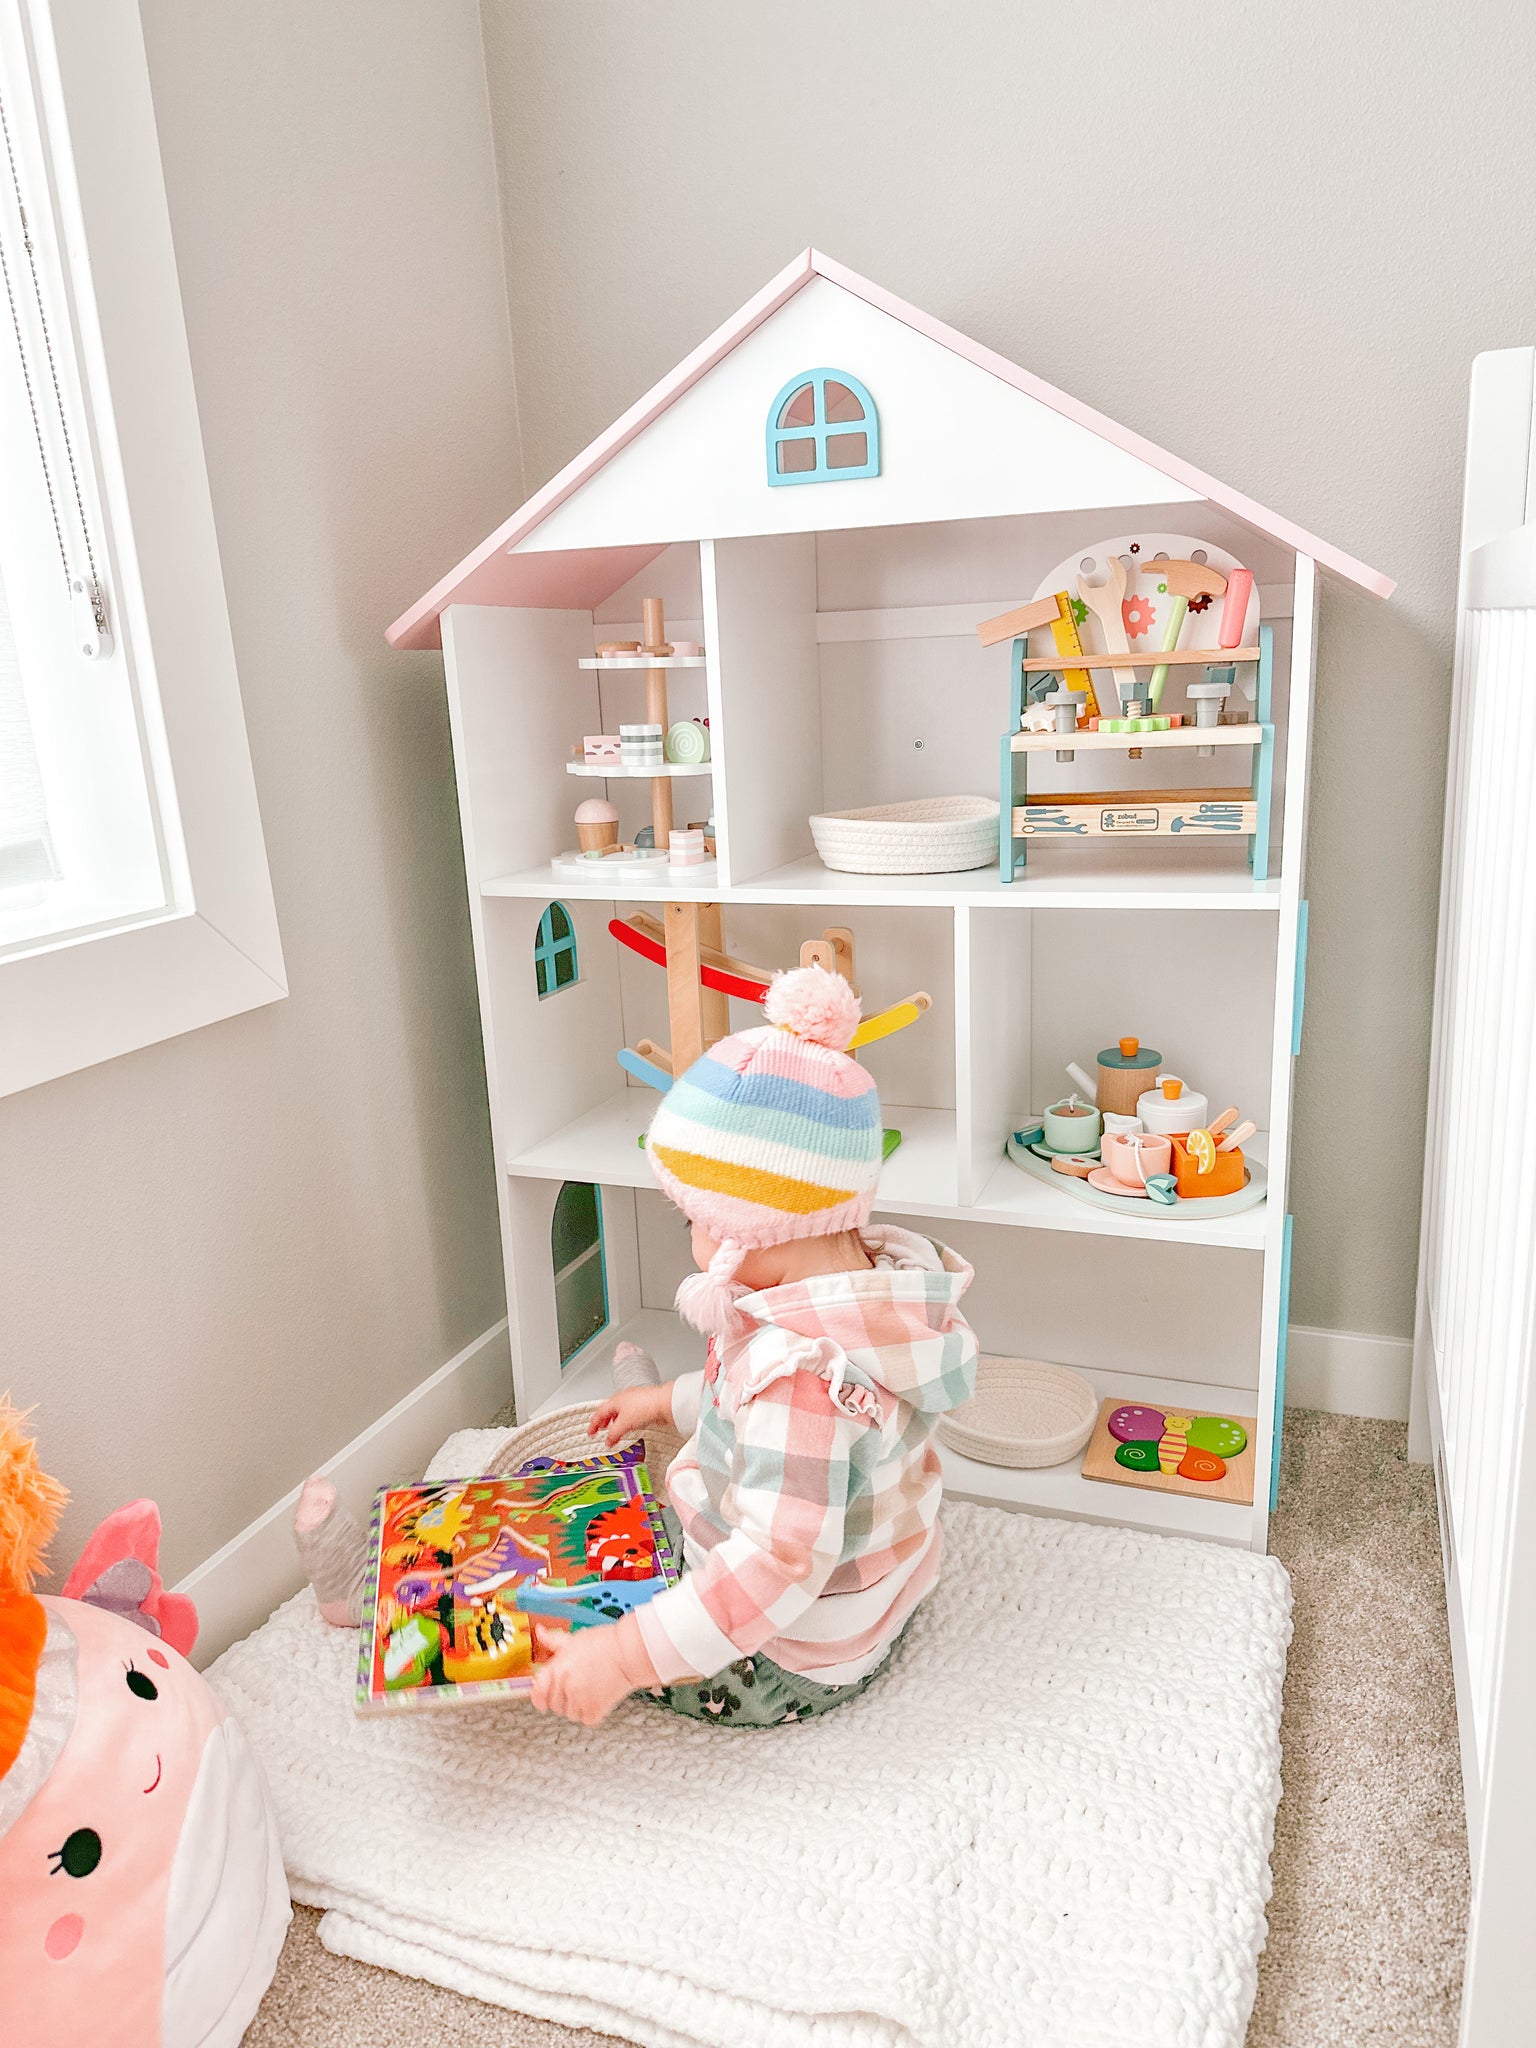
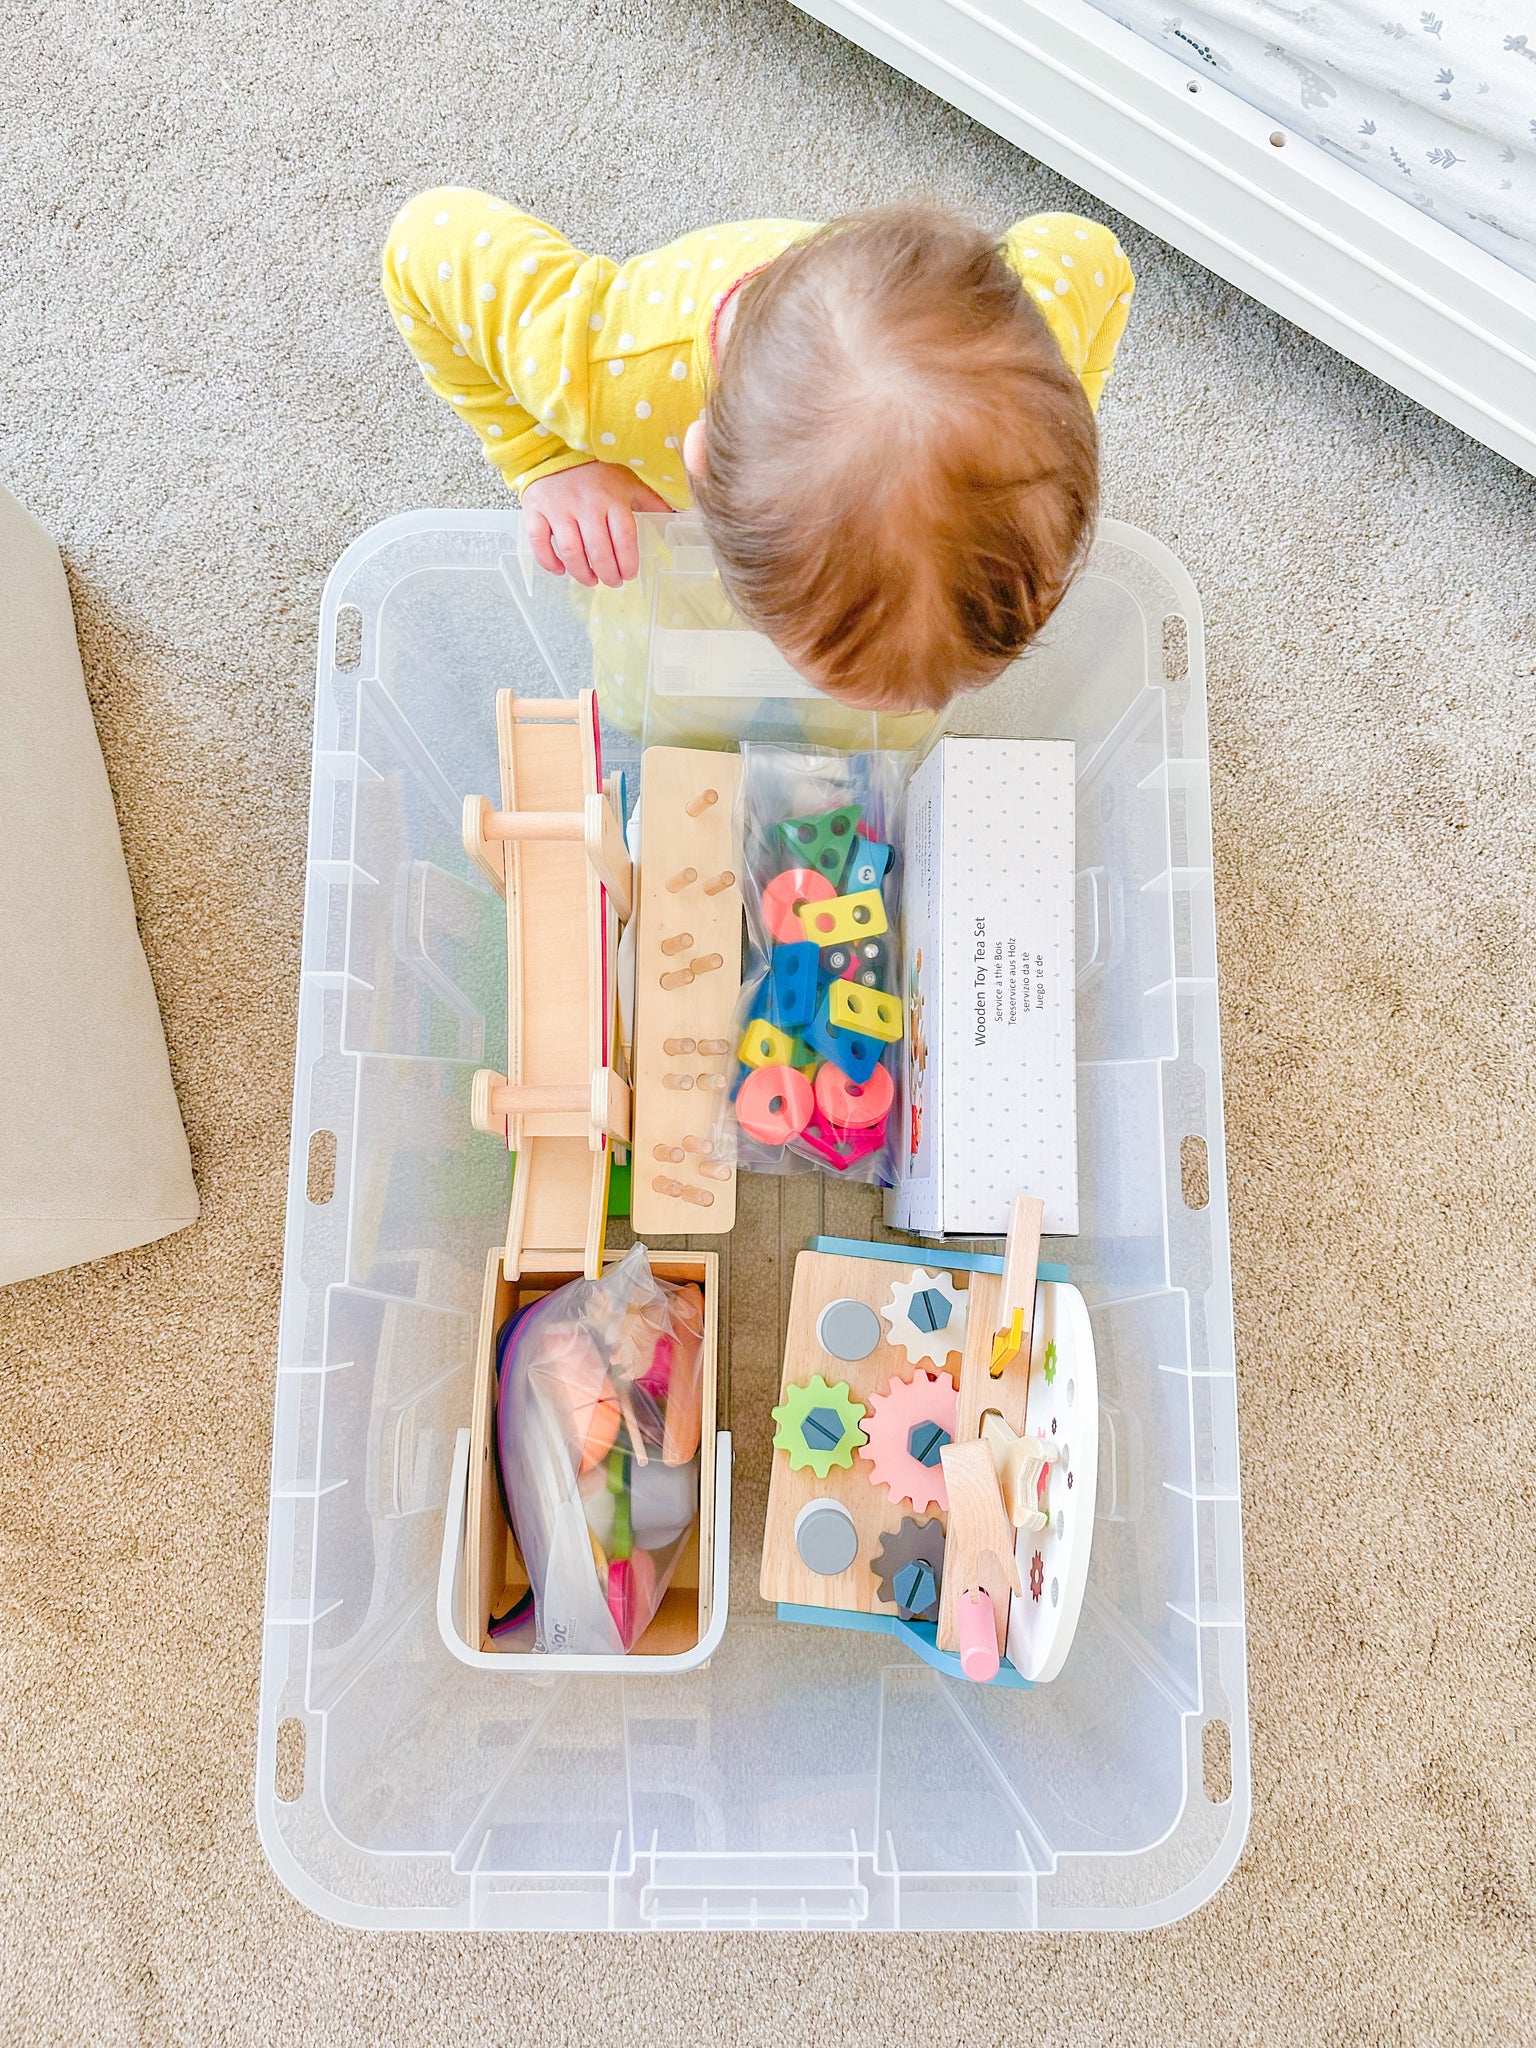
We use a multipurpose dollhouse as my toddlers Montessori shelf.
I absolutely loved this shelf! Its so cute and displays her toys beautifully.
My toddler is able to reach all of the shelves and can pick and pull any toy she feels like playing with. It has 6 slots which is perfect for offering 6 different toys.
I also love that in the future, once my toddler is old enough, I can turn the Montessori dollhouse into an actual dollhouse. Of course, dollhouse toys entail lots of small bits and pieces, so likely it will be several years before we introduce these kinds of toys.
But it's great that this shelf is able to grow with her over the years. We could also turn it into a bookshelf when she is 9. The possibilities are truly endless.
Shop Montessori Dollhouse
Once a week I rotate some of the toys out of the shelf and replace them with new ones. This keeps your toddlers toys fresh, interesting and keeps them fun for your toddler.
Sometimes I let my toddler go through the toy bin while I am trading out her toys to see what she is drawn to each week.
What I love about doing a simple toy rotation is that I can provide my toddler with a carefully selected set of toys to play with.
A toy rotation is my secret to an always clean and toy free floor by limiting the amount of available toys making clean up quick and easy every night.
It also helps prevent my toddler from becoming overwhelmed and fosters an environment that allows for more focused and engaging play.
I am literally writing this article while my toddler is playing with her toys right now. I am able to focus on my work because she is able to focus on her play. Its a win-win! 😉
Here are some of the my favorite benefits that make wooden toys so delightful.
Durability: Wooden toys are durable and can withstand rough play. They are less likely to break or wear out quickly, making them a good investment. I actually have a wooden train set from when I was a 10, which now my toddler plays with. Wooden toys definitely hold up!
Safety: Wooden toys are generally safer than other types toys, as they are not made with harmful chemicals or materials that can be toxic to babies or children. They are also less likely to have small parts that can be a choking hazard. This is especially important for babies and toddlers under 3. Wooden toys reduce risk. You just want to make sure that the toys are large enough and wont fit inside of baby’s mouth. If you find a piece that's too small, just put it up until your toddler is old enough or ready to play with smaller bits and pieces.
Open-ended play: Wooden toys often encourage open-ended play, which allows children to use their imagination and creativity. This is honestly so important! Wooden toys can be used in a variety of ways and can be adapted to different types of play. And play is such an important part of early development.
Developmental benefits: Wooden toys can help develop fine motor skills such as hand-eye coordination, and problem-solving skills in children.
Let's dive in!
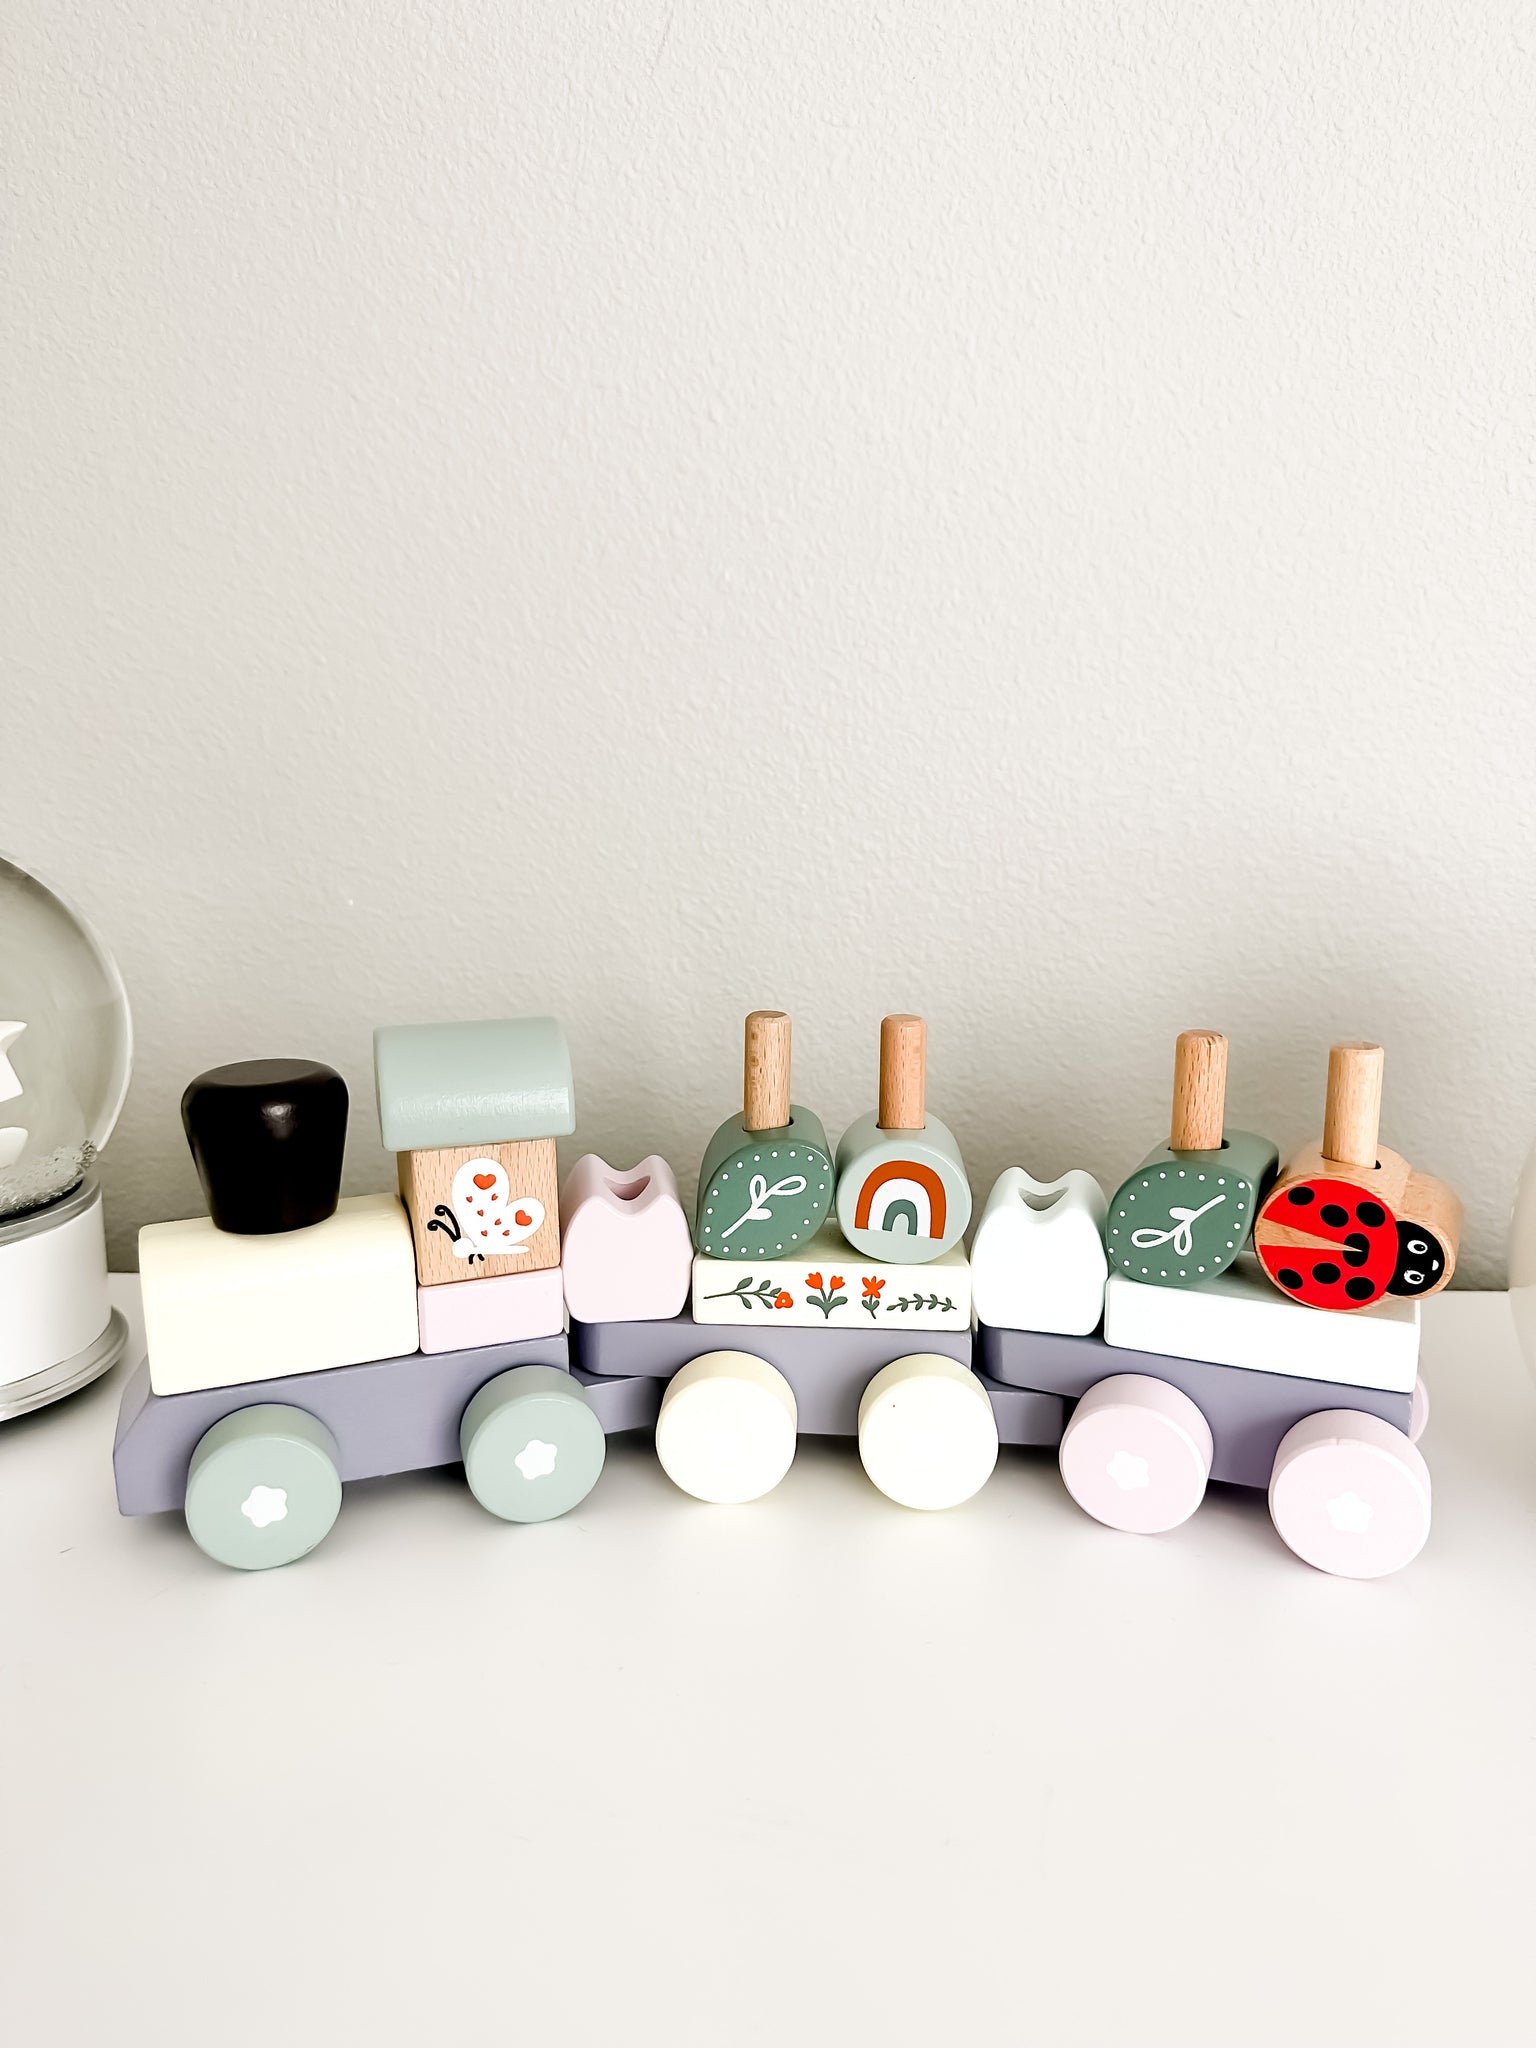
Shop Pillowhale Wooden Stacking Train Toy Set
This wooden train set it so precious! My daughter loves pushing it all around the house. She also loves removing the blocks and putting them back on in new & creative ways. It really helps work her fine motor skills.
All of the train pieces can be moved around which keeps it interesting and fun. I’m in love with the soft pastel colors which makes it perfect as a gender neutral gift or keepsake. I find the train set to be very attractive and beautiful enough to display as a decorative piece on her dresser when it isn’t in use.
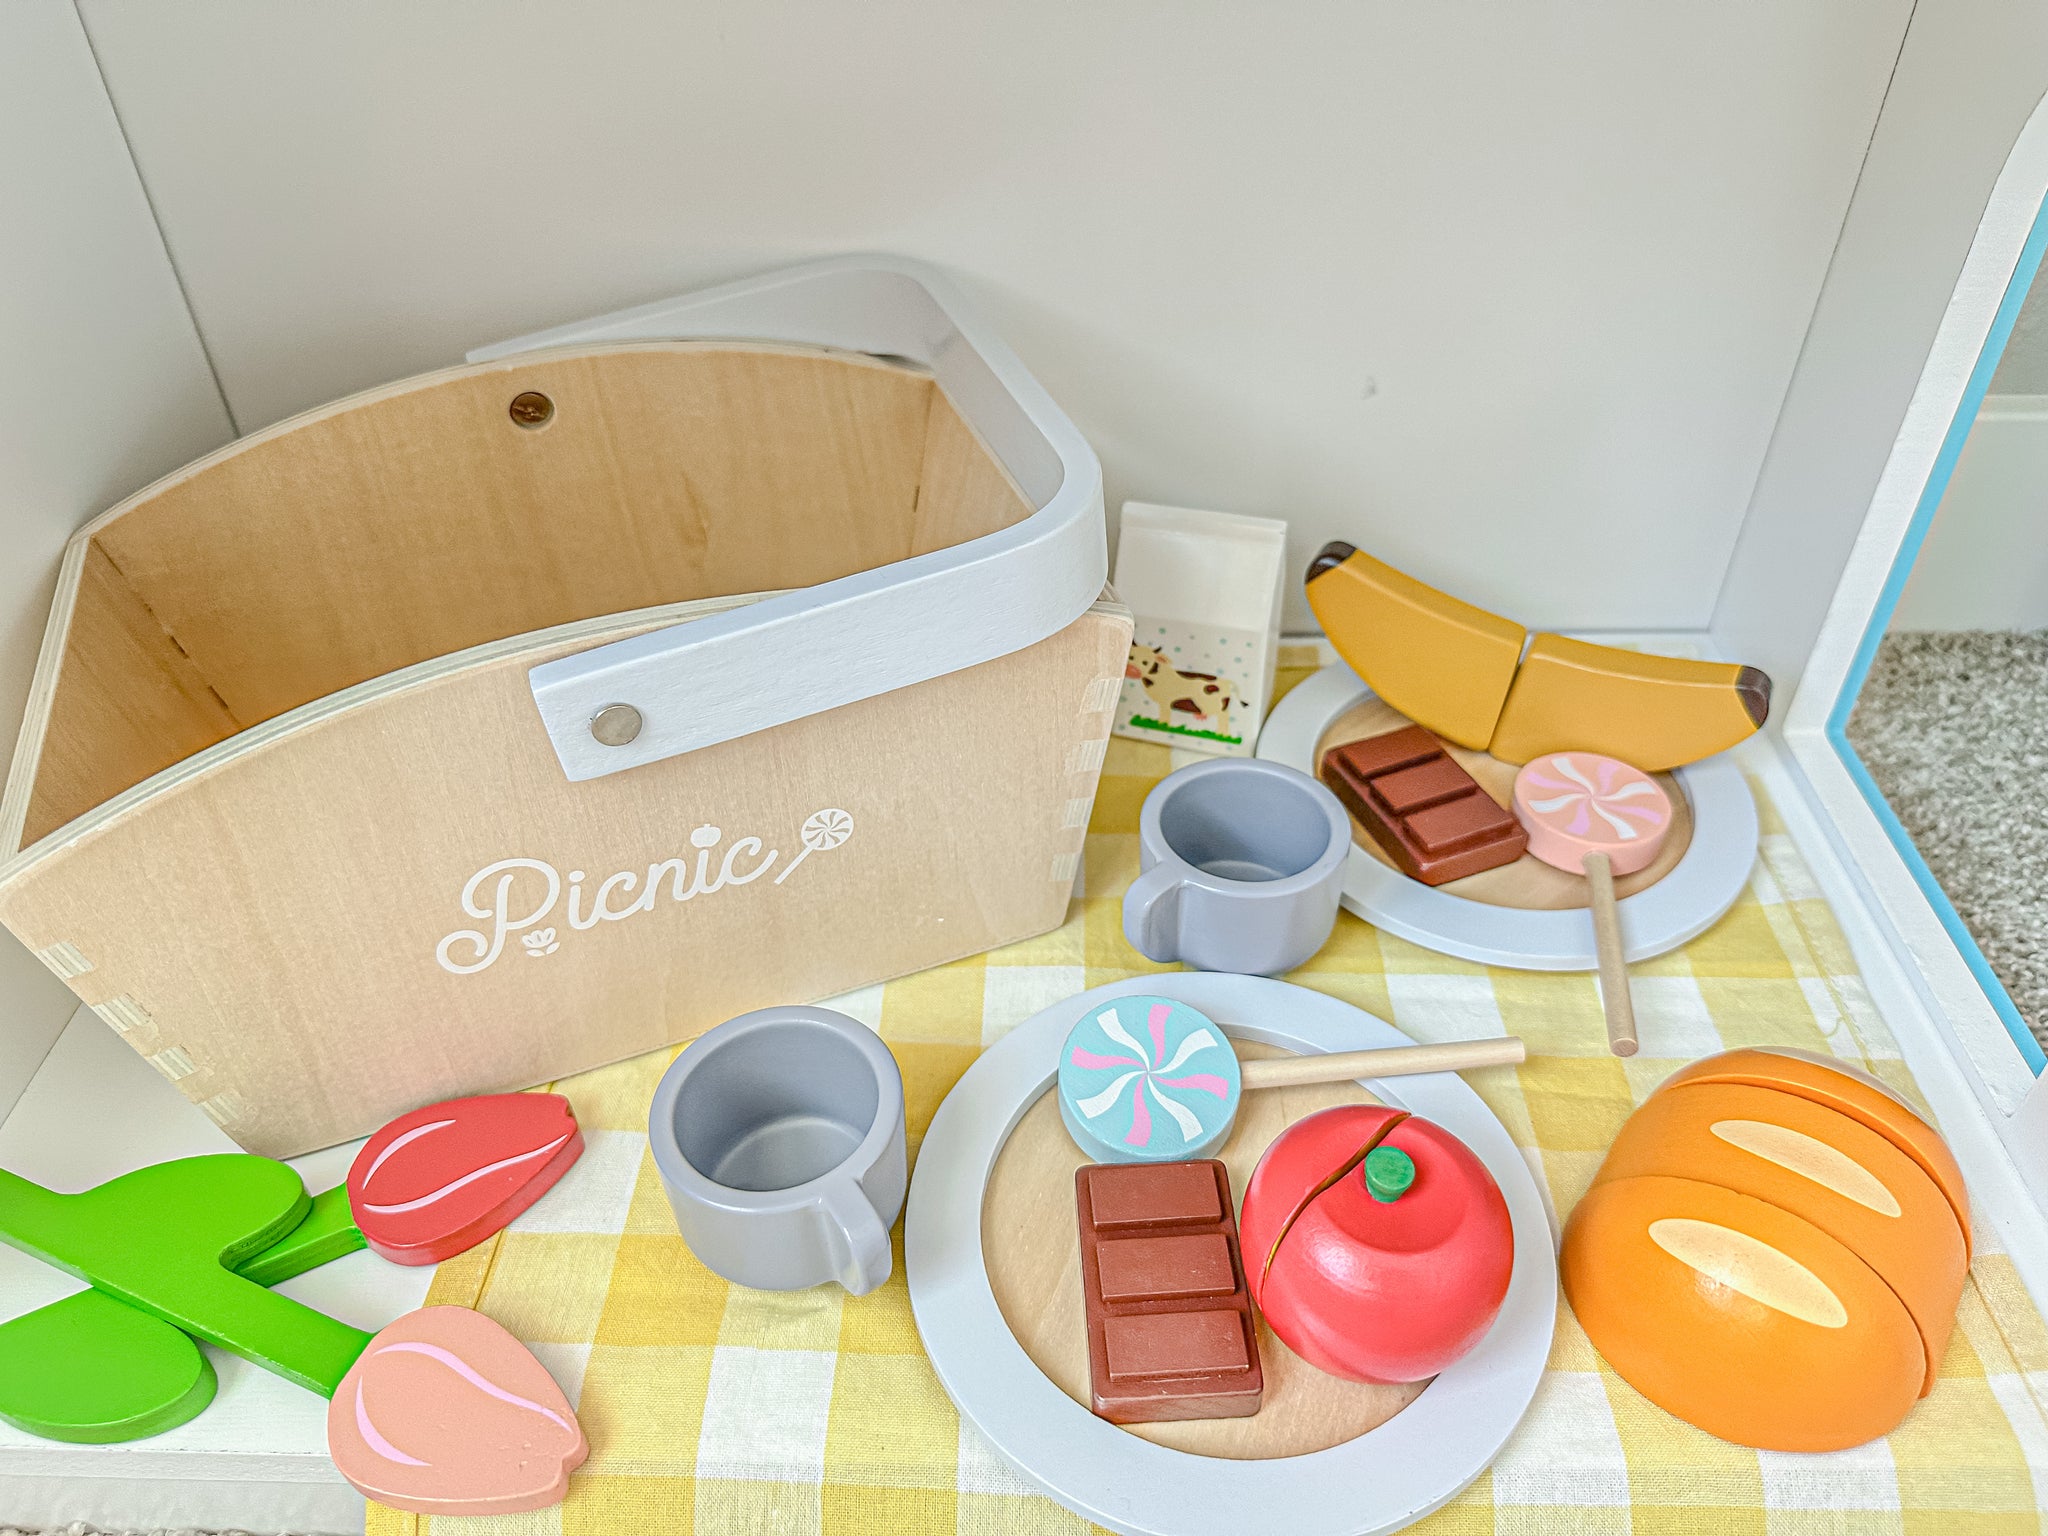
Shop Pillowhale Wooden Picnic Basket Playset Toy
This wooden picnic toy set is so dreamy! As a family we regularly enjoy picnics at the park, the beach and in the forest. We love packing picnics & enjoying a sunny day. Emma is 21 months now and she loves playing picnic at home all of the time. This is a great toy for igniting your little one’s imagination.
The neutral color palette makes it a wonderful gender neutral keepsake for your little one. The quality of the wooden toys are smooth and feel really well made. I love that this toy will grow with my baby over the years and can be passed down generations due to the quality of this special wooden toy.
Shop PairPear Flower Garden Toy Playset
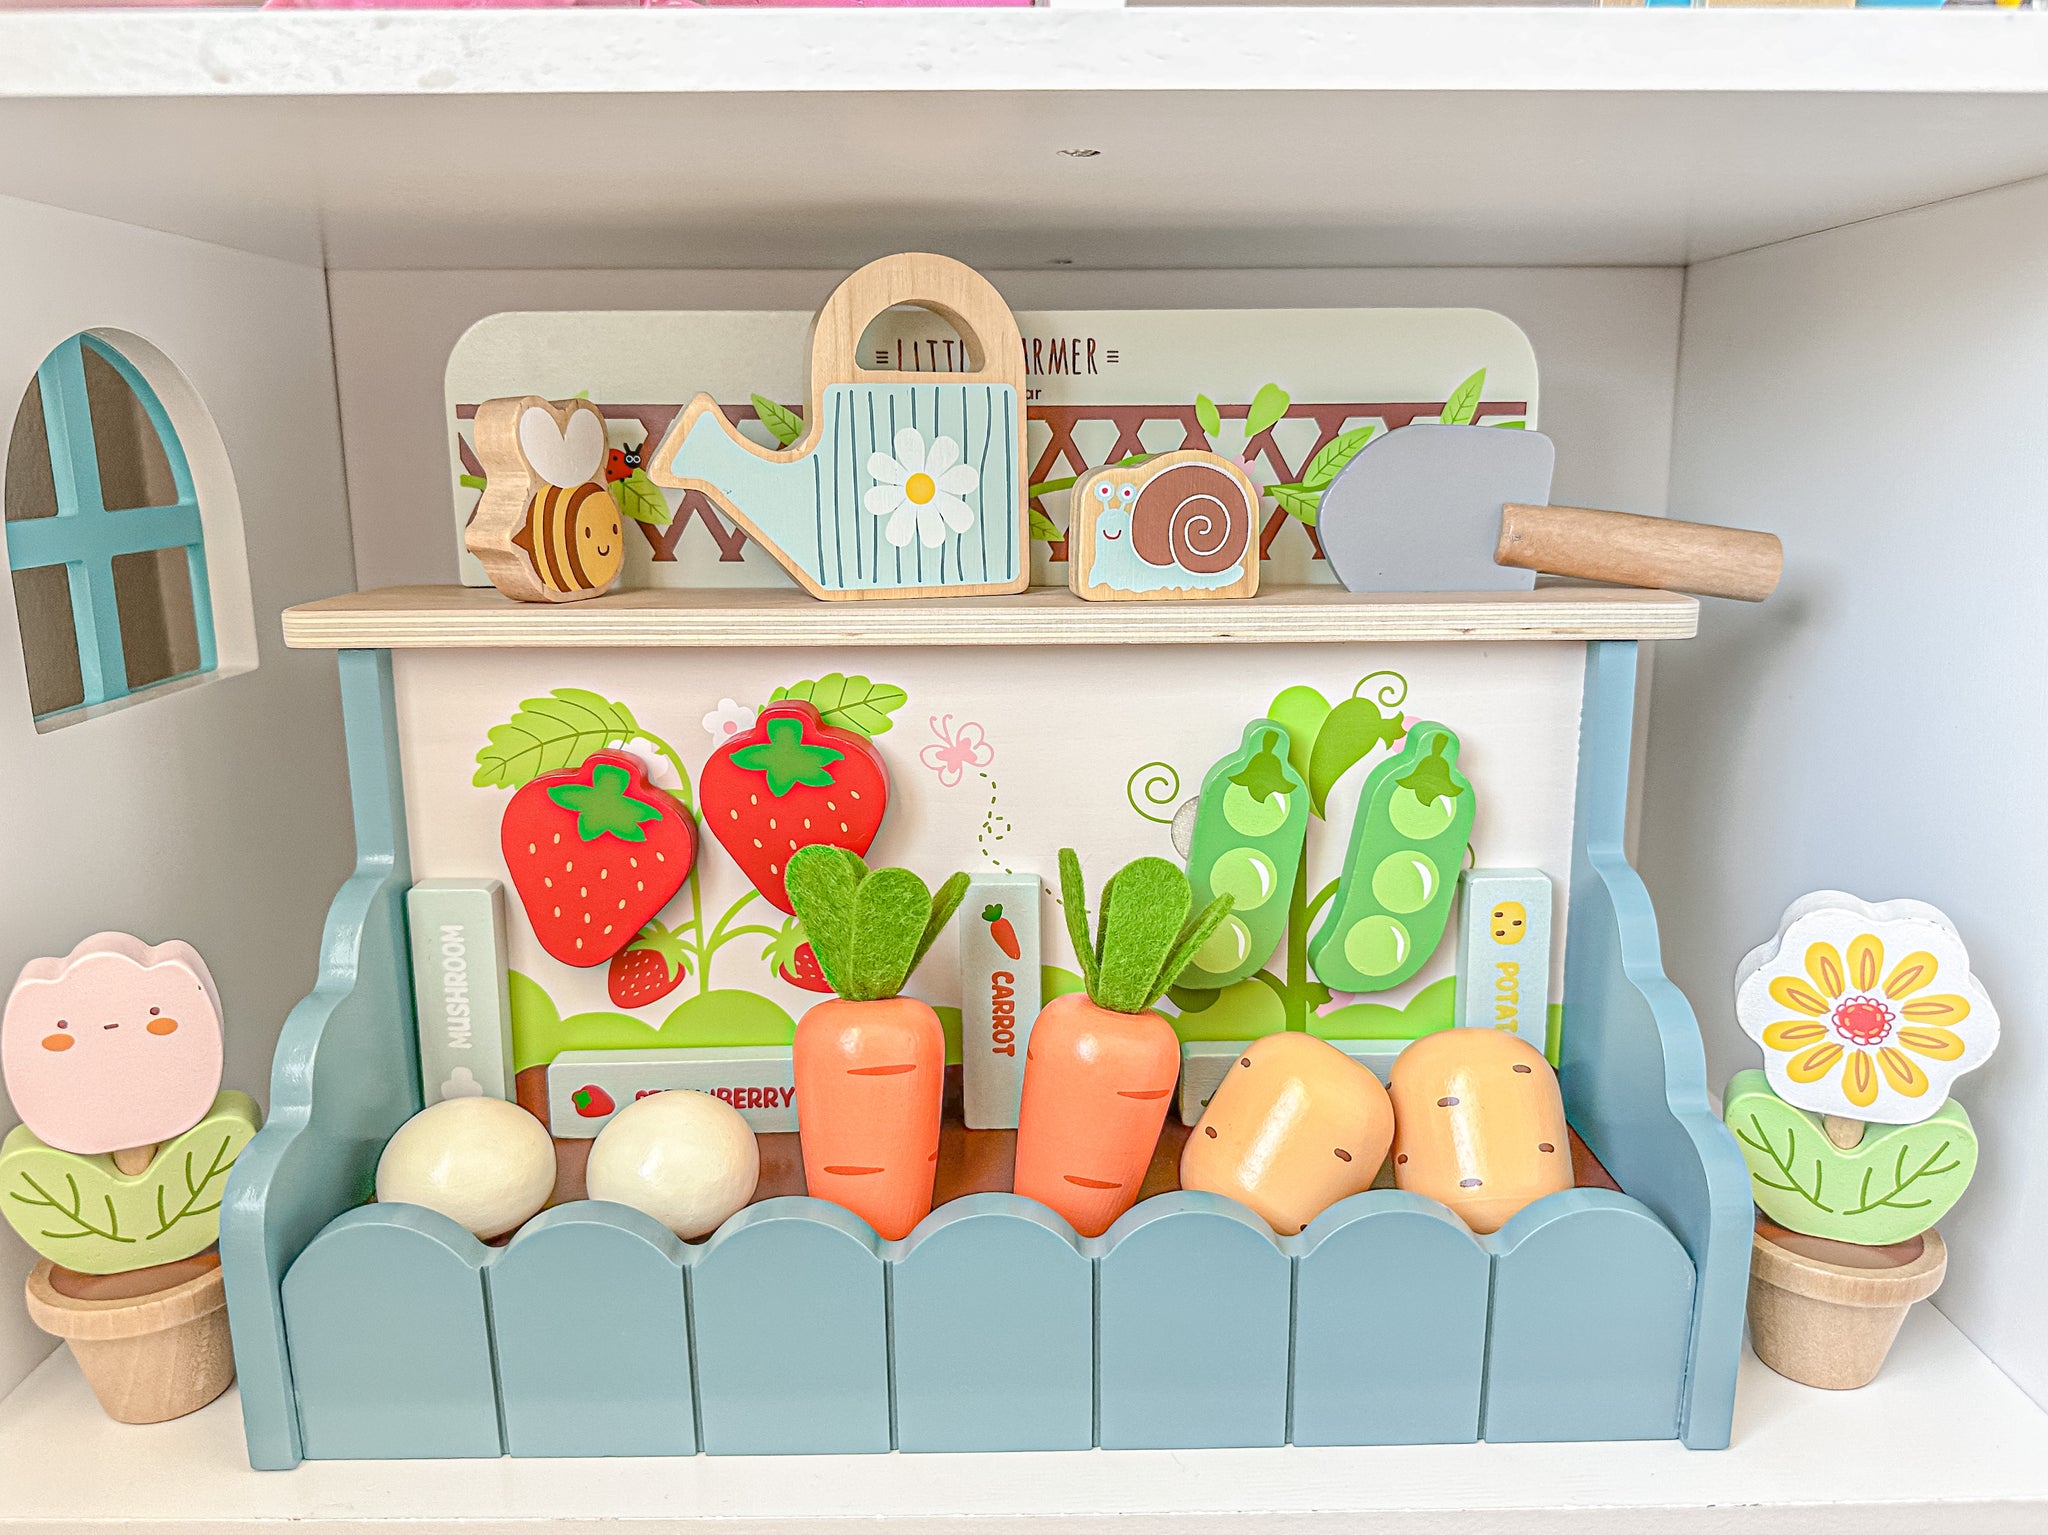
This little farmer set is one of the most unique wooden toys I’ve ever seen! The entire set is made of wood & it’s absolutely gorgeous! It’s probably my baby’s favorite toy. She will sit there and play with it for hours.
There are little slots the vegetables can go into which makes it great for developing motor skills while also offering open ended play. It’s a great gift for both girls and boys & its definitely a toy that can grow with your toddler over the years to come. So worth the investment!
Shop Similar Play22 Wooden Car Ramps Race
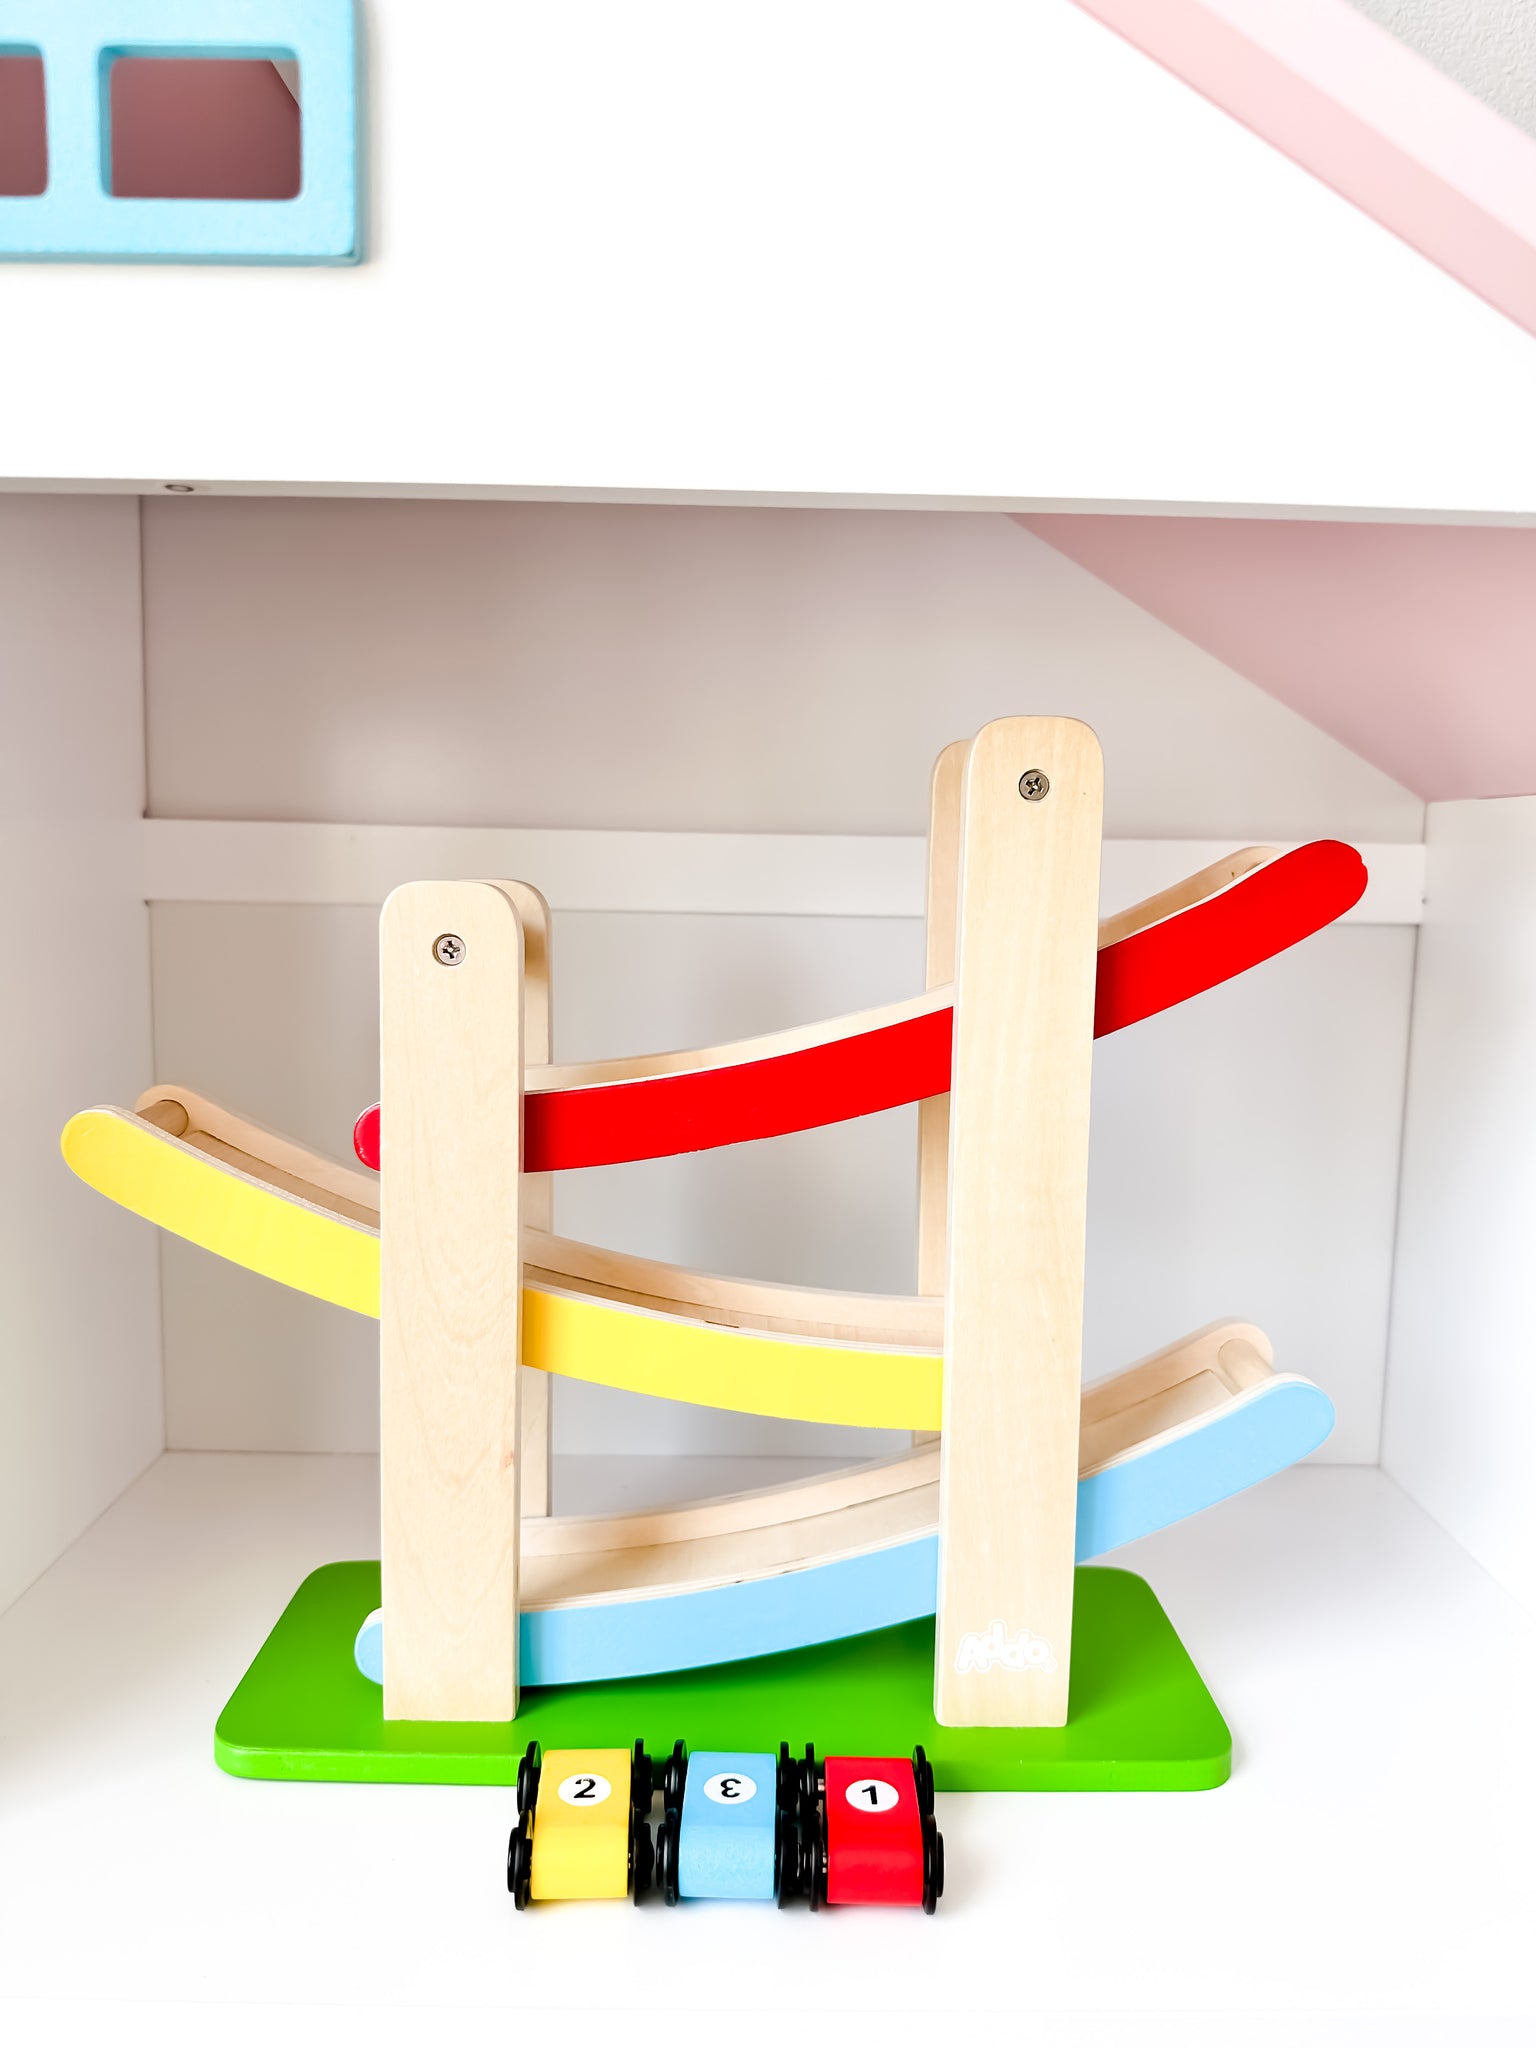
I searched high and low for a wooden race track. I found lots of different ones but when I saw this one, I knew it was the one. It’s great for developing those fine motor skills and teaching your baby cause and effect.
You can also work on numbers and colors with this toy. Overall a really great classic Montessori piece to have in your toy rotation.
Shop nunukids Wooden Makeup Toy Set
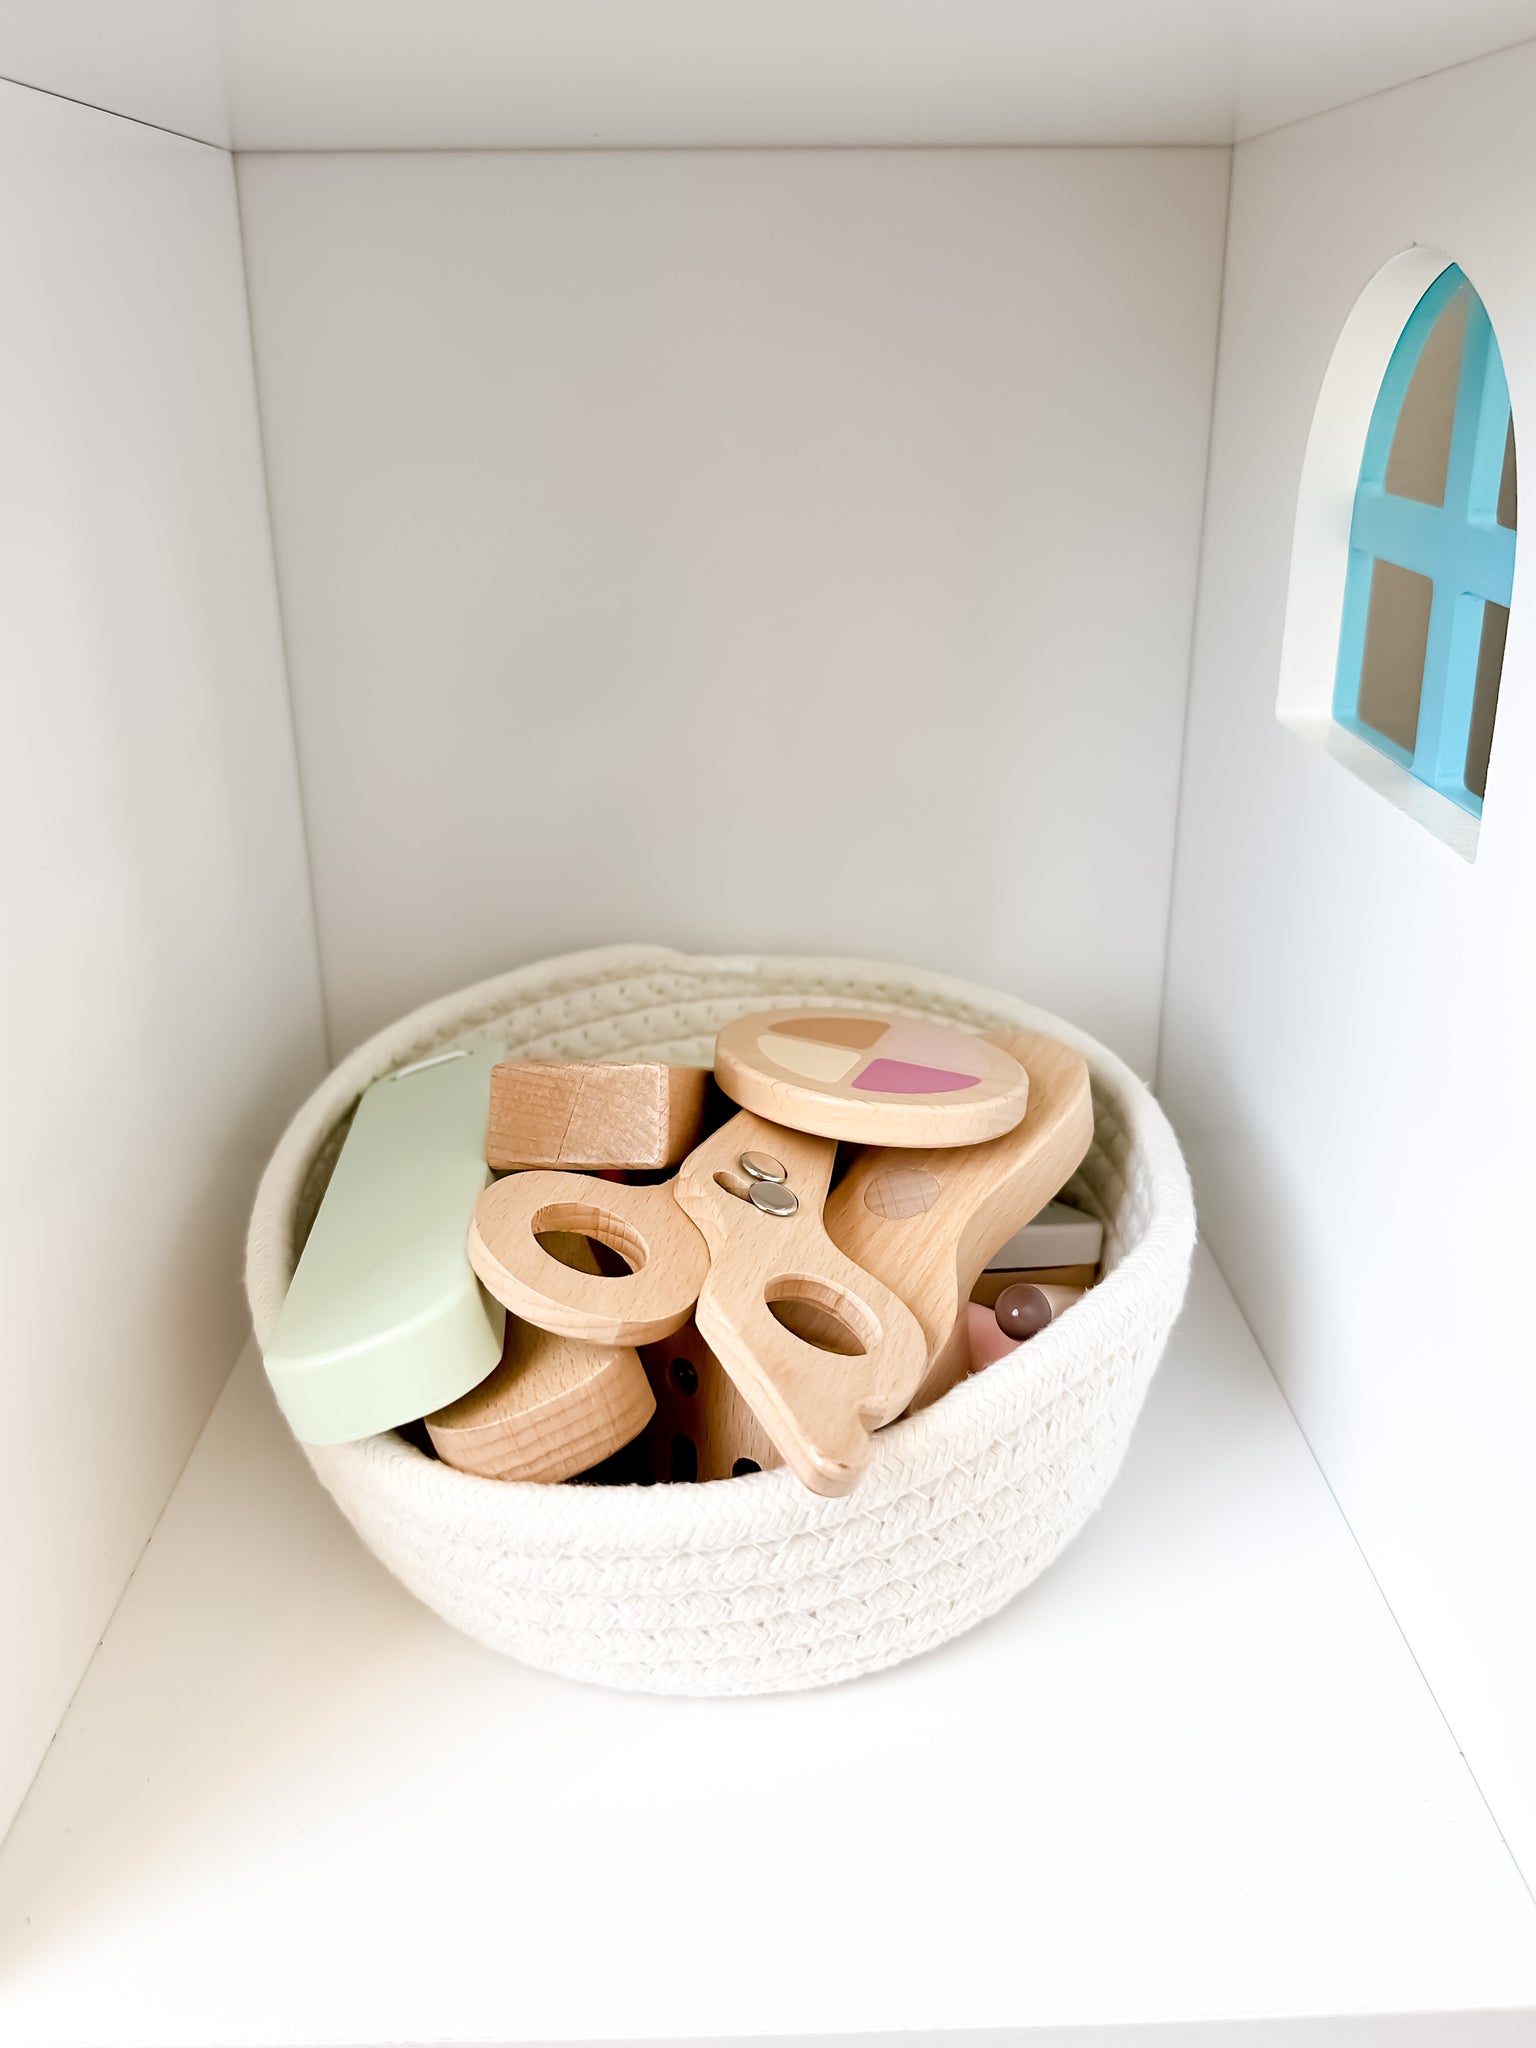
My toddler absolutely adores this wooden self care toy set. There are several different pieces included to inspire your toddler’s imagination. There’s a comb, nail polish, hair straightener, blush, hair bands and several other wooden accessories. Younger babies would probably enjoy exploring the variety of pieces while older toddlers and children would enjoy the imaginary open play opportunities this wooden toy offers.
It comes in a case to hold all of the pieces too which is nice. I also like to rotate the toys in the set since there’s so many pieces. I’ll put half of the set out for one week and swap them out later. My toddler loves to get ready with me in the mornings. It’s adorable!
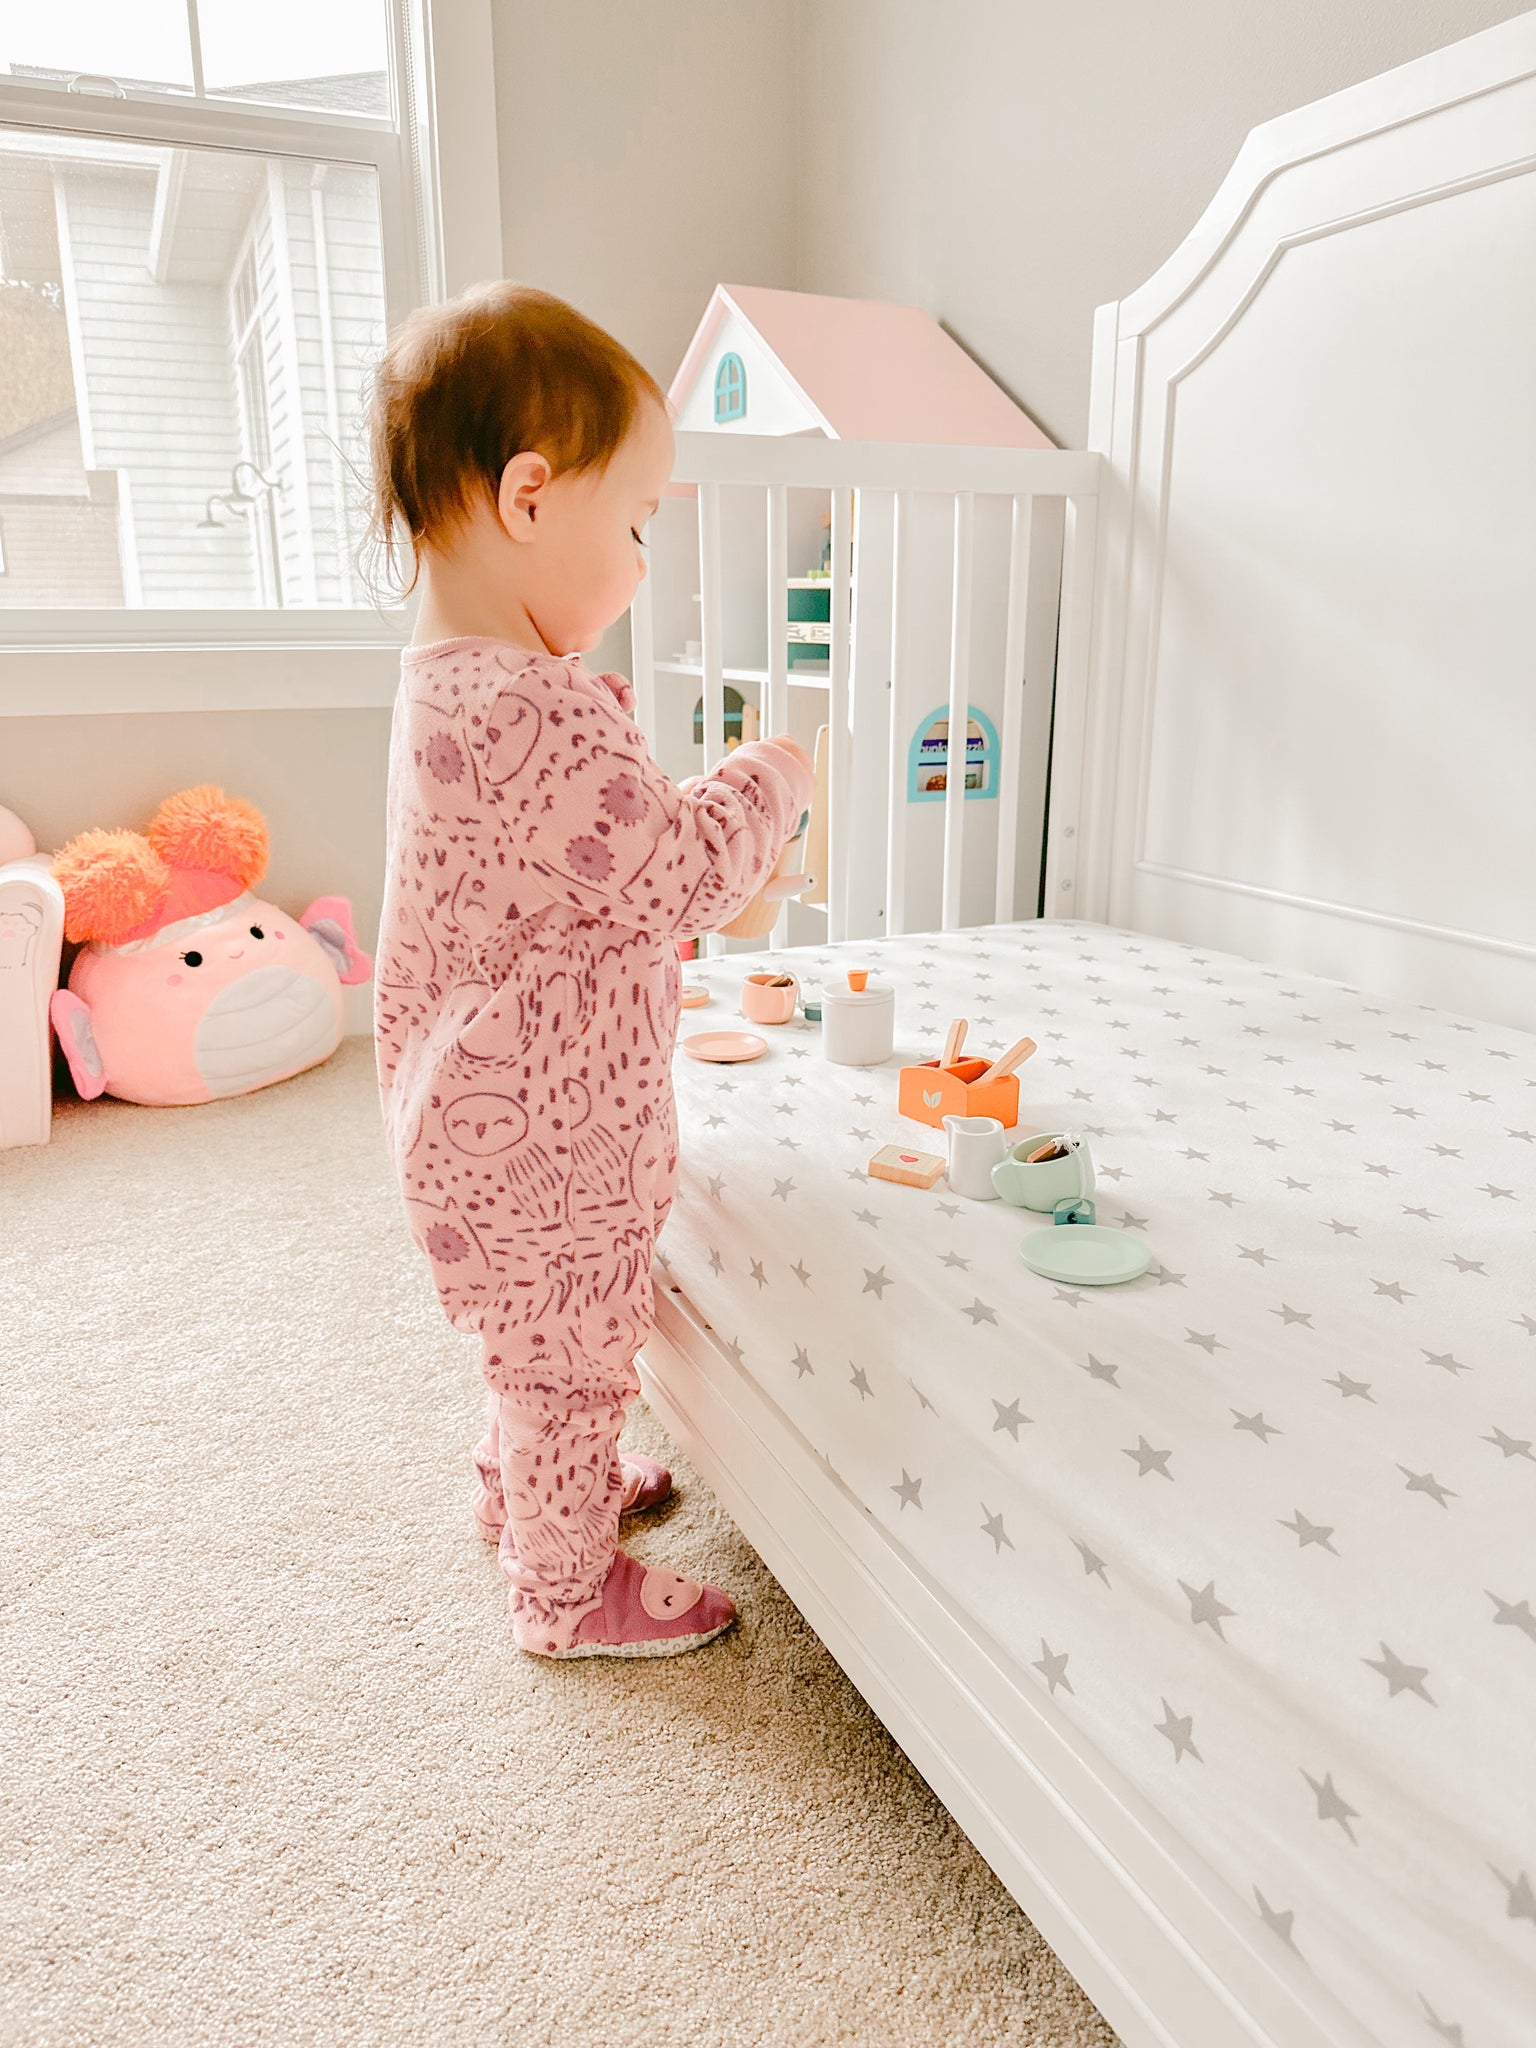
Shop nunukids Wooden Tea Party Set
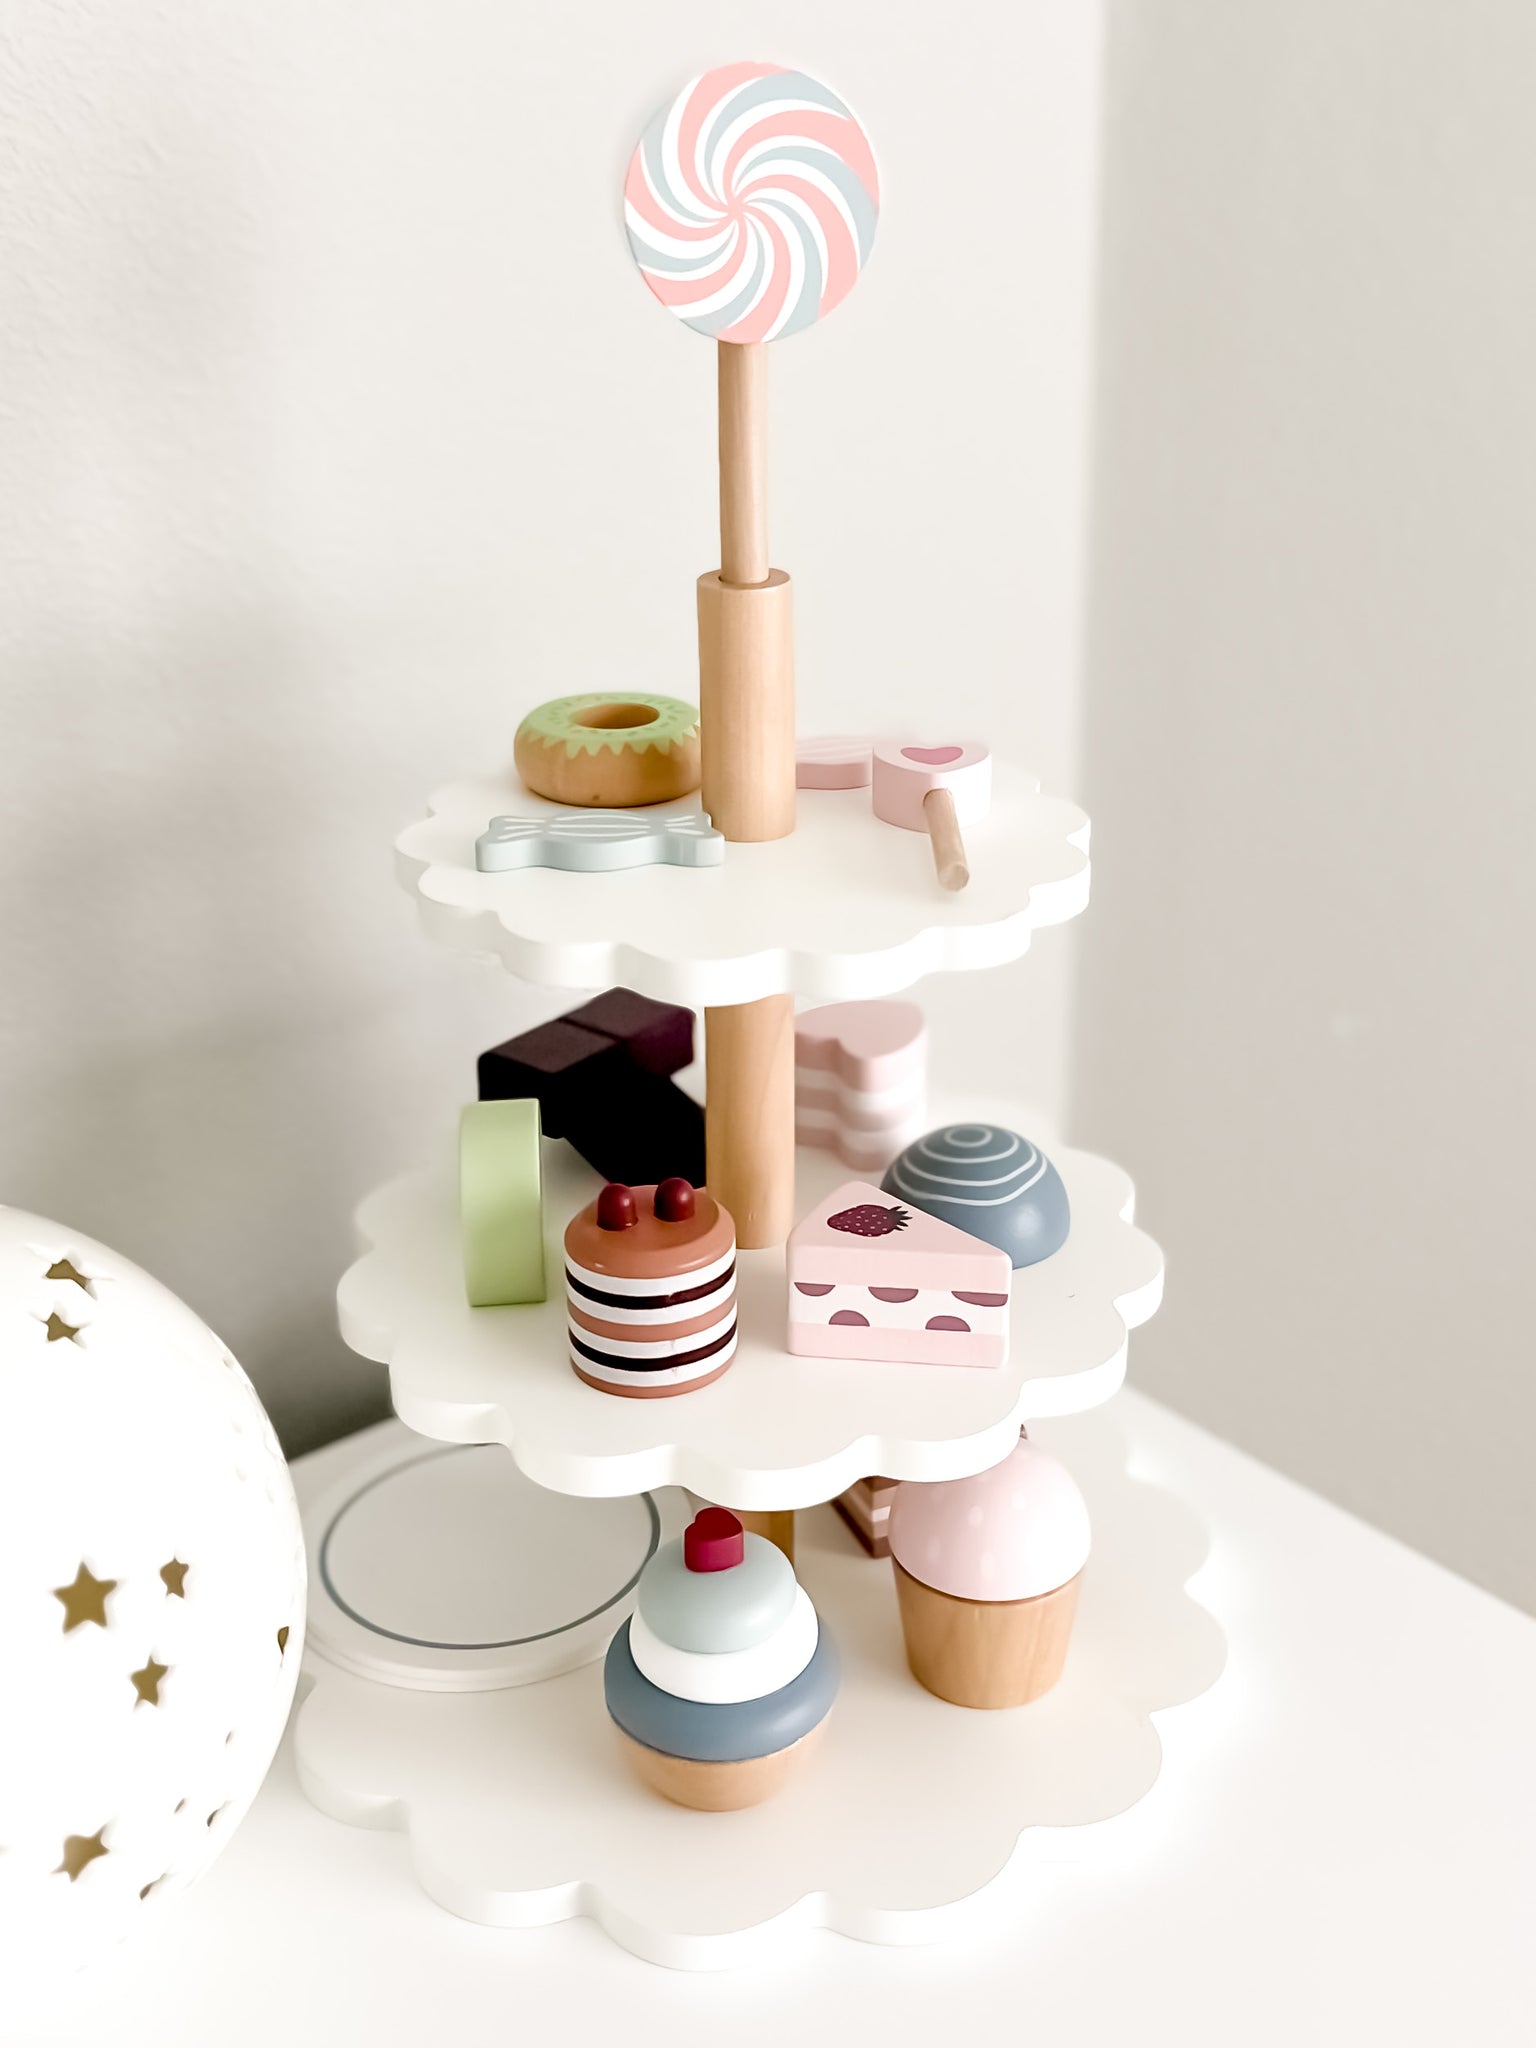
This charming wooden cupcake tower is nothing short of adorable! It’s such a pretty toy that I display it on my toddlers dresser when it’s not being played with. This cupcake tower is a great open ended play toy.
My toddler received this toy shortly after she had just turned 1. She would stack the desserts on and off of the tower and play with the pieces like blocks, or she would play “cupcake” and have fun giving everyone cupcakes on a plate with a spoon.
It’s a really sweet toy that will surely grow with your little one. It’s also a gender neutral option that’s great for sparking your toddlers imagination and providing a unique play experience.
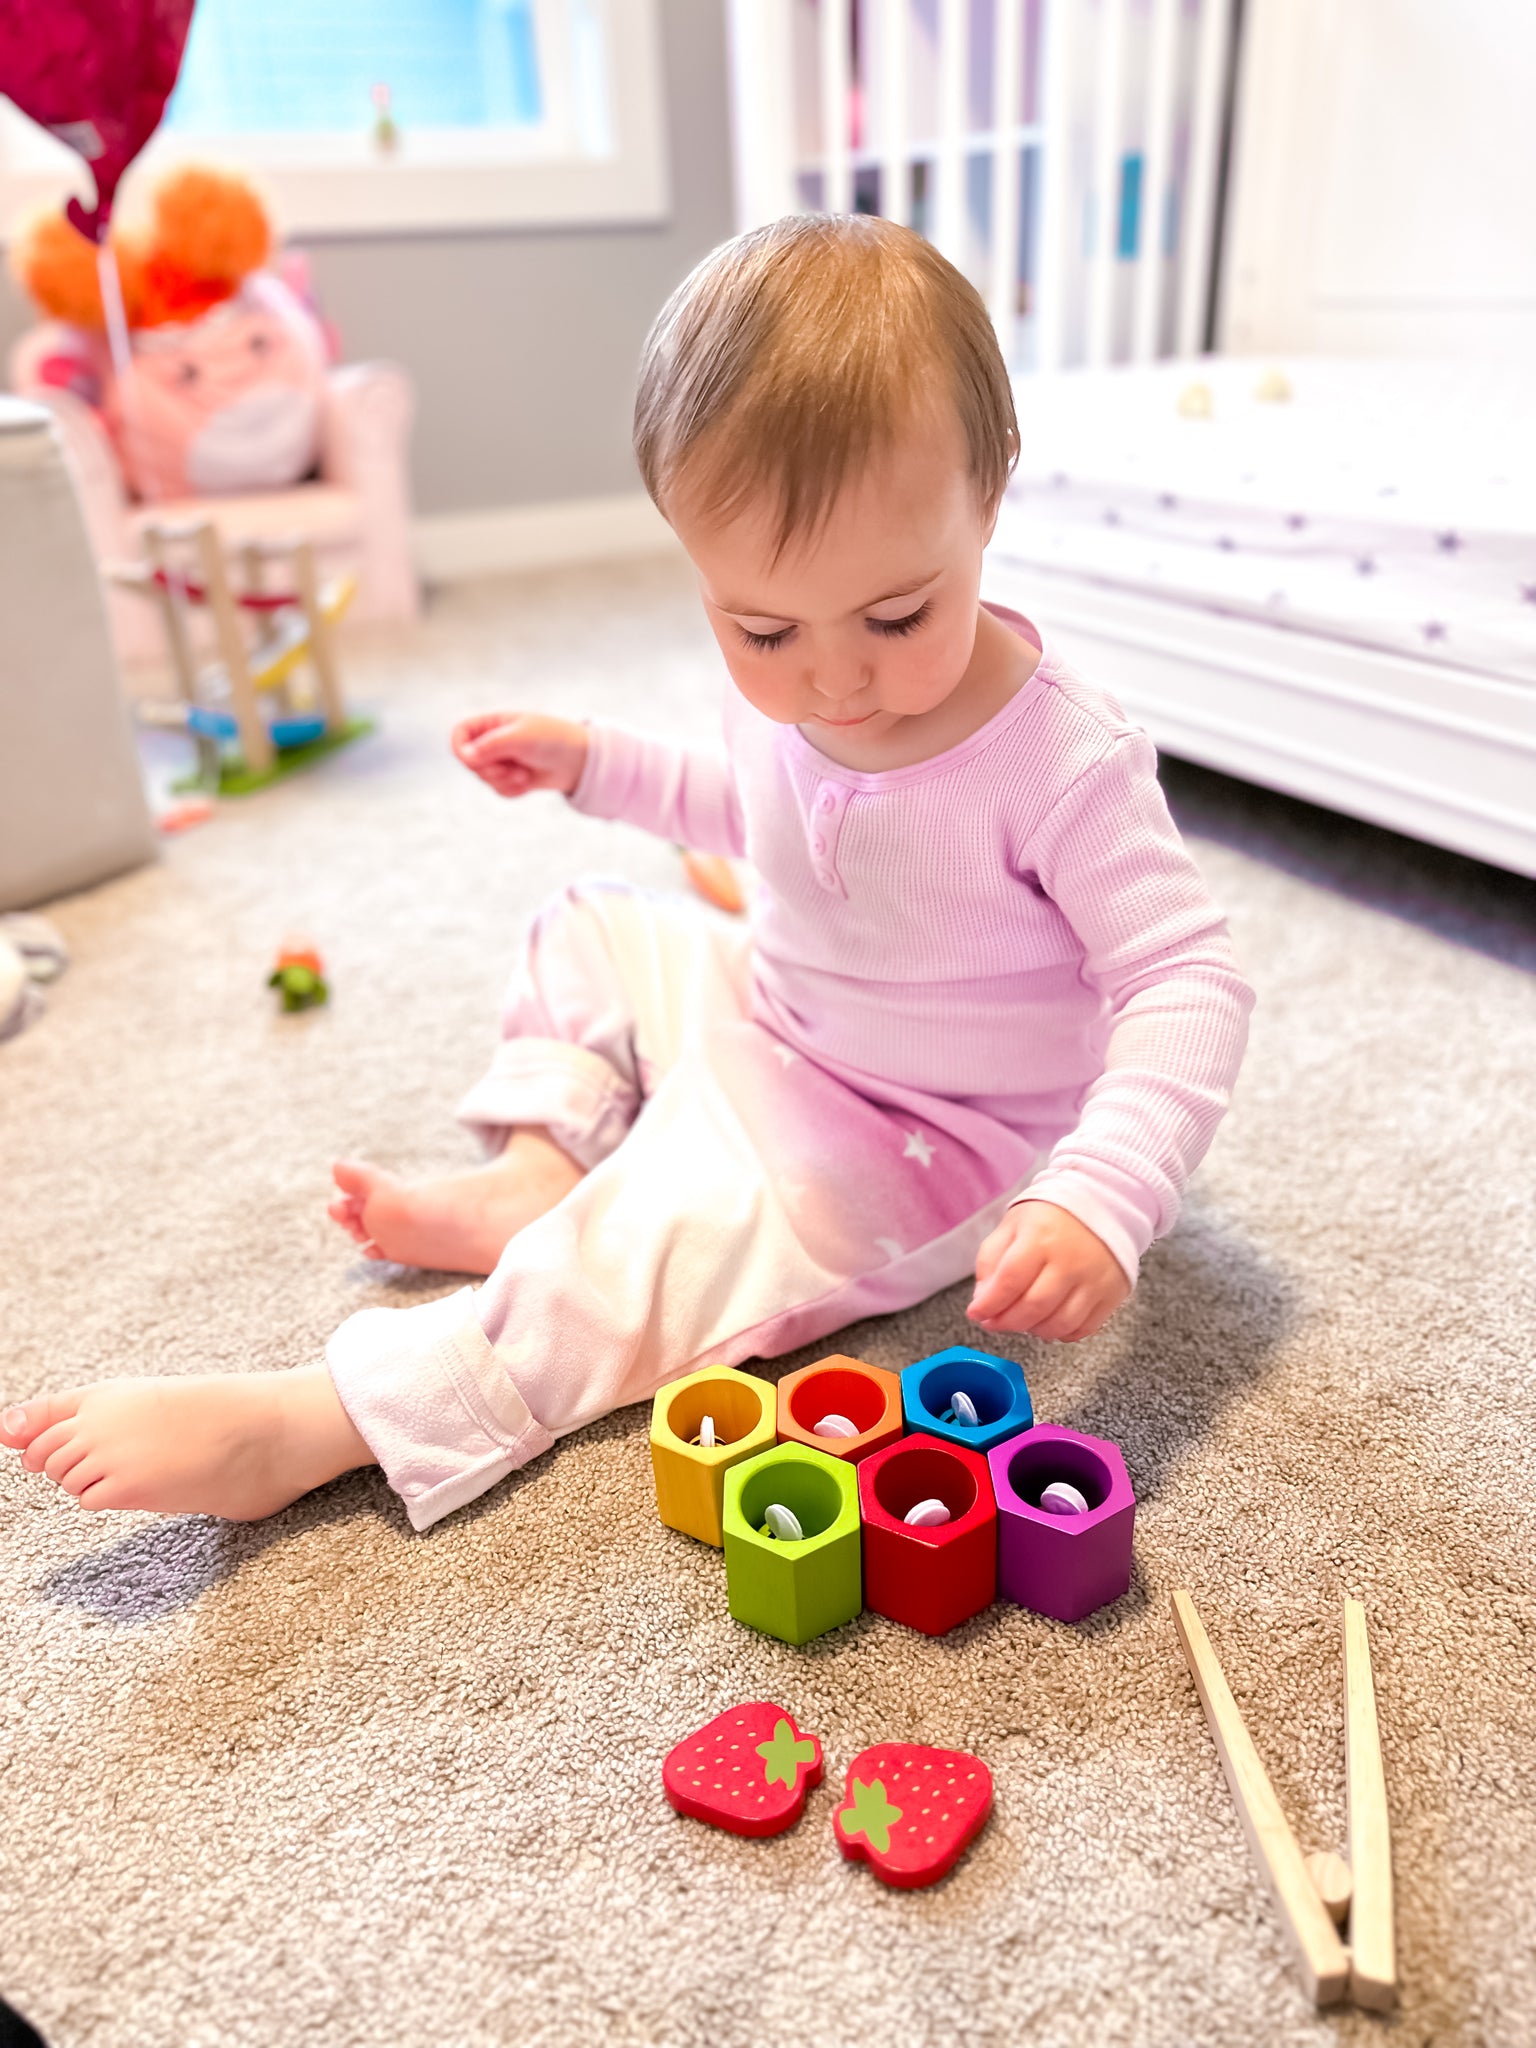
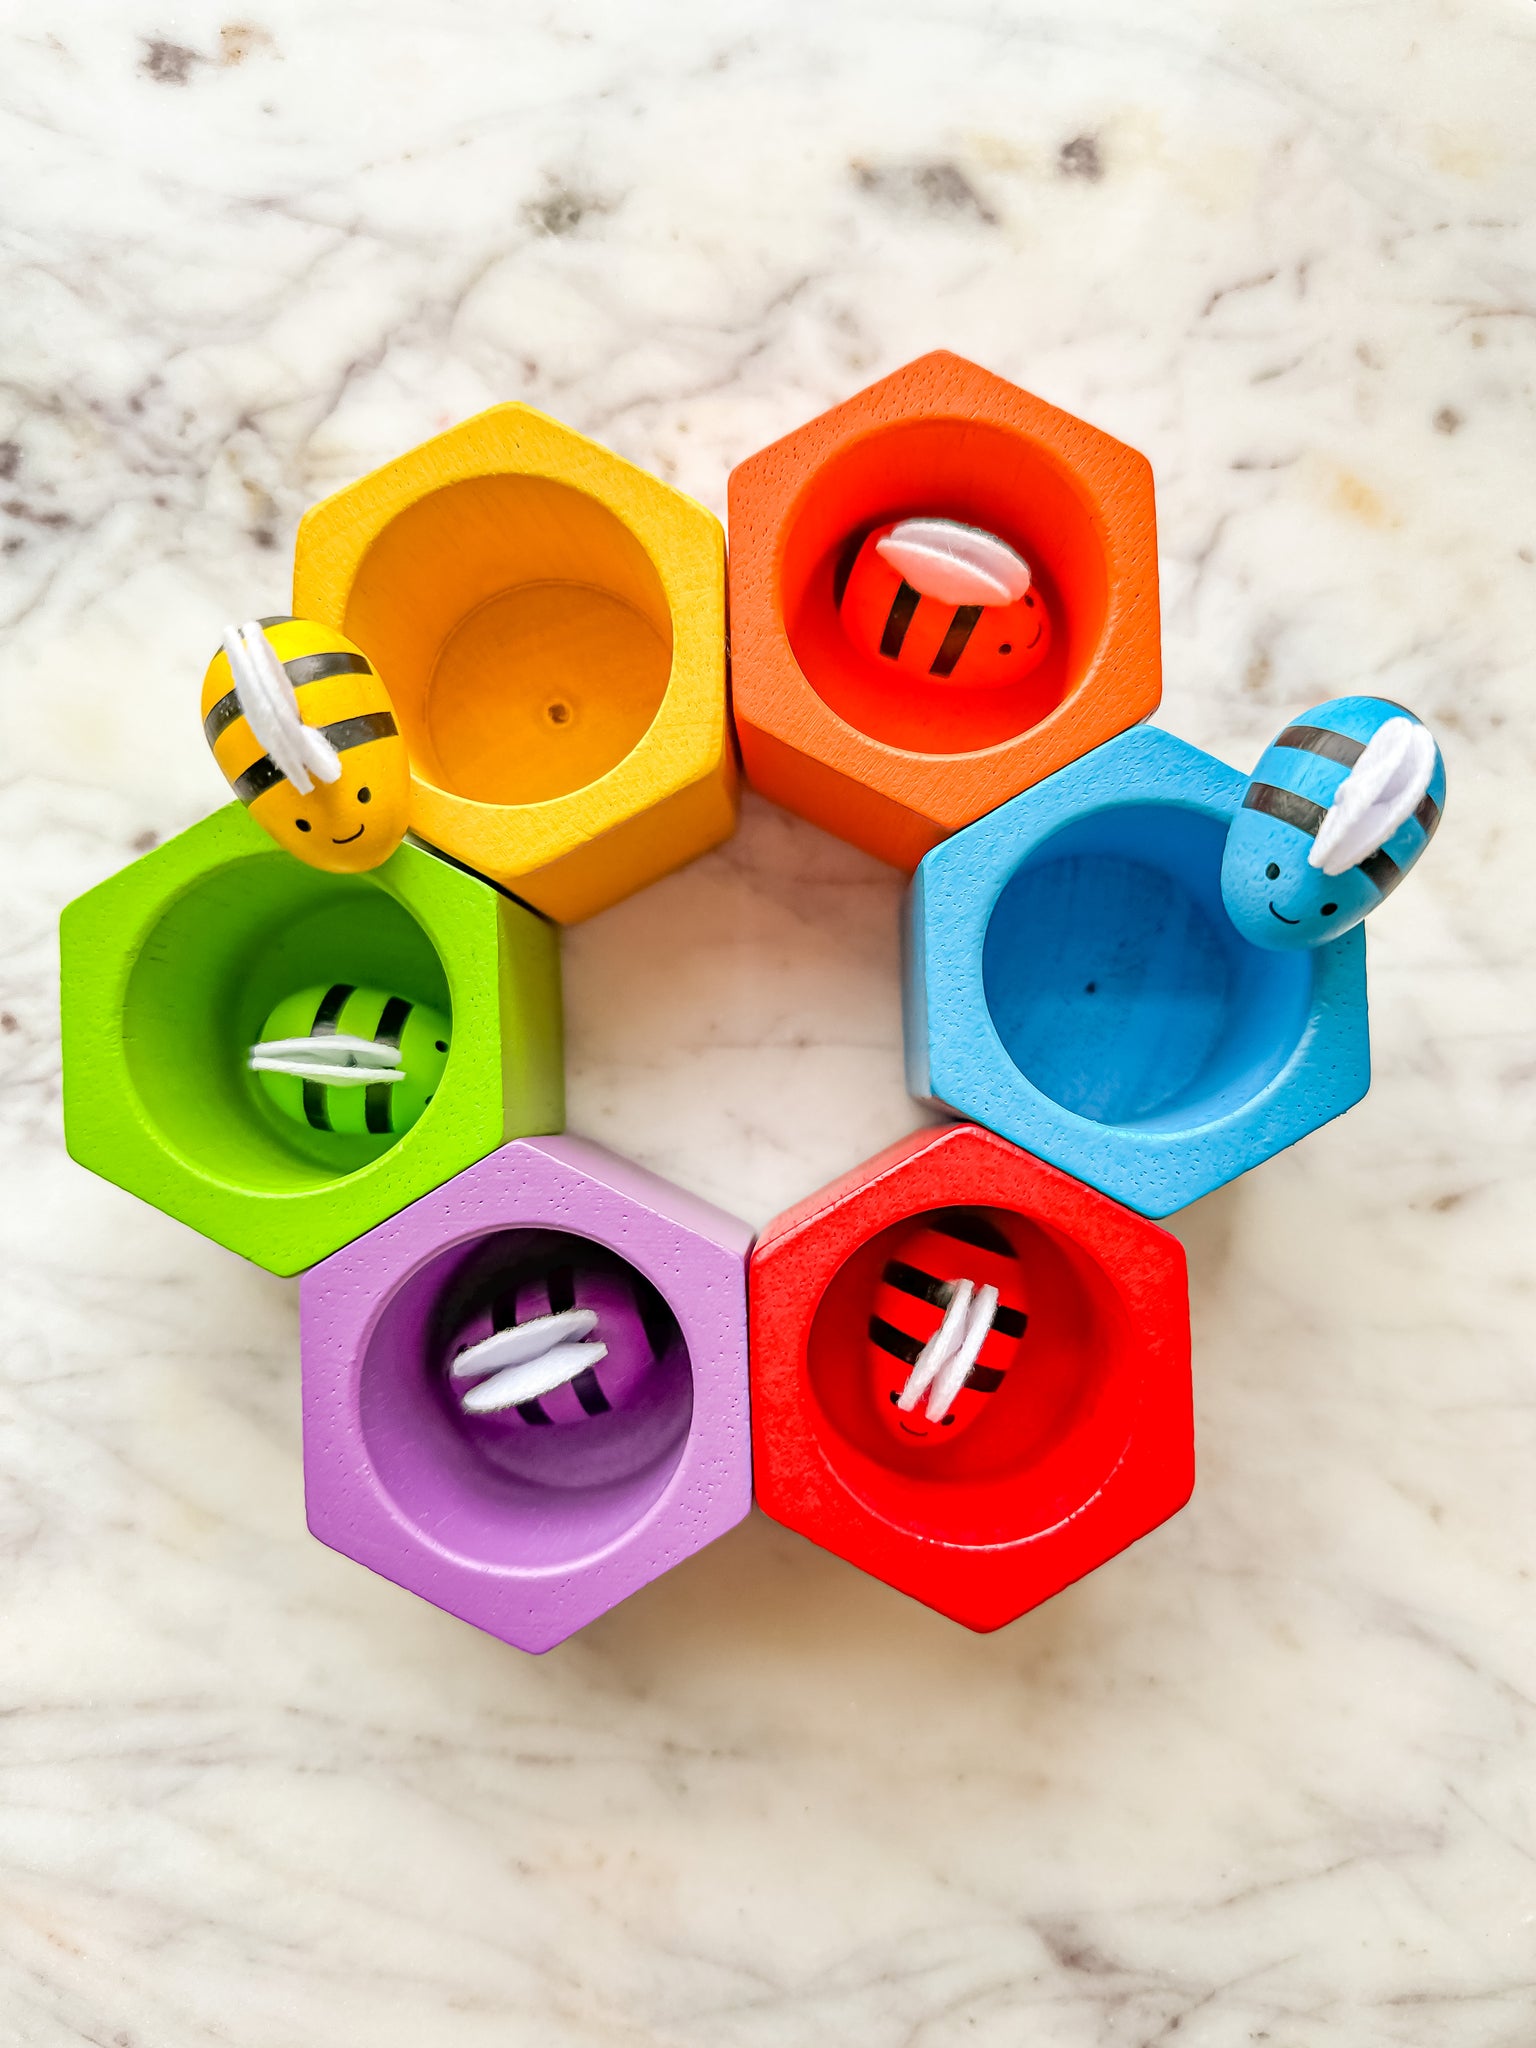
Shop PlanToys Wooden Beehives Sorting Game
There are so many great opportunities this simple wooden toy offers. Firstly, my toddler adores this wooden bee hive set! This set is actually how I was able to teach my toddler colors and color matching. She will play with it for hours on end.
The blocks can be stacked in various ways, moved into different shape hives and the bees each have a house. It’s great for learning colors, numbers and counting, along with fine motor skills. This toy also offers open ended play opportunities. Overall it’s a fantastic quality wooden toy that offers a great experience.
The only downside is that the bees are on the smaller side, so its not recommended for children under 3. The blocks are large which are totally safe, so I will let my toddler play with those freely. When we play games or colors with this set I will bring out the bees. I just keep the bees up when I am not playing a game with my 21 month old. As soon as she is old enough I will leave the bees out along with the blocks for her to freely play with.
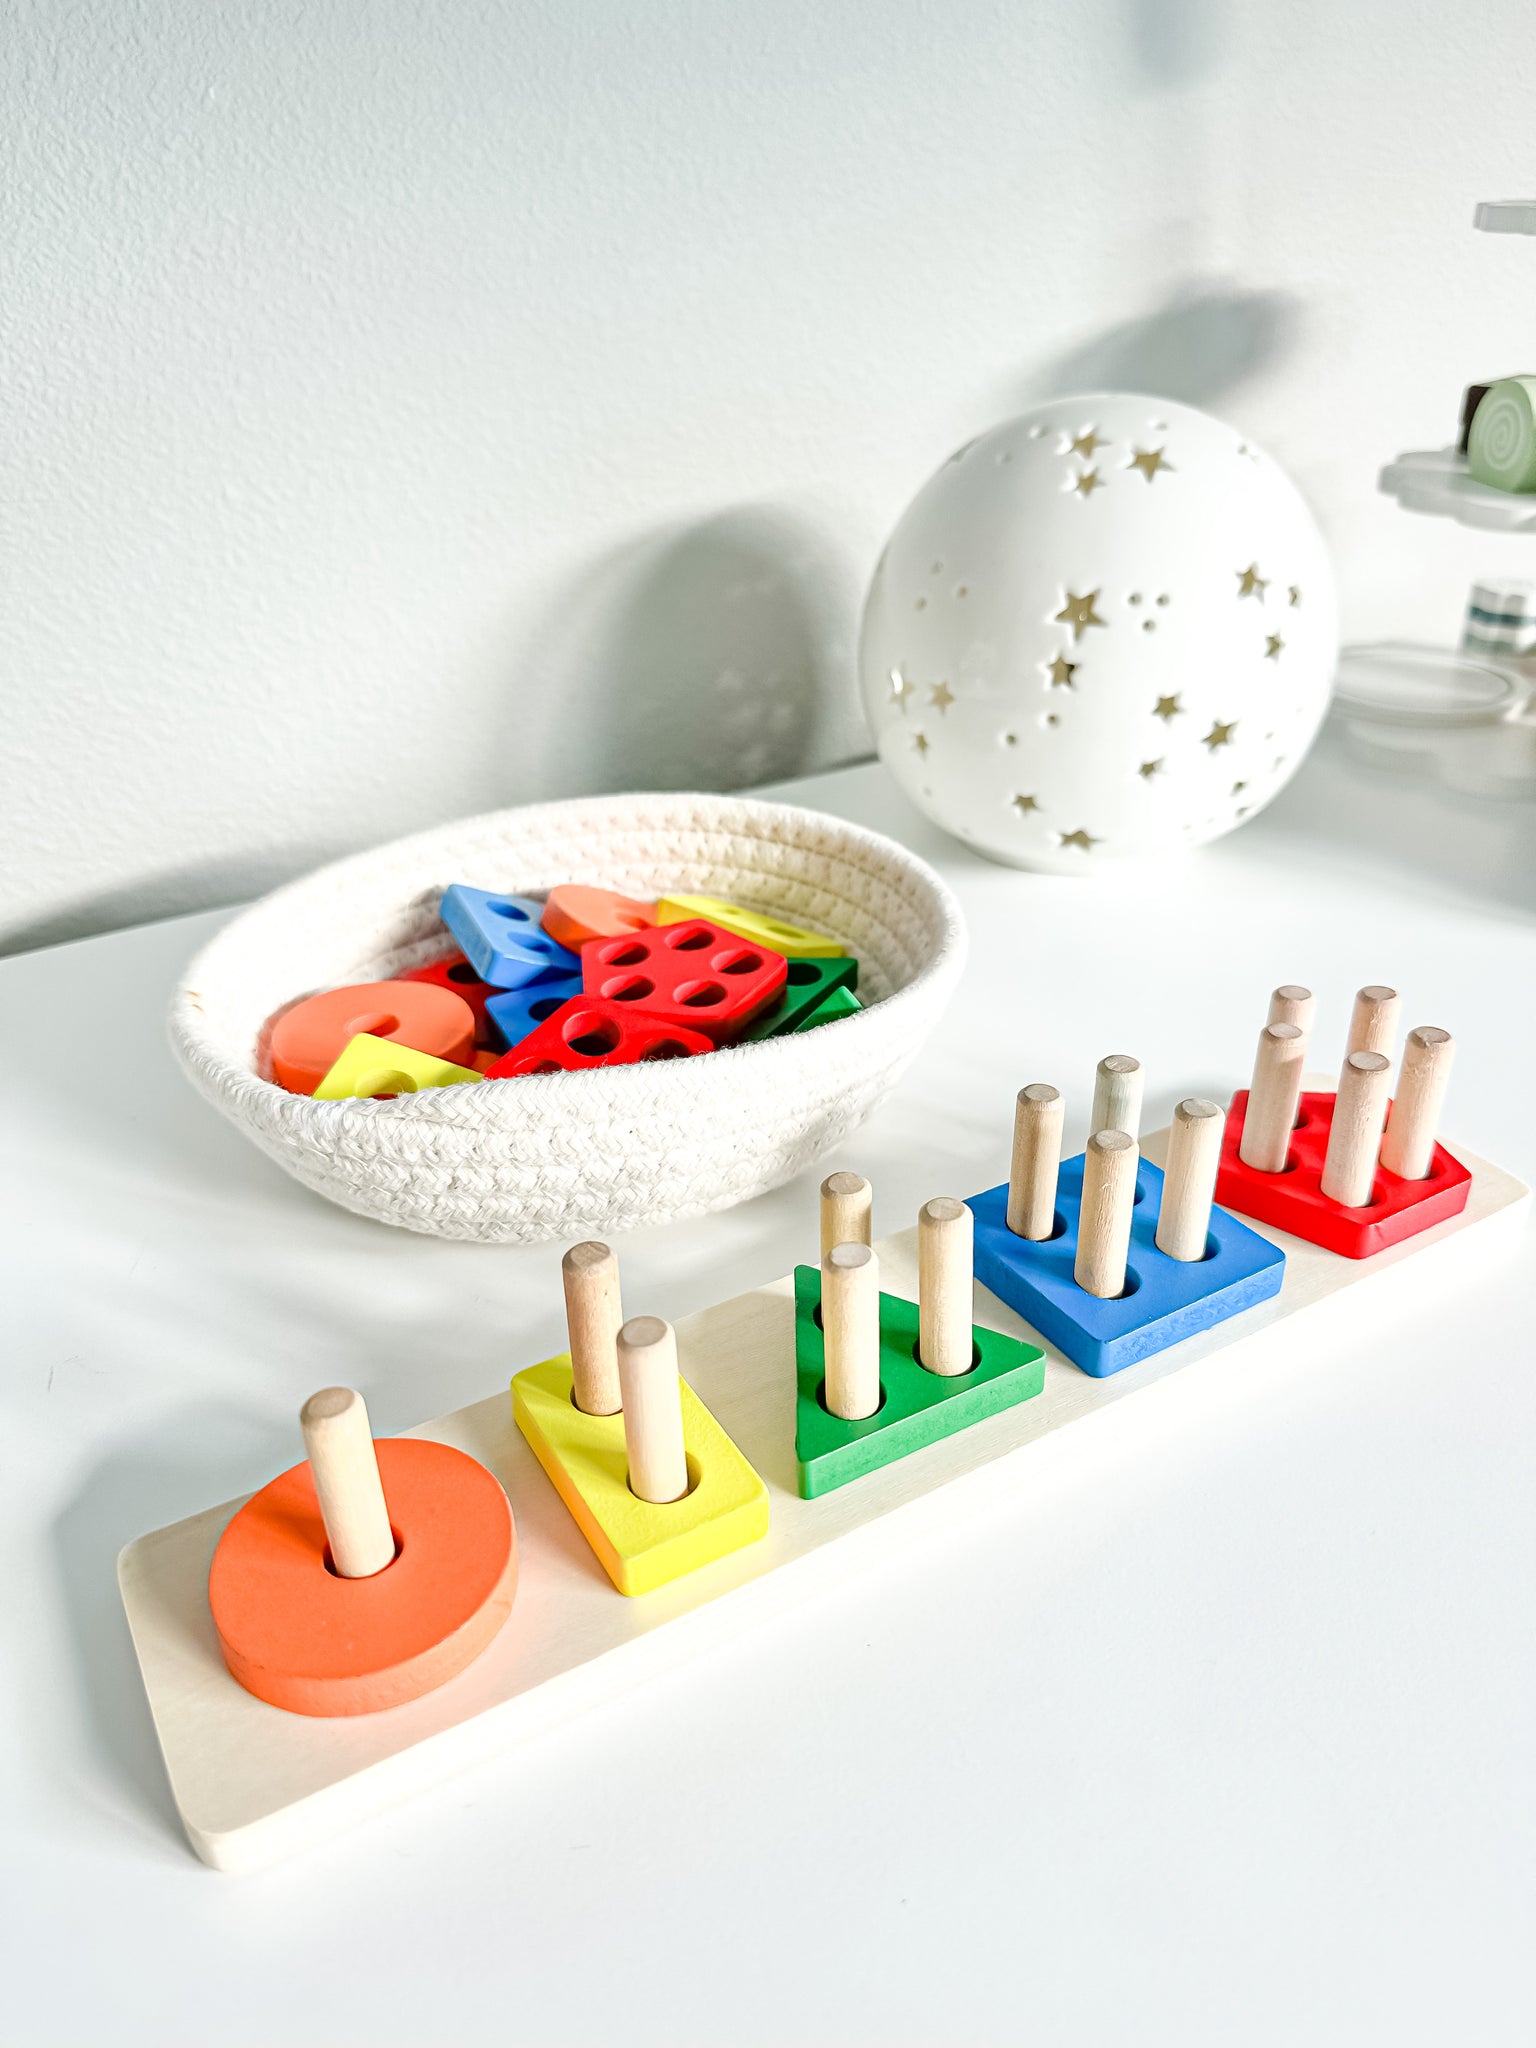
Shop Montessori Toys for 1 to 3-Year-Old Boys Girls Toddlers
Its colorful, affordable and engaging! This amazing and simple wooden toy keeps my toddler busy for hours. It’s just the right amount of challenging for a toddlers dexterity making a great toy for building those fine motor skills.
When we first got this toy it was challenging for my toddler to get the pieces in and out of their spots, but now she is super speedy at putting this toy together. It’s also great because it builds on hand eye coordination skills, colors, numbers, counting, organization skills, and more. A fantastic Montessori toy that will grow with your toddler making worth having in your collection.
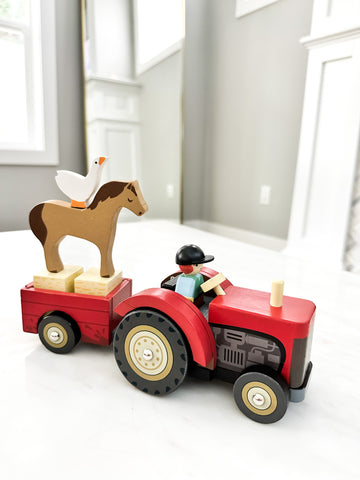
Wooden Farm Yard Tractor
So lovely and charming! This adorable tender leaf wooden tractor is so high quality and beautifully detailed. My daughter loves to push it around the house and stack the pony & duck. This toy makes a great gift and offers skills such as dexterity and it’s great for open ended play. It’s truly one of a kind!
Wooden toys are my favorite kind to offer my children as they have such a special charm and offer numerous advantages that make them truly wonderful! Wooden toys make great gifts and keepsakes for children of all ages. I hope you have enjoyed this post today!
Disclaimer: The information presented here is intended to be a helpful guide. It's crucial to consider important safety guidelines when selecting toys for young children. Always carefully read and follow the manufacturer's instructions, age recommendations, and any safety warnings associated with the toys you are considering. Regularly inspect toys for wear and tear, loose parts, or potential hazards, and promptly remove any toys that may pose a safety risk.
If you're looking for the perfect Instagram-worthy spots in Seattle, look no further!
From stunning views of the city skyline to colorful street art, I've rounded up 10 of the best locations to capture that perfect shot. Get ready to up your Instagram game with these gorgeous gems!
As a pacific northwest local, I am always trying to find the best photo spots to share with you. I am literally always saying how living in the PNW is a 10/10 one of the most beautiful places on earth. There is simply no shortage of photography spots and opportunities.
This year I met up with my parents, on my moms birthday weekend to spend some time with them in seattle. We spent 5 days in the city and took tons of photos at all of the best Seattle Instagram spots the city has to offer.
My parents had flown in from California, and had never been to Seattle before. This meant we had to do it all! But in reality we did as much as we possibly could, especially with my kids who are 1 and 12.
This also meant that everything we did was kid friendly too. So if you are bringing your family along, these spots are totally family friendly and fun!
Let's dive in!
Address: 85 Pike St, Seattle, WA 98101
Pike place market is such a special farmers market! Its busy, and fun with lots to explore and see. This was the very first thing we did upon arrival. If you are heading to seattle I highly recommend stopping at Pike Place market first.
You will be drawn in by the beautiful flowers, fresh fruits and vegetable stands all around. It can get pretty busy, so be sure to arrive early to get those Instagram photos. Pike place market is basically a must-stop for your next Instagram photos.
The lineup of flowers inside of pike place market is a sight to be seen. The fresh flowers smell intoxicating and look beautiful all in a row. Pick up a bouquet to take with you and style it as an accessory for your photos.
Pick up some fresh fruits and vegetables to munch on later. These colorful stands make beautiful backdrops to your photos. We grabbed some fresh fruit smoothies from these markets for the kids and they were totally delicious.
The shops all around Pike Place Market are all photography gems. You will find just about every spot to be aesthetically pleasing and great for a photo. I loved the Kitchen & Market shop set up. Perfect for an Instagram shopping photo! on top of being such a pretty little grocery it's perfect for grabbing some snacks for the journey.
I picked up lots of the seattle chocolates from this little grocery store. They had so many flavors I have not tried before. The Seattle chocolates are actually my personal favorite chocolate bars. I always try to keep a bar or two at home for emergencies. But I was so thrilled to see so many flavors. If you haven’t t tried these chocolates yet, stop by the Kitchen & Market shop and definitely give them a go!
Address: 1428 Post Alley, Seattle
The gum wall is definitely an awesome spot to grab that instagram photo at! The entire post alley is filled with the chewed up colorful gummy background! Its fun to look at, but don't touch it! 😉
It gave me a bit of an "ick" vibe but it was still pretty unique while offering some background texture and interest making it a great spot to snap a photo! The gum wall is located down post alley way, near the selfie museum.
This carousel was so dreamy! My kids absolutely loved riding this carousel so it was a no brainer! Bonus points for being absolutely beautiful!
This ride actually went pretty fast too! I ended up sharing a horse with baby Emma since it was just too fast for her to sit alone on. But she has a great time, and Kaiden my 12 year old had a good time too. This is definitely a family friendly stop that's totally IG worthy!
The colors and lights make the carousel a Instagram photo spot, especially with your kids. There are also lots of restaurants, shops and other entertainments on the pier which make it a fun family spot to get out of the rain for a bit.
The ferris wheel makes a great photo spot both inside and outside of the ride. On the inside of the ferris wheel you get a pretty cool view of the city from above the water. Honestly, you could get pretty creative with the photos from inside of the ferris wheel. Since there were 6 of us inside of one cart, we were a bit crammed, but if we weren’t all so squished into one ride we probably could have gotten some really cool shots. We all wanted to hang out together though, so we opted in to be squished!! 😉
You can also get some cool shots of the ferris wheel from the outside at Pike Place Market. Get your zoom lense out!
I have to say that I did love that the ferris wheel was heated, which made it a really comfortable and enjoyable ride! I highly recommend. It was also a good break for the kids, offering them the opportunity to have a moment to decompress and take a moment to relax.
The space Needle has been on my bucket list ever since I heard Owl City's song "Hello Seattle" back in 2009. I honestly don't know why it's taken me so long to visit this particular spot but its definitely bucket list worthy. the photos you can capture here seem endless and it's such a fun and highly unique experience.
The Space Needle offers a full panoramic view of the city from high above. You can really see it all. There’s just so many photo opportunities you can play around with.
You can also make a reservation and have some wine and appetizers here too. Dinner at the top of the space needle would make a great idea for a date night and Instagram photo, of course! Especially when all of the city lights come on. So dreamy!
If you only do one thing in seattle, do this!! The glass gardens were absolutely spectacular and absolutely breathtaking! I just couldn't believe what I was seeing. Everything was stunning and beautiful. Even Emma, my 1 year old was saying "Wow! Woooowww!!" The entire time. She truly enjoyed it too!
You can definitely get some pretty unique instagram photos at the Chihuly Garden and Glass. We spent a couple hours here exploring the gardens and grounds. There is also a cute gift shop and a cafe you can check out. They serve drinks and small bites which is a nice way to complete the experience.
If you know me, you might know I have a bit of a thing for botanical gardens. They draw me in like a bug to the light. Glittery and sparkly things have a similar effect. Haha!! All joking aside, this garden was stunning! It was lush, beautiful and the collection of plants were out of this world. Literally some of these plants I swear came from mars 😉
To say the least, the collection was beautiful. Botanical gardens are usually fantastic spots for photos and the Seattle Volunteer Park Conservatory was nothing short of spectacular.
You will definitely have fun taking photos in this place and seeing all of the beautiful flora and fauna. One of the best parts about this spot was the *free parking! And the park with the playground. The kids definitely enjoyed this spot!
Located in the same park is a dahlia garden, a playground and the Seattle Asian art museum.
You could basically spend all afternoon in this park and see all that it has to offer. We packed lots of snacks for the kids to keep them happy and fueled the entire time.
The park is honestly so lovely and beautiful. You can definitely get a ton of pretty photos here.
The West Point Light, which is also known as the Discovery Park Lighthouse is a beautiful Seattle Instagram spot to check out. It's a great park and lighthouse to grab some beautiful photos at while in the area. It's also great for getting in some exercise and enjoying the day. The park is massive and there’s quite a bit to see and explore while you are here. You could totally spend hours walking around and enjoying the beach and surroundings.
Puget Sound is a large inlet of the Pacific Ocean, located in the northwestern part of the United States, surrounding the city of Seattle. There are so many beautiful beaches around Puget Sound where you can enjoy the beautiful scenery, go for a swim, or participate in various outdoor activities. You can also grab great Instagram photos along the beaches and piers.
Alki Beach: Located in West Seattle, Alki Beach is a long strip of sandy beach that offers stunning views of the Seattle skyline and the Olympic Mountains.
Golden Gardens Park: Situated in the Ballard neighborhood of Seattle, Golden Gardens Park features a sandy beach, hiking trails, picnic areas, and a boat launch.
Discovery Park Beach: This is one of the largest parks in Seattle, located in the Magnolia neighborhood. The park includes a beach, trails, a lighthouse, and a variety of wildlife.
Carkeek Park Beach: This park is located in the northwestern part of Seattle and features a sandy beach, hiking trails, picnic areas, and a salmon hatchery.
If you love coffee, and even if you dont, you should still check out the Starbucks Reserve Roastery! Let me explain.
not only is it a pretty unique coffee experience located in Seattle, this starbucks was massive, beautiful and it smelled so good! Making it a perfect spot for that Instagram photo!
The Starbucks Reserve Roastery is a pretty nice coffee shop and happens to be the largest Starbucks location in the world, covering 30,000 square feet.
The roastery features a giant copper cask that holds over 1,000 pounds of coffee beans and is used to roast the coffee on site. It honestly smells so good inside! You have to order a cup of coffee or hot chocolate for inside and then get one to go. My kids enjoyed the hot chocolate. Emma has actually just recently discovered chocolate and she's obsessed. I guess the apple doesn’t fall far from the tree!
If you aren’t into coffee, The roastery has a nice bakery, which serves freshly baked bread, pizzas, and pastries made in-house. We ordered a couple of things to try out and it did not disappoint.
In addition to the bakery and coffee, the roastery has a dedicated Arriviamo Bar, which serves coffee-inspired cocktails and spirits. I was honestly amazed! You could literally hang out there all day long.
The Starbucks Reserve Roastery has become a pretty popular tourist attraction in Seattle and has basically inspired similar locations in other cities around the world, including New York, Tokyo, and Shanghai. So if you are in the seattle area, its definitely worth a spot. You'll be sure to capture some nice pics here.
Just to recap, Seattle is a clean city filled with beautiful spots all around perfect for taking photos. The city is a true gem and filled with so much beauty!
Some additional photo spots in Seattle you can checkout
Kerry Park: This park offers one of the best views of the Seattle skyline with the Space Needle in the foreground and Mount Rainier in the background. It’s a popular spot for photographers and tourists alike.
Gas Works Park: This former gas plant turned park offers unique views of the Seattle skyline and the Lake Union waterfront. The park also features a large rusty metal structure that makes for an interesting photo subject.
Seattle Center: The Seattle Center is a 74-acre park that is home to the iconic Space Needle, as well as several other attractions such as the Museum of Pop Culture and the Pacific Science Center. It’s a great place to capture the city’s modern architecture.
Pioneer Square: This historic district is known for its brick buildings and cobblestone streets. It’s a great place to capture the city’s past and present architecture.
Alki Beach: Located in West Seattle, Alki Beach is a great place to capture the city’s skyline from across the water, as well as to take photos of the beach and the sunset.
Ballard Locks: The Hiram M. Chittenden Locks, also known as the Ballard Locks, are a series of locks that connect Puget Sound to Lake Union. The locks, boats, and fish ladders offer unique photo opportunities.
We got a super cute AirB&B home in Des Moines right on the beach of Puget Sound. It really made it feel like a vacation and we all enjoyed the home. Personally, I loved having a full kitchen to prep breakfasts, snacks and dinners in. With a toddler and picky eaters, it can be a little challenging to go out to eat for every meal so this was the perfect solution! All in all, it was a perfect location. Just far enough outside of the hustle and bustle of the city to feel like a vacation, but close enough to access all of the amenities and activities.
Seattle, is known for its mild and rainy climate, with temperatures ranging from the mid-40s to the mid-60s so the best thing to wear are layers & keep a waterproof jacket on hand like a cute puffer. Of course, you want a cute outfit to wear for all of you photos.
Be sure to check out the thefoodforthoughtshow boutique & grab some cute new outfits to wear on your trip, or any day really! 😉
There's just something so dreamy and magical about a field full of flowers. Creating unforgettable memories while doing simple "slow living" activities like cutting flowers, picnicking and taking photos are such a treat. It's such an easy way to spend a sunny summers day. Like they say, summers are for livin easy.
In today's post, I wanted to share our Lavender field photoshoot, along with which lavender fields you must visit in the Oregon. These Lavender farms are truly something special and my photos don't do them justice.
When you visit the lavender fields in person, you will be captivated by the serenity and beauty of it all. The smell of lavender is intoxicating and the buzzing of the bees sounds like an ocean. But don't worry, the bees are friendly (;
If you have been following along in the FB group or on my IG you probably already saw some of these photos, but I had gotten a few questions about the Lavender fields and thought I would answer them below for you.
Lavender fields bloom in the summer time anywhere from June-August.
If you are planning on visiting a specific Lavender farm, its best to check their hours and schedule for visiting hours.
Different farms will also host different activities. You can find everything from painting lavender art, to making lavender cocktails or even making lavender stuffed Teddy bears. There are so many great summer activities for the family!
The best time of year to visit lavender fields are when the pretty flowers are in bloom which is in the summertime.
Usually blooms begin sometime in June and will last through the end of August. Of course, depending on your location the flowers will bloom at varying times.
We visited the Wayward Lavender farm in late July. The flowers were in full bloom and if you are going to visit a Lavender Farm in Oregon, I highly recommend going in July too. Another great time to visit a Lavender farm is during the annual Lavender festival in Oregon.
The annual 17th Willamette Valley Lavender Festival is located at the Chehalem Cultural Center in Newberg, Oregon from July 9th-July 10th
The west coast is pretty well known for its Lavender fields. Lavender grows everywhere out here! States like California, Oregon and Washington grow a lot of Lavender.
Yes! Lavender fields smell heavenly good! The smell is intoxicating and can really make you feel relaxed 😌
A Lavender field is a beautiful span of purple flowers all in a row for miles and miles. Sometimes the fields are on mountains and sometimes they are on level ground. Lavender flowers come in a variety for colors like light pink, bright pink, pastel purple, dark purple, and reddish tones of purple and white.
One of my favorite things to do on a nice sunny day is to pack a picnic and head out to a beautiful location to enjoy our family lunch. So far one of my absolute favorite locations is the Lavender Field.
It was such a relaxing atmosphere. Surrounded by the redwoods, mountains and lavender on a sunny day is nothing short of spectacular. I highly recommend trying it out sometime (:
So far I have visited the Wayward Winds Lavender Farm which are where I took all of the images in this post from.
I also recommend visiting the Carriage House Lavender which is stunningly beautiful too. I love their farm and I keep their Lavender body lotion on hand at all times. Even Emma, my 1 year old loves their lotion. Every night after a bath she asks to put some on. I have to keep it in stock now because its her absolute favorite, and mine!
Personally, I take a lot of inspiration from these flowers. They bring me a lot of joy and so we have planted them all around our home. I am excited for this years new bloom!
Emma is just 10 months in these photos. Even she was having a great time! She loved smelling the flowers and was very curious by the buzzing bees. It was so sweet to watch her exploring all around the lavender.
We did the you cut lavender and to include Emma in the activity I would cut a flower, hand it to her and she would place them into the basket. She was all about it!
SHOP JUMPSUIT
The most important thing to consider here are your shoes. Some lavender fields have cemented walkways, while others are covered with a plastic to prevent weeds from growing and some are just in soil. So basically avoid high heels, but sandals and comfy walkable shoes are great.
I recommend wearing a hat if you plan on going because the sun can be harsh depending on the time of day, weather, etc. You can also bring sunscreen or wear a lightweight kimono to help protect your skin against the UV rays.
I wanted to wear something bright and vibrant to the field. I loved this Jumpsuit and found it to be perfect because I could bend over, sit down on the ground, and move all around while staying cool and comfortable.
A maxi dress, jeans, romper or shorts would be a great look for going to a lavender field too.
Check Out These Related Posts Next
]]>Crostini bites are so versatile & delicious! These yummy small bites can easily complement your dinner dishes! They don’t take long to make & they are fun to serve as starters to a meal or even at your next party!
I love serving these Orange Zest Ricotta Crostini Bites as appetizers in the fall season. They make great party snack & look festive too.
My husband and I originally lived in Napa, California. You might have heard of this famous wine growing region and travel destination.
Napa is kind of like it’s own little world & entertaining is definitely high in the culture list. One of the events we would attend at various wineries each year would be the harvest party’s.
Usually around August and September the grapes would become ready for harvest and the entire city would celebrate!
A lot of wineries would hold special events, dinners, tastings, blessing of the grape ceremonies and more. Our friends would host dinner party’s and basically everyone would drink wine and snack on appetizers. Sometimes the harvest parties would go so in depth as to serve a four course meal, while others were more of a laid back wine and appetizer set up. Either way they were so fun and brilliant to attend.
I actually love harvest parties so much and prefer it to the thanksgiving holiday. If hubby and I will be throwing a dinner party in the fall months, it will likely be a harvest dinner party.
These little crostinis are always a dinner party hit and make a beautiful little presentation! The pop of flavors between sweet and savory will surely have your guests reaching for more!
I love the colors of this dish! It’s a perfect starter to serve for your autumn party’s, but it tastes great anytime of year!
This dish just takes a few minutes to prepare and can be served immediately.
The holidays are just around the corner and there's just something so satisfying and cozy about holiday treats! Decorating cookies with the kids, sipping on hot chocolate and smelling that yummy hot holiday pie baking in the oven is just part of all that holiday spirit and cheer. It's what makes the holidays feel so festive and fun!
The holidays can also be a little difficult to stay healthy and keep up with your health goals. So I have put together a list of 20 delightfully delicious and healthy treats that you will love serving at your next holiday party! These treats are healthier options, using better ingredients and can be made vegan, gluten free, vegetarian, refined sugar free, dairy free and all natural. I hope you enjoy the holidays & some guilt free treats this season!
1. Vegan Apple Crumble
This vegan apple crumble is bursting with all wonderful fall favors you love and no refined sugar. Serve it with vegan custard or ice cream for the perfect holiday dessert.
Recipe HERE
2. Mexican Christmas Salad
Mexican Christmas Salad (or Ensalada Navideña) is made of apples and other fruits dressed in a yummy and creamy sauce. It makes for an easy and healthy holiday dessert.
Recipe HERE
3. Pear Muffins
These pear muffins are light, moist and delicious. With wholemeal flour and not to much sugar they are a healthyish treat the whole family will love.
Recipe HERE
4. Four Ingredient Fruit Cake
This easy Four Ingredient Fruit Cake is vegan, gluten free and refined sugar free and simple to prepare. The delicious spices make it an ideal holiday dessert!
Recipe HERE
5. Carrot Cake Cookies
For those who love carrot cake but want to skip the task of icing and layering, these carrot cake cookies will be a welcome delight! They're simple treats that avoid the extra labor while delivering festive flavors.
Recipe HERE
6. Creamy Sweet Potato Casserole
This holiday, learn how to make this creamy sweet potato casserole for a sweet family treat! Featuring a silky smooth puree, chopped pecans, and a toasted marshmallow top, it's the perfect dessert to ignite your taste buds.
Recipe HERE
7. Sugar Free Cheesecake Bars
Creamy sugar free cheesecake bars! Enjoy this this gluten-free, low carb delicious dessert just as it is or add maple pecan topping!
Recipe HERE
8. Upside-down Persimmon Cake
Upside-down Persimmon Cake is moist, fluffy, and has a marvelously soft, spiced crumb! And the caramelized fruit juices running rivers through the batter give it so much flavor.
Recipe HERE
9. Easy Pumpkin Bread
Easy Pumpkin Bread – a tender, moist bread with pumpkin pie spice accenting the flavors and cinnamon sugar crowning it with a hint of crunch!
Recipe HERE
10. Healthy Chocolate Peanut Butter Balls
This delicious, decadent yet wholesome dessert is high in protein because of peanut butter and homemade vegan protein powder. A fabulous, fudgy bite-sized treat
Recipe HERE
11. Greek Christmas Honey Cookies
Melomakarona are traditional Greek Christmas honey cookies that are mildly spiced and dipped in a thick honey syrup. These classic Greek cookies will fill your house with a warm aroma of spices!
Recipe HERE
12. Dairy + Egg Free Chocolate Cake
This simple moist chocolate cake recipe is absolutely scrumptious with a rich chocolate flavor! It’s eggless, dairy-free, and a breeze to make in 1 bowl. No mixer or fancy ingredients are required.
Recipe HERE
13. Healthy Christmas Cookies
Deliciously oaty Healthy Christmas Cookies dipped in white chocolate with candy cane and gold sprinkles are the perfect way to start out the festive season. Kids will love decorating their own to leave out for Santa on Christmas Eve. Oat cookies packed with winter spices are a must make this Christmas.
Recipe HERE
14. Vegan Almond Flour Cookies
Easy vegan almond flour cookies with only 3 ingredients! This gluten free shortbread is healthy, oil free, crispy and buttery. They are also keto and grain free!
Recipe HERE
15. Gingerbread Cookies
These mouth-watering gingerbread cookies have crispy edges and chewy middles. They’re gluten-free, vegan, and made with nutrient-rich ingredients.
Recipe HERE
16. Gingerbread Loaf Cake
This gingerbread loaf cake is made with chickpea flour but you’d never guess from the taste! It’s sweet, moist, flavorful, and delicious!
Recipe HERE
17. Chocolate Peanut Butter Bark.
If you love the classic combination of chocolate and peanut butter, you will love this delicious combination of Chocolate Peanut Butter Bark. This delightful marriage of flavors is low carb, sugar free, and keto.
Recipe HERE
18. Ginger and Walnut Cake
This delicious ginger and walnut cake is gluten free, low carb and high in protein! A holiday cake that you can enjoy and not worry about counting slices!
Recipe HERE
19. Cranberry Brie Bites
Cranberry brie bites are the perfect addition to your next holiday party! These simple cranberry brie appetizers are so easy to prep, but look like you slaved all day in the kitchen!
Recipe HERE
20. Dark Chocolate Salted Espresso Nut Clusters
These dark chocolate salted espresso nut clusters are super easy to make, and I bet you have all of the ingredients already in your pantry. Plus, research shows that chocolate, especially dark chocolate, can be a great addition to your diet and has many health benefits. Chocolate + Coffee + Nuts are the perfect holiday treat!
Recipe HERE
Yours truly has finally popped the question and you couldn’t be more ecstatic to say "I Do!"
Wow! You are getting married and you are beyond excited to begin your new chapter in life as a married couple!
In today's post, I will be sharing my sister Laura's wedding photos along with how she planned her wedding in Clovis, California.
Lauras wedding was absolutely beautiful and I was honored to be the maid of honor! I am excited to share her lovely wedding on the blog today! Laura is a guest speaker on this post today.
I will also be breaking down the steps you can take to plan out a beautiful & effortless wedding, so you can spend more time enjoying the process and less time worrying!
First thing is first! You gotta set a date! Setting a date in the most important step in planning a wedding. Once you have a set date, you can then start to plan the next steps.
How to pick a date for your wedding can be a tough one, but once it's done you will be able to move on to the actual wedding planning process.
Here are a few things to consider when picking a date.
Determine your wedding budget early on is important as it will help you to narrow down everything else that comes along with planning a wedding.
Once you figure out your wedding budget you can then determine your values. For example, would you rather spend more on a grand wedding dress or a grand cake?
Maybe your budget allows for both, or maybe you would rather have your favorite artist play live at your wedding, so you will budge on both your dress and cake.
The choice is yours and you get to determine where you spend your budget, and having a budget early on will help you to decide on what's most important to you.
This is the fun part! To plan a wedding you need to get all of your ideas together and what better place to do that than Pinterest!
When you are in the early stages of planning a wedding, it can be a good idea to just pin everything you like to a board and just let your imagination fly high.
PS. Pin your favorite images from this blog post to your board for later (;
Take a look through your inspiration boards and begin to narrow down what you actually would like to have for your wedding based on all of the beautiful inspiration you have gathered together.
This will also help you to figure out what you value and want most, which can help determine where best to use your budget.
Here's what Laura had to say about putting her vision together.
"I had so much fun creating my own vision. I started off on Pinterest and had printed out several images. I organized the images in a binder with labels and tabs for each section. Doing this really helped narrow down what I actually wanted to do for my wedding."
A wedding planner is someone who helps and manages all or some aspects of getting your wedding party together. They are usually a great recourse of information and guidance on how to manage a wedding.
If you are confident and comfortable planning a wedding without a wedding planner, it is doable, but hiring one can definitely take some of the wedding party stress off your shoulders.
Make a list of everyone you would like to invite to your wedding. This will help you to decide how big of a wedding you will be planning. Some weddings are very small and intimate with a few close relatives and friends while other weddings are very large with over 200 guests. Either way, the choice is yours.
Decide on if you will have a wedding party and who will be in it. It can be both your friends and family. Generally your wedding party's consists of your closest Bffs!
Once you have your wedding guest list and know how many people you would like to invite, you can pick out a venue that will be able to accommodate your guest list. Certain venues can only occupy a set number of people, so it's important to know how many guests you plan to invite ahead of time.
Picking the right venue also depends on the type of wedding you would like to plan and what’s available in regards to your budget.
Are you looking for a beach wedding? A forest venue or maybe a city rooftop?
Here's what Laura said about booking her venue.
"Booking a venue took several months alone. I spent a lot of time researching online and eventually found a place I liked, but after visiting the location I found out I wouldn’t be able to get my date reserved for two years, and we wanted to get married earlier than that.
Thankfully, we had a family friend who owns a beautiful home in the hills with stunning views and a gorgeous gazebo. We decided to have our wedding in our family friends back yard, and it was a great choice for us."
Some of the benefits of a backyard wedding:
Laura chose a local wedding over a destination wedding. She says "Throwing our wedding at a nearby location was the most important part of our decision."
Here are a few reasons why Laura went with a local wedding over a destination wedding.
Local wedding Pros:
Next you will want to find a wedding photographer that fits both your style and budget. Stalk their instagram accounts, websites and blogs. Get in contact with your favorite photographers to check rates and availability.
Laura said "I spent a lot of time researching photographers that I liked, but in the end I actually went with a photographer that my sister in law highly recommended. I first talked to him on the phone and then broswed his website and loved his photography style. I am pleased with out wedding photos that we got and will cherish them forever."
Depending on your venue, you may have to book a caterer. You can find local restaurants who are willing to accommodate larger orders.
There are pretty much three options here. You can book a DJ, a live band or you can hook up speakers with your own wedding playlist.
Laura said "I first started with a google search and asked for recommendations from friends and family. I ended up going with the DJ that my wedding planner had recommended to me. Before I booked our DJ I met him in person. It is a good idea to meet with everyone who will be at your wedding in person, because you want to make sure you click with everyone who will be with you on your wedding day."
Wedding flowers are generally the main decorations and heart of any wedding party! It's important to book a florist several months in advance. You will want to know what style flowers you would like and can set up a meeting with your flosit.
You will want to discuss with your florist your wedding date, the venue, the colors and your wedding party members. Remember that pinterest board you created at the beginning? You will want to show your florist all of the flowers you have in mind.
Laura said "I found a local florist in Old Town Clovis, which my wedding planner had also recommended. The florist and I had completely clicked! She assured me that she would make everything to the best of her ability so that I could relax and enjoy being a bride. I felt really assured by her and knew she was the florist for me."
The best part about picking out a cake is the cake tasting! You will probably try flavors you never have had before and it can be a really fun experience! Have some cake photos ready as examples to show your baker!
"We had ordered our wedding cake and cupcakes from Chiffonos and had the BEST experience we could ask for. We were gives full sized cupcakes to sample which had all tasted amazing! The baker was friendly, affordable and made the best tasting cupcakes id ever had. It was a no-brainer." -Laura
You will want to book an officiant who can make it to your venue, or book your place of worship to officiate your ceremony. You will also want to look for an officiant who can do the type of ceremony you wish to preform.
Laura said "This was easy for us because we married at our church. There were two priests and they were both on stage with us. It comes with the territory of going to a church of your own."
If your venue doesn’t already come with tables and chairs, you'll need to rent them.
Laura's experience "I told my wedding planner exactly what look I wanted. I wanted rich dark wood picnic tables that gave a feeling of enchanted coziness. I had pictures to show of my vision.
My wedding planner had 3 different locations where I could potentially get these items. While these wood picnic tables were pricerier than the other tables, this was one of the more important features so I went ahead and paid the higher price for the ones I wanted."
"When it came to booking tableware rentals, I had to go through 2 separate rental vendors and still I had to purchase some items from stores such as Hobby Lobby, Joans, Target & Amazon. Both of the rental vendors still did not provide the amount of items I needed. Be aware of this if your wedding is going to be larger."
It's important to order bridesmaid dresses & best men's tuxedos several months in advance to insure enough time for them to be delivered and altered.
Laura's experience "I found the most stunning glittery dark green bridesmaid dress which was under 100! The bridesmaids and I all agreed it was beautiful so we went the dress. Ordering the dress extra early is also ideal for try on purposes, incase the size needs to be exchanged or tailored. The mens tuxedos were all done at men’s warehouse. All of the men had easy access to it, especially since some of them lived out of state."
Make sure you book your beauty appointment for your big day!
Laura's experience "I 100% went with word of mouth from a lady who is a wedding planner from our church. Although she was not my wedding planner, she had been doing the job for years so I decided to take her word on it.
I booked makeup 7 months ahead. It was one of the first things I actually booked. I found this part to be vitally important. I wanted my makeup done in a way that would look flattering in pictures and that it would last all day long!
I wanted the day of my wedding to be as relaxing as possible, so It was nice to sit back and have someone do my hair and makeup."
There are various free wedding websites that allow you to design a free wedding website page. This is totally up to you to do or not, but It can be a fun and easy way to share information about your wedding as simple as sending a link in a text to your friends and family.
Laura's experience "I went with Zola to design my wedding website. It was free, and I could get wedding invites from them as well. The invitations they had were really pretty. I could do everything from wedding registry to posting all our beautiful engagement photos. I spend A lot of time editing our website and spell checking. It took me 3 months to get it right before making it public."
You can create a wedding registry at places like target or amazon, or request a honeymoon fund.
Laura said "We kept this sweet and simple with a honeymoon fund."
Time to get the wedding invitations ready and mailed out!
Laura's experience "We sent out 200 invitations by snail mail. I bought hundreds of stamps and sent the invites out at our local post office but some were returned back to me which meant I had to contact the guests and get the right address.
I had to prepare an Excell sheet with hundreds of different address and phone numbers before sending out the invites. I got a lot of the information from family members but I still had to cold call our guests to verify the information. By the end of it all I had sent out 200 invitations."
You can add to your wedding guest invites the dress code by mentioning a line or two such as "dress to impress or black tie, or formal, or dressy casual" You can find the prettiest dressy casual dresses at the thefoodforthoughtshow Boutique & shop them HERE
Usually you book the rehearsal a night or two before the wedding so that everyone remembers what they are supposed to do and when.
Get your seating charts in order! This is not a must, but if you prefer to organize where everyone will sit, now is the time to get it done.
Laura's experience "The only seating chart was the spot my husband and I sat at, and our immediate family got front row in the church and at the reception dining tables. We kept it very simple and let people decide where to sit. There was no pressure."
Dont forget this part! It might be the most important piece of all! 😉
After all of that planning and work, you definitely deserve a vacation! and of course time to start your newlywed life on the right foot, that is in the sand-if you catch my drift. 😉
"At the end of the day everything we did felt so worth the work! My husband and I spent over a year behind the scenes setting things up.
If you want a very specific wedding, I would rec starting a year ahead minimum. I learned so much about how to plan a party. Organization is vital to maintain the chaos that can occur when planning a party for 200 people.
Along the ride I realized I am a much more creative person than I had ever given myself credit for. I have a new found confidence to throw more sophisticated parties if I wanted to.
Before this experience, I knew nothing about catering, fancy cakes, how to organize big events, and vendors for party items. I was at a complete loss at the beginning. Although, I could never in a million years be a wedding planner, this experience made me realize that I would enjoy creating smaller family gatherings where I can bring out my creative side." -Laura
]]>
We had so much fun putting together her 1st Daisy Garden birthday party! I cant believe I have a 1 year old today! I don’t know where the time has gone, but those itsy bitsy tiny baby days sure didn’t t last very long.
It was so cute seeing how excited she was over her first birthday! That excitement and joy is really what makes it all worth so it!
So in this post I will be sharing the decorations we used, the cakes and food tables we put together for Emma's Daisy Garden themed 1st birthday party.
I will also be sharing how I put her party together and what steps we took to make it all happen.
Let's dive right in!
This is a picture of Emma's Daisy Garden dessert table. We decided to do two different food stations.
We used our dining room table to display the treats, fruit and dessert.
We used our kitchen island to display the rest of the food.
We had just under 40 people attend the party, so we definitely wanted to make sure that everyone got a treat.
We had 4 cakes made, along with cupcakes, fruit, macaroons and other small treats.
To accommodate everyone's food restrictions or special diets we made sure our dessert table had something for everyone.
Some desserts were made from scratch while others I had ordered from several local bakeries.
I loved the way Emma's pink daisy cake turned out! I asked for the bakery to make a pink cake with yellow and white daisies on top and it turned out so beautiful.
I got this cake from a local bakery in Oregon called Sprinkles Of Joy. I absolutely adore the turn out! She did a beautiful job and made the cake exactly as I had envisioned. I was super impressed!
The inside of the cake was vanilla funfetti with strawberry frosting layers. The inside of the daisy cake was so beautiful and everyone commented on how cute the cake was!
Honestly it was just too cute to eat!
I am totally in love with the cute Daisy One Cake Topper which I actually ordered it off a cute Etsy shop called The Saw Dust Mama
She has several cute cake toppers to choose from but this is the one I had ordered HERE
As a small boutique owner I love to shop other small shops and support small business.
It's definitely important to me to shop small as I know the impact it has on small boutiques and honestly I love the uniqueness and quality that shopping small can offer.
The mini daisy smash cake was just adorable! Emma completely destroyed it and it was so much fun watching her have fun with it.
The cake was a 6" vanilla ombre cake with daisies on top. I ordered this custom cake from the same bakery as the main daisy cake. It's from the local bakery in Oregon called Sprinkles Of Joy.
This happens to be one of my favorite chocolate cakes ever and it's the vegan chocolate cake from Whole Foods bakery.
I have served this cake at several parties and get-togethers. It's always an easy go to.
I also got this fruit tart from the Whole Foods Bakery. This cake is so fruit forward and fresh.
I love the appearance it adds to our dessert table and for those who don't like cake, this is always an awesome option to have available.
These cupcakes we had made from scratch because I just found it a bit challenging to find a bakery who could make them for me.
This is actually my moms recipe and I will likely share her recipe in a future post.
I am obsessed with the adorable daisy fondant flowers which I actually got from another Etsy shop. I ordered these fondant flowers from Gninsshop and these are the ones I got HERE
They really worked perfectly for our homemade cupcakes. I honestly would have made these myself but having a baby and work I just found my time to be a little stretched.
I was thankful I found this cute shop who was able to make them for me. I ordered these on Jun 17 and didn't get them until July 20th so I would recommend ordering yours in advance.
They are totally worth it! Definitely check out her shop because she has so many cute fondant creations available that are all so dreamy!
We used these cute letter cutouts to serve our fresh fruit in. I will share in a later post how we made these and put them together.
The fruit we served:
We offered toothpicks in a cute shot glass to pick out the fruit.
These tiny cakes are actually homemade. Everything from the chocolate toppers to the base. These cakes were actually super easy to make, but they totally took a lot of time to make.
The purpose of the mini cakes were to be as gifted as favors. I had made several of these with various flowers on top. These sparkly little mini cakes were a hit!
We put them in cupcake baking cups for people to take home at the end of the party. I will share how I made these in a later post.
Dipped Oreos are such a party staple. I think they are so cute and can help carry out a color theme for the party.
We choose gluten free Oreos and dipped them in white chocolate.
I used cute pink princess sprinkles to decorate the cookies.
The mini daisy cookies were also homemade.
These were super easy to make but took a lot of time. They definitely helped carry out the Daisy party theme.
These mini daisy cookies were also meant to be party favors to snack on and take home at the end of the party.
Macaroons are one of my favorite cookies of all time so of course I had to have them at Emmas Daisy Garden First Birthday Party!
I had gotten the macaroons from a bakery but we actually decorated them ourselves with homemade chocolates to fit the garden theme.
Although our macaroons came from the bakery, they were not decorated. So that's when I added the cute little flower chocolates to each one.
The chocolates were hommade and took a several days to make the amount we needed but it was definitely worth it.
We packed up our favor containers with the decorated macaroons, dipped cookies and daisy cakes.
Outside of decorating with food, we used flowers to decorate. I also had found a daisy flower garland at Hobby Lobby when I was just shopping around and it we used it to lay across the table.
I personally find that a pretty bouquet of fresh flowers is a job well done when it comes to decorations. Its tasteful, simple and they smell good.
They are also great because they come in so many beautiful colors. You can really go all out with flowers.
We made about 6 flower bouquets which were displayed in various locations throughout our home.
Flowers are really the most effortless way to decorate any party.
My husband picked up several boques from Trader Joes and we just put them together our own bouquet using various vases and mason jars.
The food we served was basically all horderves and snacks along with a few salads. In order to keep people moving around and talking, I prefer to serve small bites rather than full course meals.
We got up at 5AM the day of the party to start putting together the cheese boards. They definitely took a lot of time to make look beautiful. Arrange and rearrange over and over until everything looked effortless.
My mom was amazing at helping me out these boards together because there is no way I would have finished in time for the party! Thanks mom!
We made a total of 3 cheese boards that held a variety of different hors d'oeuvres.
We also had an assortment of veggies to put out but sadly we totally forgot about them on the day of the party. I am not sure how we forgot about them but it happened.
We served 3 types of salads for Emma's Daisy Garden 1st Birthday Party.
The goal was to have something available that everyone could enjoy. Pictured above are the garden pasta salad and the quinoa salad.
The salads were so colorful and bright, they were so yummy and helped to play off the garden theme even more so. We made the salads at home and prepped them the night before the party.
I think at this point everyone expects these at any party we throw. These are just so easy to make and always make a beautiful and elegant turn out.
We kept it simple with these really cute biodegradable palm leaf pressed plates that I got from amazon HERE
These were actually a total hit! They were not flimsy like paper plates and looked much more appealing than single use plastic plates.
They also held up throughout the entire party. They didn't leak and everyone loved them and kept asking me where they came from.
These were much thicker and sturdier and were totally awesome! I highly recommend using them for your party.
I ordered the 7" size which was the perfect size for serving small plates like salads, hors d'oeuvres and cake on.
I used mason jars to hold our party utensils.
The floral napkins I actually got kind of lucky with because I happened to find them in Homegoods when I was just shopping around one day.
Okay I am officially obsessed with these chalkboard signs! They are really wonderful at labeling what the food is and they have cute little stands so you can place them anywhere.
I picked up several packs from Hobby Lobby. I used chalkboard marker to label everything so everyone would know what is what.
I started planning her birthday party 4 months in advance and by time it was her birthday, it was all worth it because it came together wonderfully.
During the initial planning stage I just got a pen and paper and put together all of the ideas I had for food, decoration and desserts.
Once I had my ideas together I created a timeline in which everything would need to be done by.
2 Months before party
3 Weeks before party
Week of party
Day before party
Day of party
Just under 40 people had attended Emma's Daisy Garden 1st Birthday Party! She had so much fun and loved all of the attention!
I was having such a great time with everyone at the party that I actually forgot to take photos during the party, but luckily I was able to capture the birthday party set up before everyone had arrived.
I had actually planned to have the party set up 1 hour before guests would arrive so that we could get some photos of the set up. Thank goodness we aimed for an earlier time because we had actually finished just in time.
The party started at 2PM and we planned to have it ready by 1PM. We had actually finished at 1:49 with just a enough time to take photos.
Guests also arrived early! So we poured them drinks while they waited for us to finish photographing everything.
All in all, we had a lovely time! Happy 1st Birthday Emma! I can't believe I have a one year old already! 🥰
Check Out These Related Posts Next
]]>
I love a fresh and simple salad to complement my meals any day of the week! What I especially love about this Arugula and pomegranate salad is how crisp and festive this salad is!
It's a perfect salad to serve during the holidays because the colors are so elegant together! The fresh bright green arugula against the bright red pomegranate seeds make it a totally festive dish!
You can easily make this salad vegan by skipping the cheese. The dressing is homemade & it's such a quick and easy mix it will take no time to throw this beauty together!
It's a fantastic and simple dish that you can throw together any time of the week. If you like to store or prep your salad for the next day, you can keep the dressing on the side until you are ready to eat.
For this salad, I like to eye the amount of dressing I am using on it. If I am making a personal salad, I will just use a small amount of olive oil and probably half a lemon, but if I am making a large salad for several people I will use more ingredients.
When pouring the dressing on the salad, I like to say that less is more. Try a bite and see if the salad needs more dressing before pouring the entire dressing onto the salad.
If you accidentally add too much dressing to the salad, you can always add more arugula to thin out the dressing.
You are fun, fashionable and unique! You love cute and comfy clothes and have an eye for style! You definitely deserve an adornment collection full of beautiful clothing that reflects your effortless style! Now, you have finally found thefoodforthoughtshow. The perfect boutique to make all of your wardrobe goals a reality!
New arrivals release every week on Tuesday and Thursday. Find the latest styles in cute, comfy and casual designs while staying on budget and on trend. You will love the selection of cute tops, dresses and so many Judy Blue Jeans to choose from!
Each week I curate dreamy collections in your favorite styles to elevate your wardrobe. Our curated collections feature beautiful florals, boho, feminine, bold statement pieces, comfy, stretchy and soft pieces in adorable silhouettes and good fashioned basics.
We believe that having fun is an essential ingredient to a happy life, so we style fun, flirty & fashionable pieces to brighten all of your days!
Our boutique offers a collection that expresses some of the most contemporary, darling, and flirty fashion pieces at an honest price while our blog captures the whimsical side of fashion. Exploring topics on fashion, beauty, and lifestyle allure!
Our dreamy small-batch clothing collections are offered in sizes XS-XXXL because we believe that everyone deserves to feel beautiful and confident. Everything you need to curate your own dream wardrobe, you can find at thefoodforthoughtshow.
Stay for a while, shop around, and find your dream outfits today!
Thank you for supporting a small business!
Xx Caroline
]]>Keeping the home clean can sometimes feel like such a chore but after I discovered these 7 genius cleaning habits my house stayed effortlessly clean! You might just be surprised by how easy it actually is to keep your home in a continuous state of clean with these easy tips!
Some of these habits are just mindset changes. I mean, it sounds easy, but in the beginning you might have to remind yourself a few times until it becomes a true habit.
The first tip and this one is probably the biggest! We all have gotta eat, therefore our kitchens will get a bit messy from time to time. The secret to a clean kitchen is to ultimately clean while you cook.
Once you get in the habit of this you will be amazed at how nice your kitchen looks even after you had just whipped up a whole meal. What I also love about cleaning while cooking is how easy it is to clean up after you finish eating.
The worst thing is to look at your messy kitchen right after you just enjoyed that yummy meal and think “look at that mess-I gotta clean all that!”
So if your all busy cooking, how in the world are you actually supposed to clean? The secret is to pick it up, throw it away, wipe it down as soon as you are done with the current activity-before moving onto the next.
The trick here is to be consistent and put things away as you finish using them. You will be amazed at how much less cleaning you will need to do when you are done cooking.
My husband loves to cook but always leaves everything out whenever he makes dinner. The kitchen always looks like a mighty explosion by the time he is finished. He is happy to clean up after, so it works for him. I am completely the opposite and cannot stand cooking where everything is out. I constantly put things away when I am finished with them and wipe things down as I finish using them or stick them in the dishwasher immediately. Sometimes the only thing left to clean up by the time I am done with dinner is the pot and spoon.
Some examples you can easily try
This one sounds pretty obvious right? Well the secret here is to put your dirty dishes in the dishwasher immediately. As soon as you are finished using that dish or utensil, rinse it and plop it into that dishwasher right away! This also means that you regularly need to have an empty dishwasher available.
You can empty the dishwasher first thing in the morning, fill it up as you go throughout your day and run it before bed. This way you will never have to "do dishes" and will always have a clean kitchen, an empty sink and more time to spend doing something else you enjoy.
I remember when I first learned this trick I was truly amazed at how simply genius it was! Growing up our family would stack dishes into the sink until it was full, and then someone would have to clean up the mess. Usually we traded off who did the dishes each night, but it was pretty dreadful. In my home today, we immediately clean up after ourselves. By the end of the night or after dinner, there are only a couple pots and pans to clean up. It takes just a few minutes and it's not even a "thing" anymore.
If you can get your family on board with the simple task of cleaning up their dishes after themselves, you will all enjoy the extra time and cleanliness together. If you find that you are the one constantly getting dish duty, a simple conversation to guide your family into practicing this good habit will be totally worth it. Trust me, you'll thank yourself later!
So what exactly does having a home for everything mean? It means that all items in your home have a designated place.
Homes that are always clean are also well organized homes. All things have a designated location, which makes clean up a breeze. If you don't have a designated location for a certain item, it may be time to re-evaluate its importance.
Finding a good "home" for all of your things will help keep clutter at bay and will also make it easier for you to find certain things. Especially those things that you always seem to need, but can never really find when you actually need them. Things like scissors, or keys, or pens, receipts, or even buttons from new clothes that you purchase.
Small things like this can easily create clutter and distraction. Having a safe place to put your things away when you are finished using them will truly make your life easier and keep your home looking nice and tidy.
Make organizing your home a priority to keep it always looking nice and tidy.
This is something my mom used to tell me all the time when I was a kid and it drove me crazy! I would be too busy playing and having fun in the moment that I definitely didn't want to stop what I was doing, just because I was no longer playing with XYZ Barbies and their wardrobe.
As an adult I totally understand this. Although I am no longer playing with barbie dolls, I am doing other things like craftings, DIYing and such. The moment you are done with the project-put it away.
This isn’t a rule for just big projects either. This habit should pertain to just about anything and everything you do. You take it out, you use it, you are done with it, put it away immediately. Don't let your future self deal with the mess. Take care of it in the moment. This will keep your home looking spotless at all times! No mess-no fuss!
Think in terms of daily use items. You are putting your makeup on in the morning and you take out your moisturizers, primer, foundation, mascara, make-up brushes-etc. Instead of leaving everything on the counter to deal with later, just immediately put it away. You will be amazed at how easy it is to keep your home clean when you practice this simple good habit.
Once you do this a few times, it will seem as though it's become ingrained in your system. You just start putting things away without even thinking twice about them. All you have to do is start!
Bonus tip: If it takes less than 1 minute, do it. This is something that sounds simple, and pertains to the "Put it Away the moment you are done with it" scenario but slightly differs. It means, if you see something that's out of place and it will take you less than a minute to do it, just take care of it immediately.
You know that person who can never hang out on the weekends because they always tell you it's laundry day? Well this is especially for that person. Let me tell you that laundry day should be everyday. Yep, you heard that right!
Think of it this way, if you are using dishes everyday, several times a day, you are most likely doing the dishes every single day. Well, you wear clothes everyday. Sometimes you change into a few different outfits throughout the day as well.
For example, you wear a robe after a shower in the morning, you work outfit, you come home and put on your loungewear and then get into Pjs before bed. Well, maybe you don't change that much but you get the point. Just like washing the dishes daily, you should be doing a load of laundry daily too.
What if I don't have enough dirty laundry to make a full load?
Lucky you! Just do your laundry as needed, but you are more likely to need to do laundry every few days. If you are using sheets, blankets, towels, then you will need to clean these items regularly too. Consider adding some of these items to your daily routine and make it a habit of having a full closet of clean clothes and fresh linens.
Laundry is one of those things that can pile up quickly and instantly make your home look messy and potentially smelly too. If you can manage to do just one load of laundry everyday you will be set. You will never have to deal with massive piles of laundry and you won't have to miss out on doing fun things because you have a huge laundry project every sunday.
Doing a load of laundry everyday means not only putting your clothes in the washer, but also moving them into the dryer (this is for the forgetful) AND putting your freshly cleaned clothes away immediately. This habit will help your home always look sparkling clean, clutter free and absent of any questionable fragrances.
If you did just one load of laundry a day, that's a total 7 loads in one week. No more spending your entire weekends doing chores!
Its honestly so much easier to do just a single load of laundry a day (or as soon as you have a load ready) rather than waiting for "laundry day" and having a gigantic mound of laundry to clean, organize and put away.
Think you don't have time to do a daily load of laundry? I get it, life is busy and somethings are just not that fun to do. You could trade 15 mins of social media time to fold and put away your laundry. You’re future self will thank you for it, even if your in the moment self wants nothing to do with laundry.
If you are concerned that your clothes might smell a little musty after leaving them in the wash for a few hours, try adding a cup of baking soda to your loads. This will help to eliminate any musky scents.
It's better to switch the laundry right away and put your clothes away while they are still warm. You will avoid wrinkles and you will feel that instant satisfaction of a job well done.
Avoid "The Sweet Spot" like the plague!
You know the sweet spot. Its that spot that you put your worn clothes basically anywhere other than the hamper. Like the chair, a corner of your bedroom, the bathroom floor or even right next to the laundry basket. This is a habit you should immediately work on if you want to have an effortlessly clean home! Just do you'r self a favor and immediately hang your clothes back up, fold them and put them back in the drawer or if they are ready for a wash, stick it that laundry basket.
This one is probably the easiest one on the list here. This is more of a something you do once rather than a habit, but I had to include it because the convenience factor will gain you bonus points it terms of establishing good cleaning habits.
Keep your cleaning supplies and tools readily available, convenient and nearby the location you are most likely to use them.
For example, if you have a trashcan in the kitchen, but you keep your fresh trash bags out in the garage, you may be less motivated to take out the trash because you have to walk all the way out into the garage and bring it back to the kitchen. But if you had your trash bags readily available under the sink right next to your trash can, the convenience factor plays a huge role in motivating you to ge that trash out.
This works for all spaces. Keep shower cleaners in bathrooms, dish soaps and sprays in kitchen and you get the idea. Convenience like this breeds good cleaning habits.
If you have little ones who could potentially get into the cleaning products and you need to keep it out of their reach, you can try using a basket or bucket to carry all of your supplies to the designated space to make cleaning more convenient.
I should have probably started off with this tip first. Making your bed first thing in the morning can help set up your entire day for success. It's a fantastic habit to develop and practice every day. Making your bed takes just a few minutes, doesn’t take much effort and can instantly transform a bedroom. Have you ever walked into to a home that just looks effortlessly spotless?
Making their beds are the very first thing they did that day. Make it a habit! It will help to make you feel more mentally clear, clean and will motivate you to continue on with your successful day. It will also keep you from crawling back into bed during the day and spending too much time scrolling through Instagram or Tik-Tok.
It's a great way to clear out the old and make room for the new! Especially if you love to shop like I do!
You know when you get that “shopping spree itch” & you just desperately want to wear something new?
It’s that feeling you get when you look into your closet & nothing seems exciting anymore.
You’ve “out-worn” everything already. You start to think “I have nothing to wear” & yet your closet is actually completely full & clothes are spewing out of their drawers. Your clothes are probably still totally wearable and in excellent condition.
Well I totally understand you! It’s time for a wardrobe refresh. The first place you should turn to when you start feeling this way is back to your closet.
The second thing you should do is pick out a few items you know you haven’t worn in a while & probably won’t wear again anytime soon. Or pick out those items that are still in excellent condition, but you feel kinda tired of wearing. Those are the best items to sell on Poshmark.
Now it’s time to list these items on poshmark and make some room in your closet for a wardrobe refresh.
First things first, wash that item.
Selling an item that may have been collecting dust in your closet is a big Noooo. Make it look beautiful & brand new again.
Once you have washed it & steam it, it's time to get the item ready for photos.
Next you are going to want to find a good spot in your home with lots of diffused natural light.
(Quick tip- avoid direct sunlight, it will leave harsh shadows & potentially skew colors)
Hang your clothes on a hanger to photograph. If you choose to photograph as a flat lay style, please, I beg you not to take the photos on the carpet floor! Mostly because I have read in several poshmark forums that people won’t buy from anyone who takes the photos of the clothes on their carpet. Many concerns about dirty carpet, pets, shoes & derbies in carpet come up often.
Instead, use a clean surface such as a table or lay some photography paper down on the floor first to protect the clothing. This also makes for a better and more professional looking shot!
If you are comfortable modeling the item you can totally wear it on yourself. This can actually help the buyer see how the item fits on an actual real body.
Another tip for selling your old clothes on poshmark iks to add more photos. Upload at least a minimum of 4 images, but the more you can add the better your chances are at getting an offer.
If you list an item with ANY flaws, make sure to show it in the images or at least disclose the flaws in the description.You want to make sure you do this or you will end up with an unhappy buyer and likely have a case opened up against you. Which nobody ever wants, but if it does happen, dont fret-It happens to the best of us!
Don't skip this step! Everyone & their mother wants to know the measurements of the item on Poshmark.
Save yourself some time by listing measurements ahead instead of waiting for when people ask-because they will!
Even if you have every measurement listed in the description you’ll still be surprised to get questions about it in the comments.
By listing out all of the necessary measurements you will find that you are also more likely to receive offers on the item than if you skip this step.
Basic measurements to include
Quick tip: If an item has a fitted no stretch waist line, add this measurement too, but if it’s a loose fit with no defined waist I skip this measurement.
If your still not 100% sure on where and how to measure, check out my How To Measure Guide HERE with Videos to show you how we get the job done!
Listing an item to sell on Poshmark is actually really really easy. They make it super user friendly. Once you have completed the steps above, listing an item should only take you a couple of minutes!
So #1 & #2 are pretty self explanatory so we can just skip to #3.
Enter a title for the item. Here you want to actually use keywords describing the item that you want to sell. So for instance if you have a Kate Spade Purse, you will want to give it a title like " Pink Kate Spade Mini Crossbody Bag" Instead of "Cute pink bag". When people are shopping they will usually search keyword phrases for something they are looking for. For example, if they are looking for a kate spade bag they might search something as simple as "kate spade bag" or "kate spade purse" and you want your item to show up when the buyer is looking for your item.
Write a description. When you write your description, make sure to add a few key elements. I like to use this outline for all of my items.
Then you will want to choose choose an item category. You want to place your item into the correct category to ensure customers can find what they are looking for.
When choosing a brand, it can be from the store you originally purchased it from or whatever the item tag states. If neither of these are applicable, you can also leave this section blank.
Choose NWT (new with tags) if it has tags or original packaging available, or none if its been word or used. A boutique item is an option only available from a boutique business on poshmark.
Style tags are anything that you can think of that quickly describe the item in 1 word. You can choose up to 3. For example, if you are listing your torn up jeans, you could add "distressed" as a style tag.
A shipping discount is optional. If you choose a shipping discount at this point, keep in mind that it will automatically apply this discount to "buy now" and all other private or public discounts you apply later on.
The availability option is actually one of my favorites and one that I use often. When you list an item, you can set it as immediately available or change it to coming soon or not available. This option is actually really wonderful. Whenever I buy an item online, I immediately add the items as a listing to my personal poshmark account and list it under "not available". This way when I am done with the item I have a listing ready to go and I don't have to scramble to put one together. I just add a few extra images of my item to my already listing and change the availability to "available" and I can sell it right away.
Now for the fun part. How to actually find buyers for your beautiful clothes! Since you have completed the first step of creating an immaculate listing, the second part is about promoting yourself and your worn clothes!
The MOST IMPORTANT thing you can do to sell your old clothes on Poshmark is to SHARE SHARE & SHARE some more. You have probably heard this one before, and it's totally true! If it's the only thing you do every day-just share. Share your entire closet over and over and over. Its tedious, but its the best way for getting your items found. Another way to share is other peoples listings to your followers. The benefit of this is that they may come back and share your listings to their followers, so it's a total win win.
When you share you bring your listings back to the top of the algorithm. But there's a catch, old listings dont always make it back up to the very top of search like new listings do. This bring me to my second tip which is to RE-LIST old items. When you re-list an item, Poshmark sees it as a brand new listing and will push it up in the feed. So if you have been sitting on an item for a couple of months, its probably due for a re-list.
Heres the thing about re-listing. It doesnt mean EDIT and then hit "list" again and it also doesnt mean "copy listing" and re-list it. It means you will have to delete the original listing completely and totally re-do the entire thing. It can be a bit of a headache, but you will see new activity on your item when you do it this way and it will be worth the effort when you finally get that buyer!
]]>
Happy Holidays!
Check Out These Related Posts Next
]]>Seriously though fall is one of my favorite times of year, but if Im being honest here I also love spring and Im definitely beyond obsessed with summer time!
The cozyness, colors and fresh air is what gets me head over heels for fall! Today im sharing a few of my favorite fall images that would make adorable iPhone wallpaper backgrounds! This post is all for the aesthetics of autumn beauty.
If you haven’t updated your phone with a custom photo in a while, or ever- so to speak now is the season to go for it! This small and effortless change can make the biggest difference. Everytime I look down at my phone and see the beautiful autumn background I feel happy and I am reminded of what a beautiful time of year it truly is.
These dreamy iPhone wallpapers are to help get you into the spirit of autumn and naturally that means all things cozy, caramel apples, pumpkins, chunky knit sweaters, crunchy leaves and pumpkin pie. There's really just too many good things to name in one sentence alone.
Save these images to your phone or to your pinterest board as a reminder for later! Enjoy!
#1 Photo by Диана Багаутдинова
#2 Photo by Ioana Motoc
#3 Photo by Polina Kovaleva
#4 Photo by David Selbert
#5 Photo by Vlada Karpovich
#6 Photo by Allie Reefer
#7 Photo by Melike Benli
#8 Photo by julie aagaard
#9 Photo by lilartsy
#10 Photo by Valeriia Miller
#11 Photo by Diana Akhmetianova
#12 Photo by Ena Marinkovic
#13 Photo by Ioana Moto
#14 Photo by Valeriia Miller
#15 Photo by Eric Nixon
#16 Photo by Aljona Ovtšinnikova
#17 Photo by Guillaume Hankenne
#18 Photo by Vie Studio
#19 Photo by Eric Nixon
#20 Photo by Tomas Anunziata
#21 Photo by Karolina Grabowska
#22 Photo by Valeriya Kobzar
#23 Photo by Vlada Karpovich
#24 Photo by Polina Kovaleva
#25 Photo by Eugene Golovesov
Check Out These Related Posts Next
]]>No matter which way you decide to celebrate this year, we have compiled some unique and festive halloween cocktails & mocktails to spice up your evening!
There's a halloween drink for everyone! Cocktails, mocktails, vegan and gluten free recipes!
These fun halloween drinks will definitely get you in the spirit! Whether you are looking for something magical, spooky or simply cozy, we have a fun recipe for you to try!
#1. CANDY CORN MARTINI
The prettiest & sweetest Halloween martini. For a whipped cream vodka treat this candy corn lookalike cocktail is the best way to celebrate.
Recipe HERE
#2. PUMPKIN SPICE COQUITO
Pumpkin spice coquito is the ultimate cocktail to enjoy once the leaves start changing colors.
Recipe HERE
#3. CROCKPOT PUMPKIN SPICE HOT CHOCOLATE
Warm up with a glass of crockpot pumpkin spice hot chocolate. Set the crockpot to warm when you have guests over to keep the drink hot throughout your party
Recipe HERE
#4. Halloween Witch’s Brew Punch
Recipe HERE
#5. 4-Ingredient Orange Julius Cocktail (Gluten-Free, Vegan)
These orange Julius cocktails are a perfect festive orange beverage for your Halloween parties!
Recipe HERE
#6. Frosty Coconut Mint Green Tea Mocktail
These minty coconut green tea mocktails are a great family-friendly beverage to serve at Halloween parties
Recipe HERE
#7. HOCUS POCUS POTION FLOAT (A FUN HALLOWEEN ICE CREAM FLOAT!)
This Hocus Pocus Potion Float is a fun and festive Halloween ice cream float, it’s the perfect party drink!
Recipe HERE
#8.The World’s Creamiest, Most Delicious Hot Chocolate (in a Slow Cooker!)
When you have to trick-or-treat in the cold, nothing's better than coming home and warming up with this deliciously creamy crockpot hot chocolate! Make it before you go, then let the slow cooker keep it nice and hot while you're gone!
Recipe HERE
#9. Dark & Spooky: Halloween Cocktail with Edible Fake Blood
Set the tone for Halloween with the Dark & Spooky—a festive take on a classic Dark & Stormy with an edible fake blood rim.
Recipe HERE
#10. Black Magic Halloween Sangria
This Black Magic Halloween Sangria Recipe is a fun and SPOOKY Halloween cocktail made with red wine, vodka, raspberry liqueur, apple cider, and fresh fruit topped with bubbly soda. Serve this delicious and easily customizable sangria recipe at your next grown-up Halloween party!
Recipe HERE
#11. RED DEATH COCKTAIL FOR HALLOWEEN
From the master of macabre, this Red Death Layered Martini is a sweet and sinister cocktail. Serve up a little bit of mystery at your Halloween party.
Recipe HERE
#12. Halloween jungle juice
This Halloween jungle juice is a refreshing cocktail of fruit juices with liquor and a dash of sugar to round off the flavors.
Recipe HERE
#13. Bug Punch Halloween Mocktail Drink
Recipe HERE
#14. Harry Potter pumpkin juice
This Harry Potter pumpkin juice is a delicious elixir of pumpkin puree, pumpkin spice, vanilla, ACV, and brown sugar to create a magnificently balanced drink of sweet and bitter flavors.
Recipe HERE
Check Out These Related Posts Next
I love spring style because it feels so fresh and beautiful. Just like how springtime time feels after winter. Overall, I love wearing clothes that are lightweight and comfortable. Not having to layer on so many clothes to stay warm anymore is definitely a plus!
This spring, there are a few styles that stand out above the rest. You can find these outfit hints all over the runway. These pieces are great for spring time when it's still a bit crisp in the mornings and warm in the afternoons. These outfits should keep you comfy all season long while still looking totally gorgeous and way adorable!
Here are 8 cute trending outfits to try this season
1. Try babydoll tops
This lightweight, flowy babydoll top is so cute and will look perfect however you choose to style it! It features a round neckline and short sleeves with a some ruffling. Plus, you'll love the blush and pink color block combination and this top's relaxed fit.
Shop HERE
2. Try waffle tops with printed sleeves
The Sweet Pea Paisley Top in Brick is a perfect and simple transition top. It features a high v-shaped neckline and long sleeves with a hint of a paisley pattern at the cuffs. You'll love having this top in your closet!
Shop HERE
3. Try animal print
Trust me. You can't miss THIS cat print top! It's lightweight with a bit of stretch to it. It features a high and wide neckline and it's a top you'll want to live in. You'll love getting creative with this top and coming up with endless ways to style it.
Shop HERE
4. Try a crisp button down shirt
The Eleanor Button-Down top is lightweight and features a splatter tie-dye pattern. This flowy blouse features functional buttons and will keep you cool and comfortable as the weather warms up. Plus, it's simple and trendy and makes styling effortless.
Shop HERE
5. Try rainbow print clothing
When you're expecting sunny days, you'll want to dress for the weather! This lightweight sweater features bright, vibrant colored stripes that feel so spring and summer. It also fits relaxed and has long sleeves and a high-cut rounded neckline.
Shop HERE
6. Try tie dye everything
I can't think of anyone who doesn't just love a "lounge around the house" day at least once a week! These joggers are stylish and ultra-comfortable. They feature an elastic waist with a non-adjustable tie, functional pockets, and a jogger style hem. They are also lightweight and stretchy, so you know you'll be content all day. Try pairing them with the "Lounging N Loving It V-Neck in Sunset" for a cute matching set look!
Shop Bottoms HERE
Shop Top HERE
7. Try cardigans in pastel colors
It's hard to look AND feel like a million dollars these days! But, that task is made easy with this stylish cardi! It's lightweight and so stretchy! Plus, it's a beautiful peach color.
Shop HERE
8. Try two tone tops & dresses
This top is lightweight and is so soft! It features a high rounded neckline and long sleeves with tighter cuffs that create a slight balloon effect. It also features a tight hem that makes this top fit true to size. You'll adore this top, trust me!
Shop HERE
What's your favorite thing about spring style? Let us know in the comments if you have ever tried any of these looks before and which one you love most?
If you enjoyed this post, give it a share or pin it to your Pinterest fashion board 💕
Shop more cute springtime inspiration HERE
]]>
1. The wide headband. Start at your hair line and push it back. It will hold your bangs in place and give you a sweet look.
2. The wrap headband. This is a fun and festive look. Put the wrapped headband around your neck like a necklace, then pull it up from the front to sit nicely over your natural part.
3. The pearl headband. This look is classy and lovely. Naturally air-dry your hair for a pretty wave and place the headband just behind your ears for a posh statement.
4. The bandana scarf. This one is good for a pretty casual day look. Just wrap the scarf around your head with either your hair down or up for a casually classic look.
5. A little pop of color. Sometimes you need to add just one more element to complete your look and a bright headband can be the finishing touch. Use the headband to keep your bangs in place and out of your eyes.
6. Keep it sporty with a cute tie-dye headband. You can leave your bangs out and pull your hair back for a flirty and sporty chic look.
7. A statement embellished headband might just do the trick. Keep your hair slick and straight for a prim and proper vibe.
8. This headband parting combo is a classic go to. For a casual and flirty mood, go with a patterned headband. Wear your hair all natural with a part it in the middle and place the headband at the back of your head to achieve this look.
9. This look gives us all of the Gossip Girl vibes. With naturally flowing waves, add a braided headband to your slightly off center part for this posh statement.
What's your favorite way to wear a headband? Let us know in the comments if you have ever tried any of these looks before and which one you love most?
If you enjoyed this post, give it a share or Pinterest re-pin! 💕
Shop more cute headband inspiration below or click HERE
]]>
Its even a great evergreen look. You can wear it year-round in every season, year after year and still look pretty darn cute. Here are a few fun and easy stylish ways you can incorporate a denim jacket into your wardrobe routine.
1. We know how the athleisure look is literally alive and well everywhere. Next time your heading from the gym to the juice bar, don’t forget to throw on your jean jacket over your casually cool work out look.
2. Have you ever tried the denim over denim look? Some say not to do it, while others say its a must! The trick with this look, is not to be so matchy-matchy. Try a medium washed pair of ripped jeans and a light washed denim jacket to pull off this look. Or vice-versa. What you want to avoid in the denim over denim look is to look like your wearing a denim suit. So change up the colors and textures in the denim, add some color contrast with your shoes and top for a cool laid back look. A crisp white top and shoes are always a good choice when choosing a denim jacket.
3. The best way to dress down a fancy dress is with a jean jacket. A denim jacket will definitely bring down the formality of any dress to a more casual look while still looking totally chic. This is a really popular and cute way to wear a denim jacket, you basically cant go wrong here.
4. Instead of a blazer, try a black jean jacket. You can wear this jacket with white or khaki pants and chunky heels for a more polished look. Try white shorts and sneakers for a casual but crisp spring vibe
5. When it's too warm in the summer for a full on jean jacket but you still want to achieve that casual cool vibe, try a light washed denim shirt over a crisp white top and medium washed jeans. This outfit is effortless, cool and says your ready for a fun day out!
What's your favorite way to wear a denim jacket? Let us know in the comments if you have ever tried any of these looks before and which one you love most?
If you enjoyed this post, give it a share or Pinterest re-pin! 💕
Shop more cute jacket inspiration below or click HERE
]]>
1. When it comes to accessorizing an outfit, french style is rather minimal. Choose accessories that naturally elevate your look without overwhelming it. Try a cute hair scarf to complete your next outfit.
Shop HERE
2. Nothing quite says french style like an oversized chunky knit cardigan. We love how cute, comfy and cozy this look is. Its basically saying that your just not trying very hard at all and yet you’re still so effortlessly adorable. Try this cute cardigan in this neutral color (which we love) over your next outfit to transform your style.
Shop HERE
3. The dreamiest floral dress. Choosing a simple floral dress with an easy floral design is always a wonderful choice, especially for those beautiful golden & warm mid-summer days. Florals offer all of the femme vibes and can be styled in so many brilliant ways.
Shop HERE
4. We love a good Midi skirt for many reasons, but in french style a midi skirt is about balance. Its easy and practical to wear all around town, yet its never a dull choice. Midi skirts are breezy, elegant and practical. You can choose a simple top and sandals to keep it casual, or dress it up with a nice blouse and a chunky kitten heel for a more refined look.
5. Spice up your wardrobe with a little bit of satin. Satin is silky, soft and so luxurious & can elevate any casual outfit. Satin is truly effortless, elegant and its safe to say that it doesn’t try hard to be sexy, it just is. The smoothness of the material is something out of a dream. You can wear it with a blazer and jeans for a more polished look, or keep it playful with jeans and cute white sneakers for a gorgeous casual vibe.
Shop HERE
Which french style aesthetic do you love most? Let us know in the comments if you have ever tried any of these looks before and which one you love most?
If you enjoyed this post, give it a share or re-pin! 💕
]]>Winter can be a difficult time to keep your fashion sense alive and well. When we are all just trying to snuggle up and stay warm all season long, it seems easy to just live in our cozy Pjs or oversized jackets for the rest of the season & then some.
But there’s hope with a few cute outfit ideas you can wear underneath your oversized coat to help keep you stylish and cozy. Thankfully, there is such a thing as dressing warm and still looking pretty cute.
Here are a few easy outfit ideas you can try to help you transition from the ultra chilly winter months into the brisk spring days ahead. Stock your closet with good basics, pieces in soft spring colors and lots of long sleeve tops for a cute and easy transition this season.
1. Every Girl's Favorite Basic Top in Apricot
Shop here
2. Nautical Vibes Sweater
Shop HERE
3.Chelsea Tie-Dye Detail Top
Shop HERE
4. Sariah Spotted Sweater
Shop HERE
5. Fields of Flowers Waffle Knit Top
Shop HERE
6. Deliah Distressed Sweater
Shop HERE
7. Marie Sweater
Shop HERE
8. Hazy and Lazy Joggers & Hazy and Lazy Pullover
9. Waffle Love Top in Gray
Shop HERE
10. Kaleidoscope Dreams Button-Up Sweater
Shop HERE
]]>I have compiled a list of the top 10 must see, do & eat places in Mendicino, CA. Since we visited during Covid and the fires, many museums and places were still closed but we were still able to experience a full weekend of adventures.
#1 The drive
No matter which direction you are coming from, your going to have to stop at some point and appreciate the beautiful views.
#2 Skunk Train
This was such a fun and relaxing experience. The skunk train is a 100 year old running vintage train that takes you on a majestic journey through the forests. Its family friendly and they host special seasonal events throughout the year. If your in the area, you should definitely grab some tickets and enjoy the ride!
#3 The Last Little Red School House
I love vintage school houses and this one was in immaculate condition. Its been renovated and kept up by the Mendicino Fire Dept. We didn’t get to go inside, but we still got to check out the charming property and have a picnic outside on the lawn. This place gave off some seriously vintage vibes. The school house is located on Highway 20 between Fort Bragg & Willits. Its nestled just a bit inside the woods, so if you’re driving too fast, you might just miss it.
#4 Point Cabrillo Lighthouse
As you may notice, there is definitely a theme here. Mendicino is filled with history and many of the vintage buildings and railroads have been kept rather well and are still completely charming and beautiful. The 4th place you must visit is Point Cabrillo Lighthouse. Once you park your car, you can hike out to the lighthouse. Hubby and I choose the longer path to take which was only about a mile long. Its a really beautiful must see setting. We explored the beach near by and saw thousands of purple jellyfish floating in the water all around the lighthouse cliffs. There are vintage cottages and the head light keepers house which you can rent out and stay the night in. The buildings were built in 1909, but have been recently renovated.
#5 Dinner at Albion River Restaurant & Inn
If you are looking for good food and a beautiful setting, you must book your reservation here. I recommend making reservations here as early as possible because they are always booked out. We sat out on the patio and watched the sun set over the ocean on their private property. The night sky was beautiful & we even saw shooting stars that night! Something we never get to see living in the city. They had twinkling lights, fire pits and heaters all around so we were pretty cozy. The setting was perfect, the food was wonderful and the staff were knowledgeable and friendly. You can check them out HERE
#6 Mendicino Botanical Gardens
This was 47 acres of pure beauty! We walked the entire garden and spent our entire afternoon here. This garden was so much better than what I had expected. There was so many pretty plants to see and paths explore. It was so fun, relaxing and a totally perfect way to start our anniversary weekend. If you love plants, you have to go HERE. Wear something cute, because your gonna want to take some fun Insty pics! Ill link some cute outfits to wear at the end of this post.
#7 North Coast Brewing Co
If you enjoy a nice cold beer and pub fries, this is your spot. I enjoyed a tasting flight of four beers along with my dinner. This taproom was definitely a fun spot to checkout for a late afternoon dinner! We went here straight after we got off the Skunk Train. It was close enough to walk over, no need to re-park our car.
#8 Glass Beach
The beaches were completely beautiful, however there really wasn’t much glass left. It seems as though everyone had taken the glass home. It was a bit disappointing because I wanted to capture a cool shot of the glass with the ocean, but nonetheless it was still beautiful. I would recommend bringing some peanuts along because there are some seriously hungry beach squirrels! 🐿
#9 Mendicino Chocolate Co.
Chocolate. Enough said. They are located just down the road from the North Coast Brewing Co and Skunk Train. If your a chocolate lover like me, I highly recommend it. I purchased an assortment of dark sugar free chocolates and they were so yummy. If sugar free dark chocolate isn’t your thing, there is an assortment of all other yummy kinds too.
#10 Bike Rentals + Coastal Breakfast Picnic
You can rent bikes and ride along the coast + pack a picnic and some beach towels to soak up the soft dewy morning sun. We stayed right on the water so in the morning we grabbed some fresh hot coffee and breakfast and rode down to the beach where we enjoyed our brekky picnic. There is definitely a lot to see and experience in Mendicino, but just about anything you choose to do here will be beautiful and charming.
More Mendicino Travel Guide Ideas + Itinerary
What To Wear
]]>
It wasn’t long ago when I stumbled across an Instagram photo of a colorful cup of coffee art on Instagram & tagged was a coffee shop in San Fransisco called HomeSF.
This coffee shop isn’t just your ordinary shop serving ordinary cups of joe. They definitely have your well-known coffee menu available but they also have a creative menu for those looking for something a little extra special. You can check out their Instagram account Here to see all the cuteness they create.
I ordered the creative Birthday cake coffee with soy which actually tasted like vanilla cake! I got mine with a couple of espressos shots & a creative teddy bear hot chocolate for Kaiden. If your a coffee lover definitely check out this sweet little shop in the city! It was so yummy! I can't wait to go back!
]]>